Arsenal – Arma 3
OzDeadMeat (talk | contribs) No edit summary |
Killzone Kid (talk | contribs) (→Access: spawn instead of call to avoid crash when called from debug console) |
||
| Line 86: | Line 86: | ||
=== Access === | === Access === | ||
You can use Arsenal in a scenario you're designing simply by calling the following [[Functions|function]]: | You can use Arsenal in a scenario you're designing simply by calling the following [[Functions|function]]: | ||
[] [[ | [] [[spawn]] [[BIS_fnc_arsenal]]; | ||
This version has several limitations as opposed to the Virtual one: | This version has several limitations as opposed to the Virtual one: | ||
* Voice, Face and Insignia are not available (to avoid clashing with profile) | * Voice, Face and Insignia are not available (to avoid clashing with profile) | ||
| Line 93: | Line 93: | ||
To open Arsenal with full options, execute: | To open Arsenal with full options, execute: | ||
["Open",true] call BIS_fnc_arsenal; | ["Open",true] call BIS_fnc_arsenal; | ||
=== Virtual Ammo Box === | === Virtual Ammo Box === | ||
Revision as of 14:36, 3 August 2014
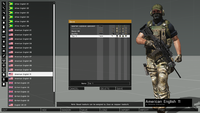
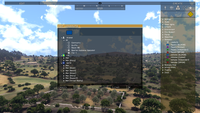
Arsenal is, essentially, a character, equipment and weapon viewer which has been added to Arma 3 in the Bootcamp update. This tool offers an overview of the available content, and enables customized loadouts to be exported to script, which can be used in the editor, other game modes, such as Zeus, and by community scenarios/mods.
You can access it from the main menu by locking on LEARN > VIRTUAL ARSENAL
Using
Loadout Export
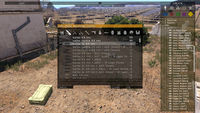
Clicking on EXPORT button or pressing Ctrl + C will copy the current loadout to clipboard in SQF format. You can paste it to soldier's init field or use it in a script.
You can take the same code and import it (Ctrl + V) back to Arsenal. Use this to share loadouts with other players.
Example:
comment "Exported from Arsenal by DavidArmstrong85";

comment "Remove existing items";
removeAllWeapons this;
removeAllItems this;
removeAllAssignedItems this;
removeUniform this;
removeVest this;
removeBackpack this;
removeHeadgear this;
removeGoggles this;

comment "Add containers";
this forceAddUniform "U_I_CombatUniform";
for "_i" from 1 to 4 do {this addItemToUniform "30Rnd_556x45_Stanag";};
this addItemToUniform "16Rnd_9x21_Mag";
this addVest "V_PlateCarrierIA2_dgtl";
for "_i" from 1 to 4 do {this addItemToVest "FirstAidKit";};
for "_i" from 1 to 6 do {this addItemToVest "HandGrenade";};
for "_i" from 1 to 3 do {this addItemToVest "16Rnd_9x21_Mag";};
this addBackpack "B_TacticalPack_oli";
for "_i" from 1 to 2 do {this addItemToBackpack "SatchelCharge_Remote_Mag";};
for "_i" from 1 to 4 do {this addItemToBackpack "DemoCharge_Remote_Mag";};
this addHeadgear "H_Cap_headphones";
this addGoggles "G_Bandanna_oli";

comment "Add weapons";
this addWeapon "arifle_Mk20C_F";
this addPrimaryWeaponItem "muzzle_snds_M";
this addPrimaryWeaponItem "acc_flashlight";
this addPrimaryWeaponItem "optic_MRCO";
this addWeapon "hgun_P07_F";

comment "Add items";
this linkItem "ItemMap";
this linkItem "ItemCompass";
this linkItem "ItemWatch";
this linkItem "ItemRadio";
this linkItem "ItemGPS";

comment "Set identity";
this setFace "GreekHead_A3_03";
this setSpeaker "Male03GRE";
[this,"TFAegis"] call bis_fnc_setUnitInsignia;
Zeus Ammo Box
As Zeus, you can create virtual ammo box where players can endlessly resupply. Instead going through the classic inventory screen, they'll be able to access Arsenal and select any item you'll give them.
- Play a scenario as Zeus
- Place an ammo box (Units > Empty > Other > Ammo > [anthing from the list])
- Select an item you want to make available in the Arsenal
- Decrease number of items to 0. Button on the left should change from '-' to '∞'
- Click on the button once more. Number of items should now be infinite
- After confirming, players will be able to access Arsenal through a new action attached to the box.
Zeus Respawn Loadouts
Saved loadout can be given to players as respawn loadouts by Zeus. Works only in scenarios with MenuInventory respawn template enabled.
- Save your loadout
- Play a scenario as Zeus
- Place Modules > Respawn > Loadouts
- Select side tab
- Expand Arsenal category
- Select the saved loadout.
- After confirming, players of the given side will be able to respawn with your loadout.
Modding
Access
You can use Arsenal in a scenario you're designing simply by calling the following function:
[] spawn BIS_fnc_arsenal;
This version has several limitations as opposed to the Virtual one:
- Voice, Face and Insignia are not available (to avoid clashing with profile)
- Not all assets are automatically present, designer has to whitelist allowed classes. By default, only player's current equipment is available.
To open Arsenal with full options, execute:
["Open",true] call BIS_fnc_arsenal;
Virtual Ammo Box
You can also use Arsenal as virtual inventory, allowing players to get unlimited number of items of given types from an ammo box. Action to access the Arsenal will be added automatically on all clients, you don't need to use addAction to enable it.
Syntax (shared by all mentioned functions):
["AmmoboxInit",<box>] call BIS_fnc_arsenal;
or
["AmmoboxInit",[<box>,(<allowAll>,<condition>)]] call BIS_fnc_arsenal;
- box: Object - ammo box on which the action will be added
- allowAll (Optional): Boolean - true to add all available weapons, magazines, items and backpacks in the box
- condition (Optional) (Development build only): Condition for showing the Arsenal action (default: {true})
- Passed arguments are the same as in addAction condition, i.e., _target - the box, _this - caller
Returned value: Nothing
Example (paste it into init field of a box)
["AmmoboxInit",[this,true]] call BIS_fnc_arsenal;
To set which specific items should be available, use functions mentioned below.
Template:note
Add
Functions:
- BIS_fnc_addVirtualBackpackCargo
- BIS_fnc_addVirtualItemCargo
- BIS_fnc_addVirtualMagazineCargo
- BIS_fnc_addVirtualWeaponCargo
Syntax (shared by all mentioned functions):
[<target>,<classes>,(<isGlobal>,<addAction>)] call BIS_fnc_addVirtualWeaponCargo;
- target: Object or Namespace - ammo box to which classes will be added. When missionNamespace is used, they will be available across all boxes.
- classes: Boolean or Array of Strings - whitelisted classes. Alternatiovely, use true to whitelist everything of the given type
- isGlobal (Optional): Boolean - true to add classes globally (default: false)
- addAction (Optional): Boolean - true to add "Arsenal" action which players can access the Arsenal (default: true)
Returned value: Array of Arrays: All virtual items within the target's space in format [<items>,<weapons>,<magazines>,<backpacks>]
Example:
[myBox,["arifle_MX_F","arifle_MX_SW_F","arifle_MXC_F"],true] call BIS_fnc_addVirtualWeaponCargo;
Remove
Functions:
- BIS_fnc_removeVirtualBackpackCargo
- BIS_fnc_removeVirtualItemCargo
- BIS_fnc_removeVirtualMagazineCargo
- BIS_fnc_removeVirtualWeaponCargo
Syntax (shared by all mentioned functions):
[<target>,<classes>,(<isGlobal>)] call BIS_fnc_addVirtualWeaponCargo;
- target: Object or Namespace - ammo box from which classes will be removed.
- classes: Array of Stringss - removed classes
- isGlobal (Optional): Boolean - true to remove classes globally (default: false)
Returned value: Array of Arrays: All virtual items within the target's space in format [<items>,<weapons>,<magazines>,<backpacks>]
Example:
[myBox,["arifle_MXC_F"],true] call BIS_fnc_removeVirtualWeaponCargo;
Get
Functions:
- BIS_fnc_getVirtualBackpackCargo
- BIS_fnc_getVirtualItemCargo
- BIS_fnc_getVirtualMagazineCargo
- BIS_fnc_getVirtualWeaponCargo
Syntax (shared by all mentioned functions):
[<target>] call BIS_fnc_addVirtualWeaponCargo;
Returned value: Array of Arrays: All virtual items within the target's space in format [<items>,<weapons>,<magazines>,<backpacks>]
Example:
myBox call BIS_fnc_getVirtualWeaponCargo;


