Targeting – Arma 3
Overview
Targeting systems and aids in Arma 3
Forum topic: Main thread
Features
Target Acquisition and Tracking (Sensors)
Some vehicles can be equipped with sensors ("scanners" in config) that can detect, identify and track various types of targets. Different types of sensors loosely reflect the systems that exist in real life (Radars, CCTV, IRST, LST) and are only able to acquire respective types of targets.
Actions (default)
- [T] - to mark target under the cursor
- [R] - to cycle through available targets (may not always be available)
Indication
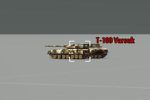
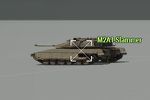
- A marked target, tracked and visible, is indicated by square brackets.
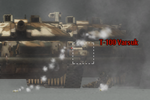
- Once the marked target moves out of the sensor's line-of-sight or gets masked the indication changes into a dashed square and the target's actual position is only an estimate.
- A full square indicates that the currently selected weapon is able to acquire a lock and be guided on the target
Laser Spot Tracker
Indication
- All vanilla Arma 3 vehicles equipped with a LST (CAS, Gunships, bigger UAVs) have all known lased targets indicated by a dotted cross
Radar
Description WIP
Imaging (Targeting Pods)
Actions (default):
- [Left CTRL, RMB] - to enter the TGP video feed (limited to pilots of some aircrafts)
- [Left CTRL, T] - to switch the TGP into Area or Point lock mode
Identification
Indication
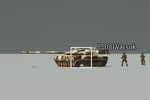
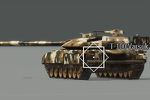
- A crossed square indicates a friendly unit
Engagement
Fire Control Systems
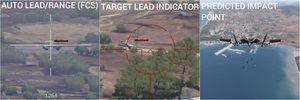
Some weapon systems can help the gunner find better firing solution when using standard ballistic munitions. There are currently 3 types of aids available. Target Lead Indication (used in jets and AAAs) and Automatic Lead/Range (used for tank cannons as an FCS abstraction), which provide solution for a marked target, and Predicted Impact Point (or CCIP) that show where the projectile will land if fired at that moment.
Indication
- AUTO - Full green square indicates that firing the weapon now will most probably result in a hit. Lead and zeroing are shifted automatically according to the target's distance, speed and direction, so player only has to make sure the crosshair is on target when pulling the trigger.
- TLI - A line with a circle on its end indicates where the player has to aim to hit the target. Weapon crosshair needs to be placed on the small circle when pulling the trigger.
- PIP - A small crosshair with a dot in the center indicates where a projectile will land. Pipper needs to be placed on the target when pulling the trigger.
Precision-guided Munition
- A diamond indicates the lock acquisition. Once a dot appears in the center it means that the lock has been acquired and weapon can be launched. If there's no dot the locking is still in progress.
Countermeasures
Description WIP
Crew coordination and awareness
General turret directions are shown on the radar or compass on the top of the screen. Crew positions where tight cooperation is required have an additional, precise indication in 3D where their partner is looking or aiming.
Indication
- An X indicates where the gunner is aiming when he's operating his weapon autonomously
- A cross indicates where the gunner is aiming. Once the gunner aimed at target a circle appears in the middle of the cross.
- Curved brackets indicate where the commander is looking
