MP Support Guideline – Arma 3
m (changed category) |
m (Text replacement - " it's" to " it is") |
||
| Line 1: | Line 1: | ||
==Info== | ==Info== | ||
Most of the work involved in creating your own Support mission consists of simply inserting and synchronizing several modules and game logics in the Editor. We'll take a look at how it | Most of the work involved in creating your own Support mission consists of simply inserting and synchronizing several modules and game logics in the Editor. We'll take a look at how it is done in this step-by-step guide. | ||
For easier orientation, <font color="006600"><b>Modules</b></font> (<i>F7</i>), <font color="0033FF"><b>Synchronizing</b></font> (<i>F5</i>) <font color="CC0000"><b>Triggers</b></font> (<i>F3</i>) and <font color="993300"><b>Units</b></font> (<i>F1</i>) will be highlighted as such. | For easier orientation, <font color="006600"><b>Modules</b></font> (<i>F7</i>), <font color="0033FF"><b>Synchronizing</b></font> (<i>F5</i>) <font color="CC0000"><b>Triggers</b></font> (<i>F3</i>) and <font color="993300"><b>Units</b></font> (<i>F1</i>) will be highlighted as such. | ||
| Line 122: | Line 122: | ||
This module serves as a base for unit respawning. You can leave the unit type ratios at 0 (<i>the next module is designed specifically for this</i>). What you need to concern yourself with the most is the manpower cap limit - the modules will spawn units at a given rate at random spawnpoints until this cap is reached. You can also blacklist groups (<i>as defined in the Config Viewer under cfgGroups</i>) you don't want to use (<i>AA, tank platoon etc.</i>). | This module serves as a base for unit respawning. You can leave the unit type ratios at 0 (<i>the next module is designed specifically for this</i>). What you need to concern yourself with the most is the manpower cap limit - the modules will spawn units at a given rate at random spawnpoints until this cap is reached. You can also blacklist groups (<i>as defined in the Config Viewer under cfgGroups</i>) you don't want to use (<i>AA, tank platoon etc.</i>). | ||
Now it | Now it is time to insert modules for group respawns, in which you'll set the weighted ratio of unit types. | ||
* Insert your <font color="006600"><b>Spawn AI: Spawnpoint</b></font> modules (<i>Modules > Mics > Spawn AI: Spawnpoint</i>) wherever you want AI groups to spawn | * Insert your <font color="006600"><b>Spawn AI: Spawnpoint</b></font> modules (<i>Modules > Mics > Spawn AI: Spawnpoint</i>) wherever you want AI groups to spawn | ||
Set the weighted ratio of each module - infantry, motorized, mechanized or armor - and <font color="0033FF"><b>synchronize</b></font> it with the <font color="006600"><b>Spawn AI</b></font> module. The maximum manpower cap set in the Spawn AI module applies to all synchronized Spawnpoints. This way, you can have several completely different types of unit spawns. | Set the weighted ratio of each module - infantry, motorized, mechanized or armor - and <font color="0033FF"><b>synchronize</b></font> it with the <font color="006600"><b>Spawn AI</b></font> module. The maximum manpower cap set in the Spawn AI module applies to all synchronized Spawnpoints. This way, you can have several completely different types of unit spawns. | ||
Revision as of 19:23, 7 September 2020
Info
Most of the work involved in creating your own Support mission consists of simply inserting and synchronizing several modules and game logics in the Editor. We'll take a look at how it is done in this step-by-step guide.
For easier orientation, Modules (F7), Synchronizing (F5) Triggers (F3) and Units (F1) will be highlighted as such.
To enable respawning, you also need to include a description.ext file with respawn definitions in your mission folder. You can download an example file here.
Example
You can find the example in the Arma 3 Tools (accessible from Steam):
\Steam\steamapps\common\Arma 3 Tools\Samples_F\Example_Supports_Mission\MP_GroundSupport01.Altis\
Basic settings
Once you've finished with the basics - inserting playable units, naming and saving the mission, setting the time of day, etc. - you have to add the core of the Support game type.
- Insert the Support module (Modules > Gameplay Modes > Support)
Now you have to define the 2 sides that will be fighting each other.
- Insert the respective Game Logics (Units > Game Logic > Sides > BLUFOR/OPFOR/INDEPENDENT) of your chosen sides and synchronize them with your Support module
You then need to set the number of tickets for each side and the conditions and quantity of the ticket bleeding.
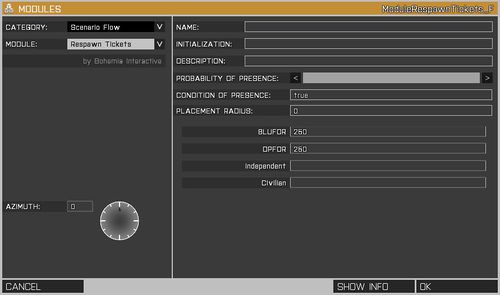
- Insert the Respawn Tickets module (Modules > Scenario Flow > Respawn Tickets) and set the desired number of tickets for both sides.
- You can also set the minimum, maximum and default amount of tickets in the description.ext. This will allow you to change the number of the tickets on the server before each game.
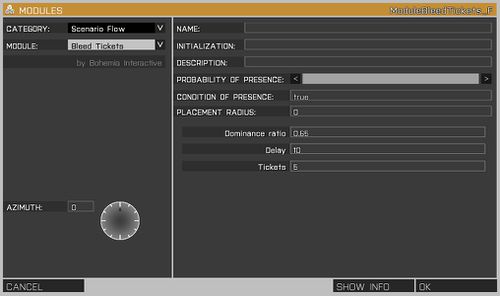
- Next, insert the Bleed Tickets module (Modules > Scenario Flow > Bleed Tickets) and adjust your settings accordingly.
As HQ will be giving you regular updates on the situation, you need to insert an HQ module for all 3 possible sides. Don't worry about your mission only using 2 sides, the system simply needs all 3 HQ modules in order to work properly.
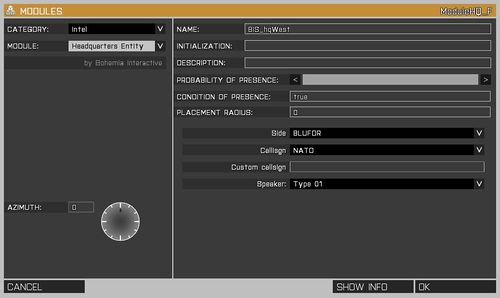
- Insert the Headquarters Entity module (Modules > Intel > Headquarters Entity) for each side (BLUFOR, OPFOR and Independent).
- Set the Name of the HQ module depending on its side: BIS_hqWest, BIS_hqEast, BIS_hqGuer
Base Icon: To assist with situational awareness, an icon (similar to sector icons) will be displayed above a side's flagpole positioned within their base.
- Place a flag (Empty > Objects (Flags) > Flag NATO/CSAT/AAF) within both side's bases.
- If you do not place a flag object within the base's radius, one will be created and positioned automatically.
Group Icons: All friendly groups have their icon displayed in the 3D world and on the map (the 3D world icons can be toggled on and off by pressing "U").
Creating sectors
Then you need to define the sectors that can be captured - just like your typical "Sector Control" game type.
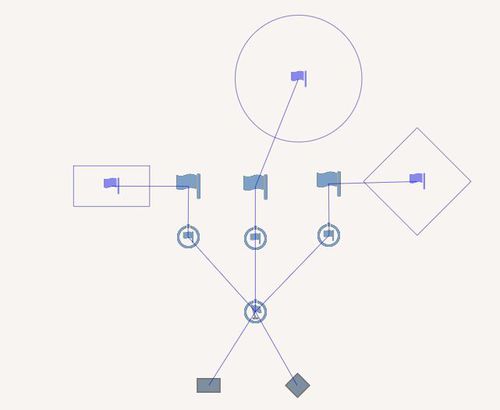
- Insert the Sector module (Modules > Multiplayer > Sector) onto the map. You can set its name and adjust other settings
- Synchronize the sector to the Support module
Now you need to define the sector's area.
- Insert the Area logic (Units > Game Logic > Locations > Area)
- Synchronize it to the Sector module
- Insert an empty Trigger onto the map and set its position, direction and size to represent the properties of your sector
- Synchronize the Trigger to the Area logic
- You can also give each sector a unique name (which will be used for the mission's Tasks), either naming it based on its location (Pyrgos, Molos airfield etc.) or by giving it a codename of your choice (Checkpoint Alpha, Point Victor etc.).
This way you can set as many sectors as you wish.
Setting Bases
Each side needs a base where the players will respawn.
- Insert the Support: Base module (Modules > Gameplay Modes > Support: Base) and set its side accordingly. All playable units, and most of the objects in the base, need to be synchronized to this module in order for the system to function correctly.
- The position of the module is important as it is used to determine the center of the base area.
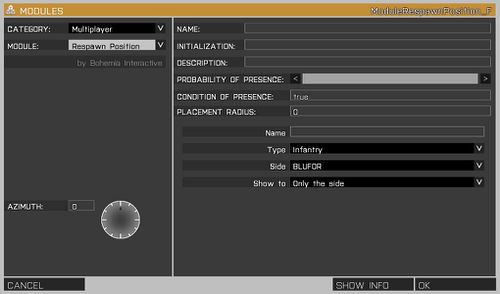
- Insert the Respawn Position module (Modules > Multiplayer > Respawn Position) at each base and adjust its settings: Side: BLUFOR/OPFOR/INDEPENDENT, Type: Infantry
Now you also need to place your helicopters and set their respective respawn positions. To avoid potential conflicts, the Respawn Point game logic is used here instead of the Respawn module.
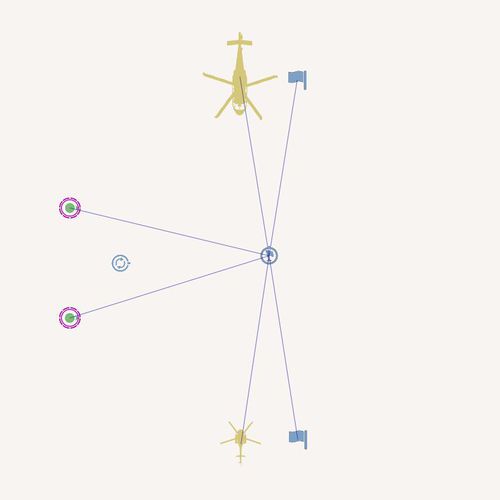
- Insert empty helicopters for each side at their respective bases and synchronize them with their Base modules
- Create Respawn Points (Units > Game logic > Locations > Respawn Point) for each helicopter (or more, to avoid possible respawn issues) and synchronize them with the Base modules. Set their azimuth according to how you want the helicopter to spawn.
To allow the resupplying, rearming, and replacing of dead crew, you need to place Resupply Points.
- Insert Resupply Point game logics (Units > Game Logic > Locations > Resupply Point) and synchronize it with the Base module.
- To mark the resupply points for players you should place the appropriate helipad object on top of every Resupply Point.
- We couldn't do that automatically as in some situations there could be a helipad already in the map and you would end up with 2 overlapping helipad textures.
- Additionally, a helipad light will spawned automatically on every Resupply Point so that the point is visible even if playing at night.
For greater authenticity, we recommend you add some resupply vehicles nearby. Synchronizing them to the module will remove their own supplies and will leave the maintenance functionality to the Resupply Point. They will also become indestructible.
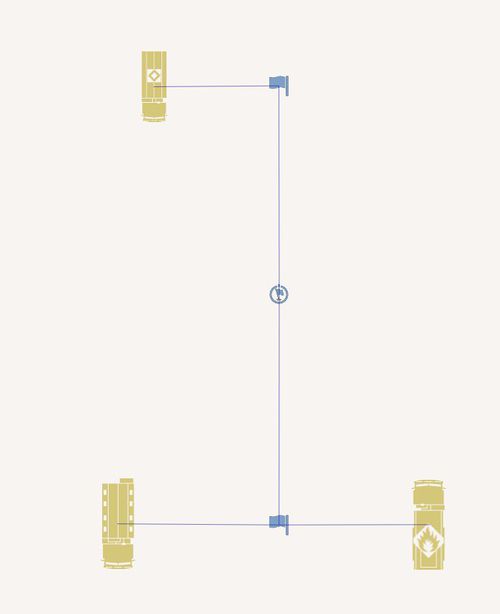
- Insert your supply vehicles (Units > Empty > Supports > ) and synchronize them to the Resupply Points.
- Placing them is purely optional but, if you use them, synchronizing is highly recommended.
You also need to set an Evac Point to have a place where injured units - those requesting Medevac - need to be transported.
- Insert an Evac Point game logic (Units > Game Logic > Locations > Evac Point) and synchronize it with the Base module.
- To mark the evac points for players you should place the appropriate helipad object on top of each Evac Point.
- We couldn't do that automatically as in some situations there could be a helipad already in the map and you would end up with 2 overlapping helipad textures.
- Additionally, a helipad light will spawned automatically on every Evac Point so that the point is visible even if playing at night.
As the units taken to the base must be treated (and deleted afterwards), you need to place a empty medical truck nearby (technically, any vehicle can be used, but we recommend a medical one).
- Create medical truck nearby and synchronize it with the Evac Point.
- Unlike resupply, this vehicle is required for medevac tasks and automatic unit garbage collection to work correctly!
Now you have a fully functional base. You can also insert helipads (Units > Empty > Objects (signs) > Helipad variants), Smoke shell modules, Chemlight modules (Modules > Effects > ) to mark them.
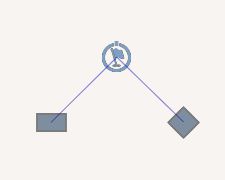
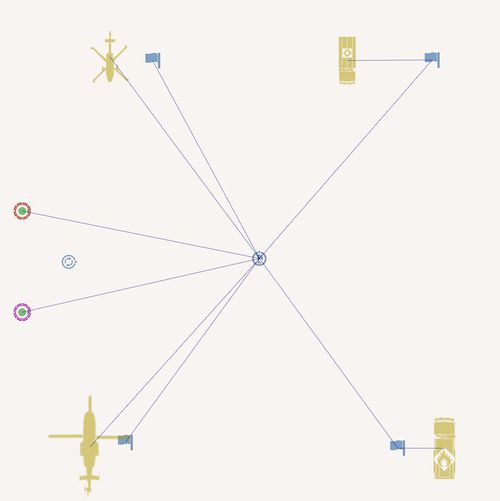
A simple base for two players should now look something like the picture below.
AI Spawnings and Tactics
Now we need to set up the AI, their respawn positions, and insert the module that will control their behavior. Each side will have its own Spawn AI and Spawn AI: Spawnpoint modules, where you need to define the rate and maximum cap of units that can be spawned, and the chance of spawning each unit type (infantry, motorized, mechanized and armored). After you insert the Spawn AI: Sector Tactics module, the AI will start capturing nearby sectors and, if they're infantry, will board your helicopter if you land close enough to them. Delivering units to sectors will decrease the time it takes to capture them.
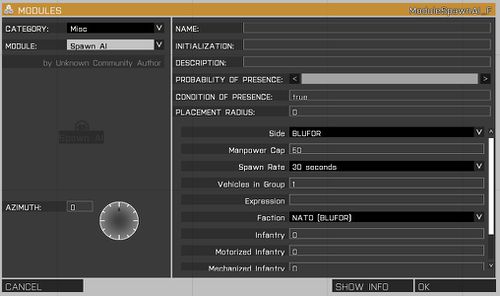
- Insert your Spawn AI modules (Modules > Mics > Spawn AI) and set their correct sides, manpower caps and respawn delays.
- The unit manpower cost measures how dangerous and tough the unit is.
- To get a very rough idea of the costs of units, here are a few examples:
- a rifleman costs about 0.5
- an AA/AT soldier about 6
- a MRAP about 6
- an APC about 12
- a tank about 27
- All the values are calculated using the cost and threat values defined in the unit's config. As long as those values are accurate, the resulting manpower cost should be correct.
This module serves as a base for unit respawning. You can leave the unit type ratios at 0 (the next module is designed specifically for this). What you need to concern yourself with the most is the manpower cap limit - the modules will spawn units at a given rate at random spawnpoints until this cap is reached. You can also blacklist groups (as defined in the Config Viewer under cfgGroups) you don't want to use (AA, tank platoon etc.).
Now it is time to insert modules for group respawns, in which you'll set the weighted ratio of unit types.
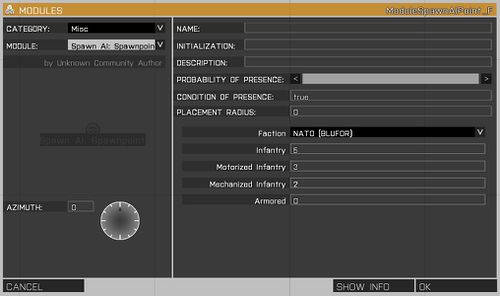
- Insert your Spawn AI: Spawnpoint modules (Modules > Mics > Spawn AI: Spawnpoint) wherever you want AI groups to spawn
Set the weighted ratio of each module - infantry, motorized, mechanized or armor - and synchronize it with the Spawn AI module. The maximum manpower cap set in the Spawn AI module applies to all synchronized Spawnpoints. This way, you can have several completely different types of unit spawns.
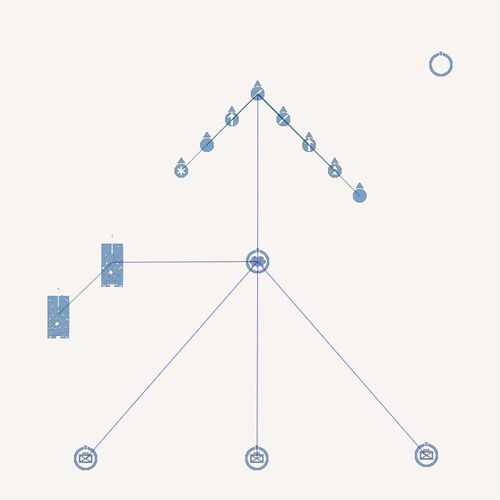
As the battlefield would otherwise be empty at the start, you can also insert some groups yourself in the Editor. If you synchronize them with the Spawn AI module, they will be added to the manpower cap, preventing there from being too many AI on the battlefield at the same time.
Now for their tactics - each group, no matter their type, will check for the nearest sector and try to capture it. However, as you also have some transport helicopters at you disposal, you can transport the infantry groups closer to the sectors. Just land nearby, let them in, take off and land near one of the sectors - they will get out and try to capture the sector. Please note that if the group is within 500m of their objective, or is fighting in a sector, they will not board your helicopter.
- Insert the Spawn AI: Sector Tactics module (Modules > Mics > Spawn AI: Sector Tactics). No synchronization needed
Now you have a fully playable scenario.
