|
|
| Line 145: |
Line 145: |
| | | | | |
| == Brush Shape and Type == | | == Brush Shape and Type == |
| | [[File:armareforger-world_editor_terrain_tool_paint_brush_shape_and_type.png]] | | | [[File:armareforger-world_editor_terrain_tool_paint_brush_shape_and_type.png]] |
| | | | | |
| * '''Brush shape''' – Linear/Smooth/Sphere/Inverted Sphere – these options define the style of painting, icons next to these tabs work as an indication what each option provides. | | * '''Brush shape''' – Linear/Smooth/Sphere/Inverted Sphere – these options define the style of painting, icons next to these tabs work as an indication what each option provides. |
Revision as of 20:40, 30 July 2022
Manage
🚧
TODO: this must be updated.
Sculpt
Common values
Strength: strength of the effect - range 0..500
Height (in Flatten mode): wanted terrain's absolute height
Radius: radius (in metres) range 0..200
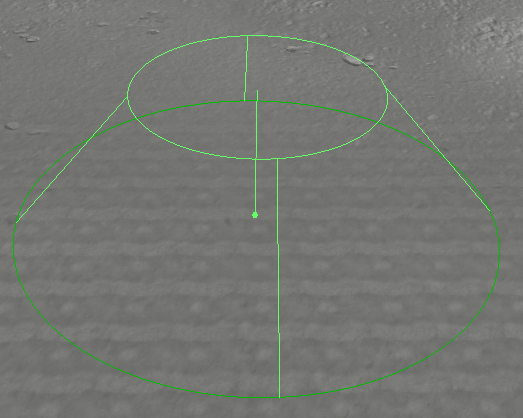
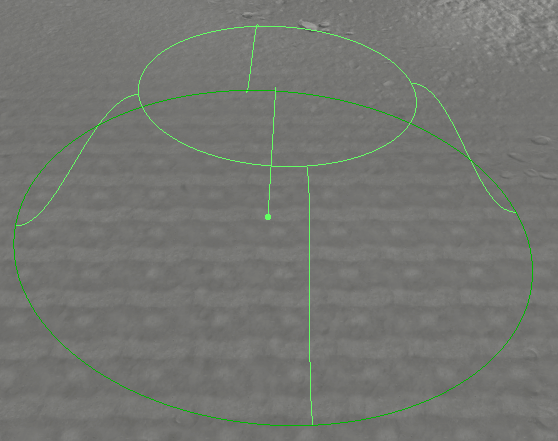
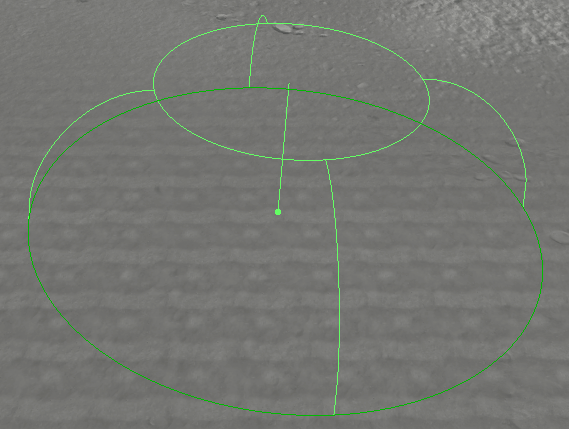
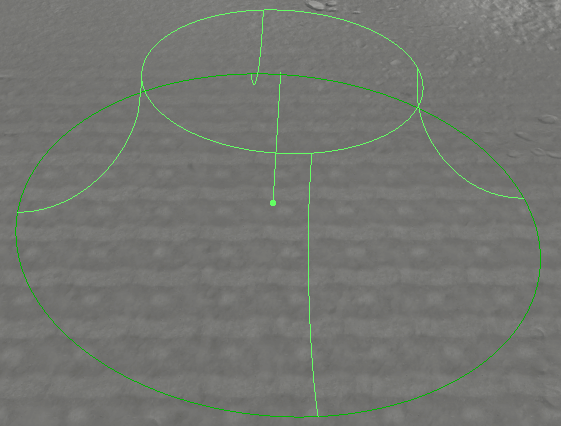
Falloff: the "cone/cylinder" slope ratio (see below) - range 0..100
Angle: the effect angle - range 0..360
Common Controls
| Controls
|
Effect
|
⇧ Shift + Mouse up
⇧ Shift + Mouse down
|
Set strength/height
|
Ctrl + Mouse up
Ctrl + Mouse down
|
Set radius
|
Ctrl + ⇧ Shift + Mouse up
Ctrl + ⇧ Shift + Mouse down
|
Set falloff
|
| Ctrl + ⇧ Shift + Mousewheel
|
Set angle
|
Sculpt
 raises terrain according to Strength.
Alt + lowers the terrain.
Flatten
Sets the terrain to a defined Height. Space picks the height of the current terrain position under the cursor.
Smooth
Softens edges.
Noise
Generates Perlin-based terrain noise
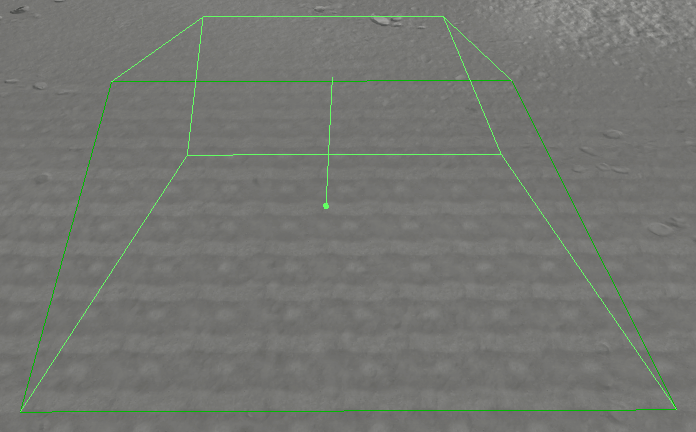
| Linear
|
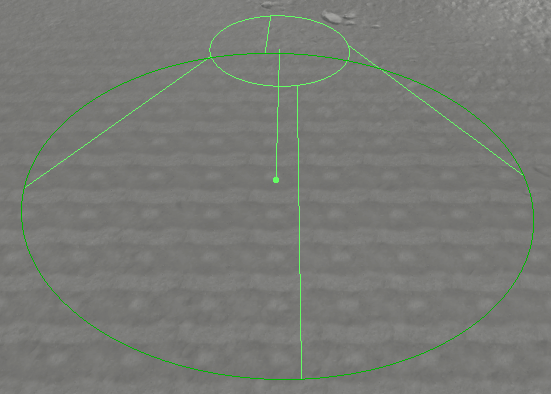
Smooth
|
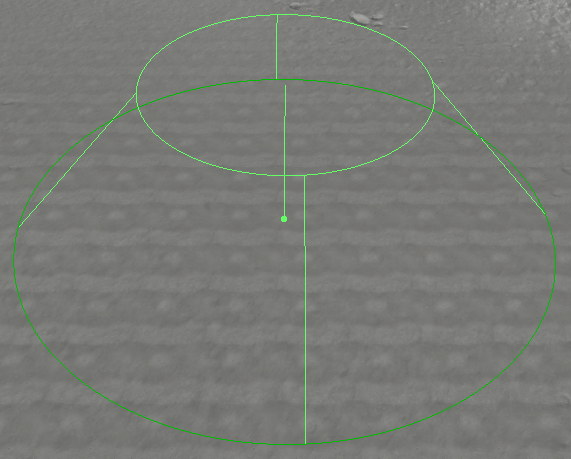
Sphere
|
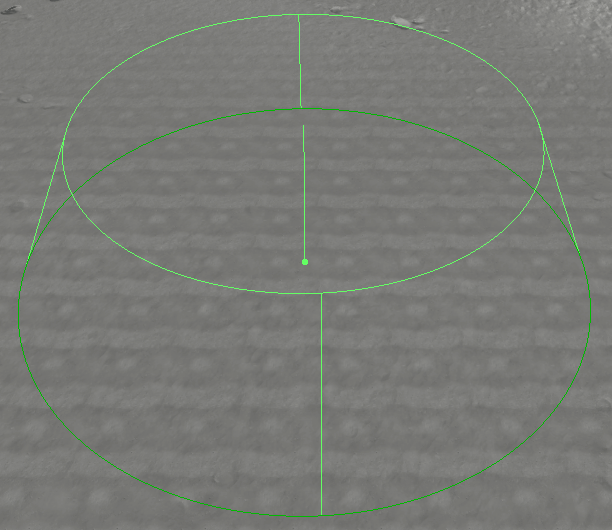
Inv-Sphere
|
|
|
|
|
| Round
|
Rect
|
User
|

|
|
- shown shape is identical to Rect
- Falloff does not impact the result
- Looks into the Data\Brushes directory
|
| Falloff (small)
|
Falloff (medium)
|
Falloff (large)
|
|
|
|
Paint
A specific terrain tool used for painting surface materials on terrain ground.
- Paint tool is used for painting surface materials on a terrain ground with an adjustable brush. All paint brush properties can be set in the same tab.
- Information where each surface material is painted is stored as a mask inside game files upon saving a project. However, it is possible to both import and export each surface's mask in a .png file.
- As of Arma Reforger v0.9.5 there is a limit of 5 surfaces per block for a terrain.
| Feature
|
Screenshot
|
Description
|
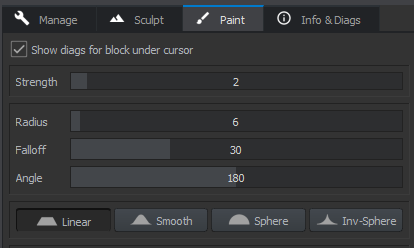
Basic Brush Settings
|
|
Show diagnostics for block under cursor – this option enables a simple surface layer list per block tab in World Editor viewport when using Paint tool and hovering over terrain. Information about block under cursor will be shown. Useful as an overview to manage surfaces in multiple blocks efficiently while painting.
ⓘ See the Sculpt section above for more information. Strength
range: 0..40
Strength of the brush. ⇧ Shift + MouseUp/⇧ Shift + MouseDown to adjust.
Radius
range: 0..200
Radius of the brush. Ctrl + MouseUp/Ctrl + MouseDown to adjust.
Falloff
range: 0..100
Fadeout of the brush. Ctrl + ⇧ Shift + MouseUp/Ctrl + ⇧ Shift + MouseDown to adjust.
Angle
range: 0..360
Rotation of the brush – useful for rectangular or user brushes.
|
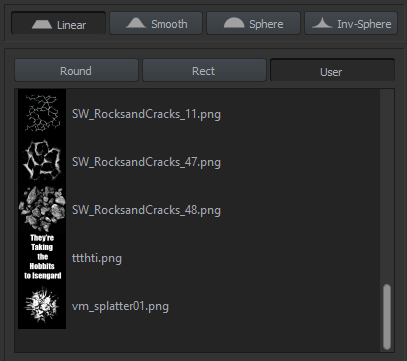
Brush Shape and Type
|
|
- Brush shape – Linear/Smooth/Sphere/Inverted Sphere – these options define the style of painting, icons next to these tabs work as an indication what each option provides.
- Brush type – Round/Rectangle/User. User brushes are loaded from root/Brushes (i.e. root/Brushes/blot.png).
|
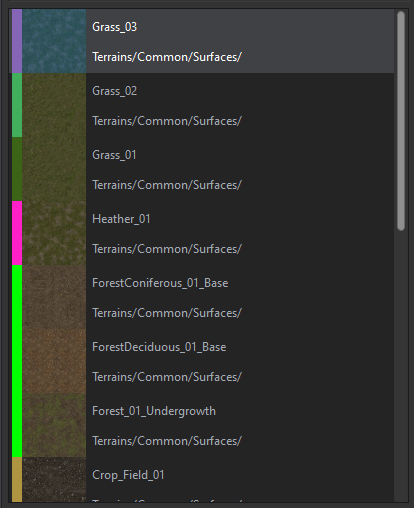
Surface Layer List
|
|
- Surface layer list – A simple drag & drop list of surface materials. These can be dropped from either Workbench or World Editor's Resource Browser.
- The very first surface layer is always used as default and while it can not be removed or imported, it can be changed to a different one. In this scenario, Grass_03 is used as a default surface. When masks are stored in game files, they are all merged together. Any information that is remaining from the resulting merged mask is used as default layer.
|
Basic Painting
|
🚧 TODO: this must be updated. |
|
|
|

|
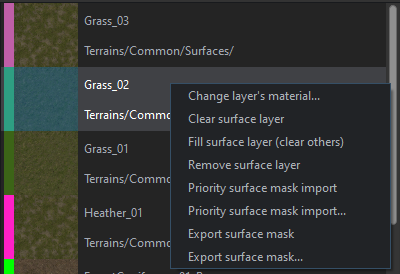
- Change layer's material... – Change surface material to a one not included in the list.
- Clear surface layer – selected surface layer's mask will be cleared with default surface layer.
- Fill surface layer (clear other) – selected surface layer will fill the entire terrain ground, replacing every other surface layer.
- Remove surface layer – removes surface layer from the list.
- Priority surface mask import – will automatically import mask of a selected surface layer.
- Priority surface mask import... – will import a specific surface layer mask.
- Export surface mask – will automatically export mask of a selected surface layer.
- Export surface mask... – will export a specific surface layer mask.
- A simple batch import and export feature for surface masks is also available – these options work with masks from all surfaces at once.
All surface masks are in a .png format and for the best results a predetermined sizing should be followed – this information can be found in the Info & Diags tab (section below).
|
Info & Diags
This tab contains useful info about blocks and their surface layers. These diagnostics also allow either manual merging or replacing of surface layers in specific blocks.
| Step
|
Screenshot
|
Description
|
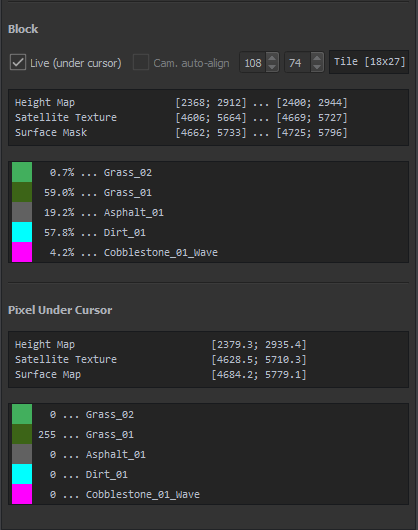
Block and Pixel Under Cursor Diagnostics
|
|
- In the lower part of the Info & Diags tab, there is an extra information about blocks containing painted surface layers.
- While in Info & Diags tab, you can press Ctrl+X in World Editor's viewport to visualize surface layers painted on the terrain ground. Diagnostic colors are set in each surface layer.
Block
- Live (under cursor) – diagnostics will describe the block actually under cursor in World Editor's viewport. If the tile is clicked then this checkbox becomes unticked.
- Camera auto-align – when a block is selected, camera will automatically align to it.
- Coordinates – it is possible to input specific tile coordinates and have camera automatically moved to their location. Below is a list of specific pixel coordinates of height map, satellite texture and surface mask. As each has a different size, the coordinates are different. Listed coordinates are Top-left coordinates/Bottom-right coordinates.
- Percentage list determines the mask coverage of a surface layer in a selected block. These percentages work with surface layer mask blending as well, meaning that the total value can be up to 500%.
Pixel Under Cursor
- Coordinates – same as above.
- The Pixel Surface statistics list shows surface layers per pixel. The range is set from 0 to 255 (black - white) and always add up to 255. It is possible to determine exactly which pixel contains what surface layers through this data.
|
Basic Surface Diagnostics
|
|
- Merge – merges selected surface layer with already existing one.
- Replace – replaces selected surface layer with a layer not present in selected block.
- A 3x3 grid is an indicator of selected block and its neighbours. The orientation is based on cardinal directions.
- Green – there is a free slot for that surface layer.
- Yellow – selected block.
- Red – the limit of 5 surface layers is reached in that block.
|
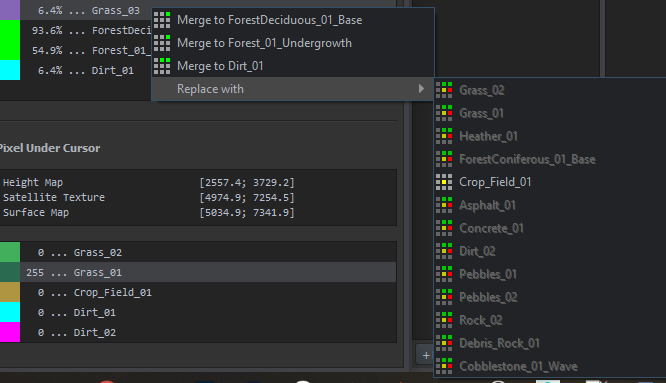
Surface Layer Merge or Replace Operations
|
🚧 TODO: Add graphic element? |
- Select a block in which you want a surface layer merged or replace.
- Select specific surface in the percentage list by right-clicking on it.
- Pick between either Merge or Replace options.
- If Replace is further expanded, pick a surface layer which you want to replace selected one.
- If there is a red square in the 3x3 grid, the 5 surface layer limit is reached in that block and it needs to be processed by further merging surface layers there to empty the slot.
|


