R3vo – User talk
High Command (HC) allows the player to slip into the role of a commander. Instead of having control over a group of several units, as high commander the player can take control of serverel squads and teams.
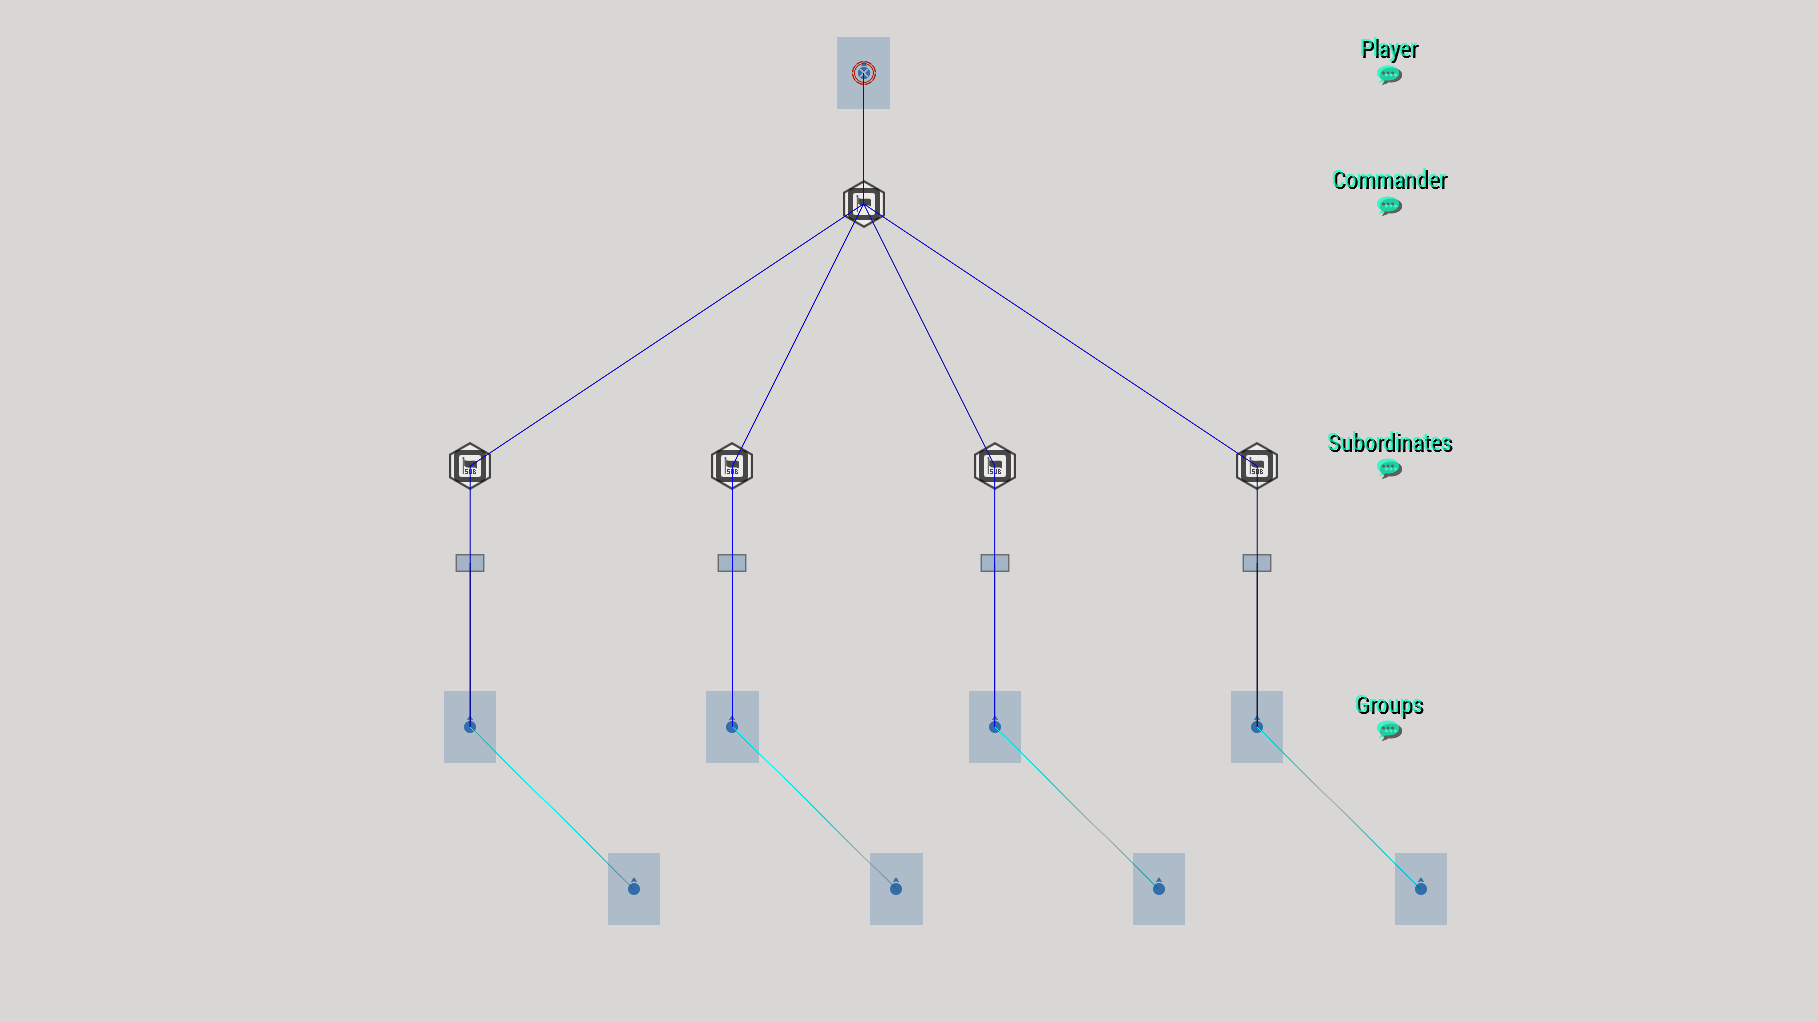
Setting up High Command
- Create a new scenario in Eden Editor
- Place a player unit
- Place the High Command - Commander module
- Synchronize the module with the player unit
- Place one High Command - Subordinate module for each group you want the player to have control over
- Place one group for every High Command - Subordinate module. Any group type will do e.g., Sentry, Fire Team, Weapon Team, tank platoon
- Synchronize each group with one of the previously placed modules.
Additional Information
- If no subordinates were synchronized with the High Command - Commander module, all groups of the commander's side will automatically be added to the High Command.
Taking Control
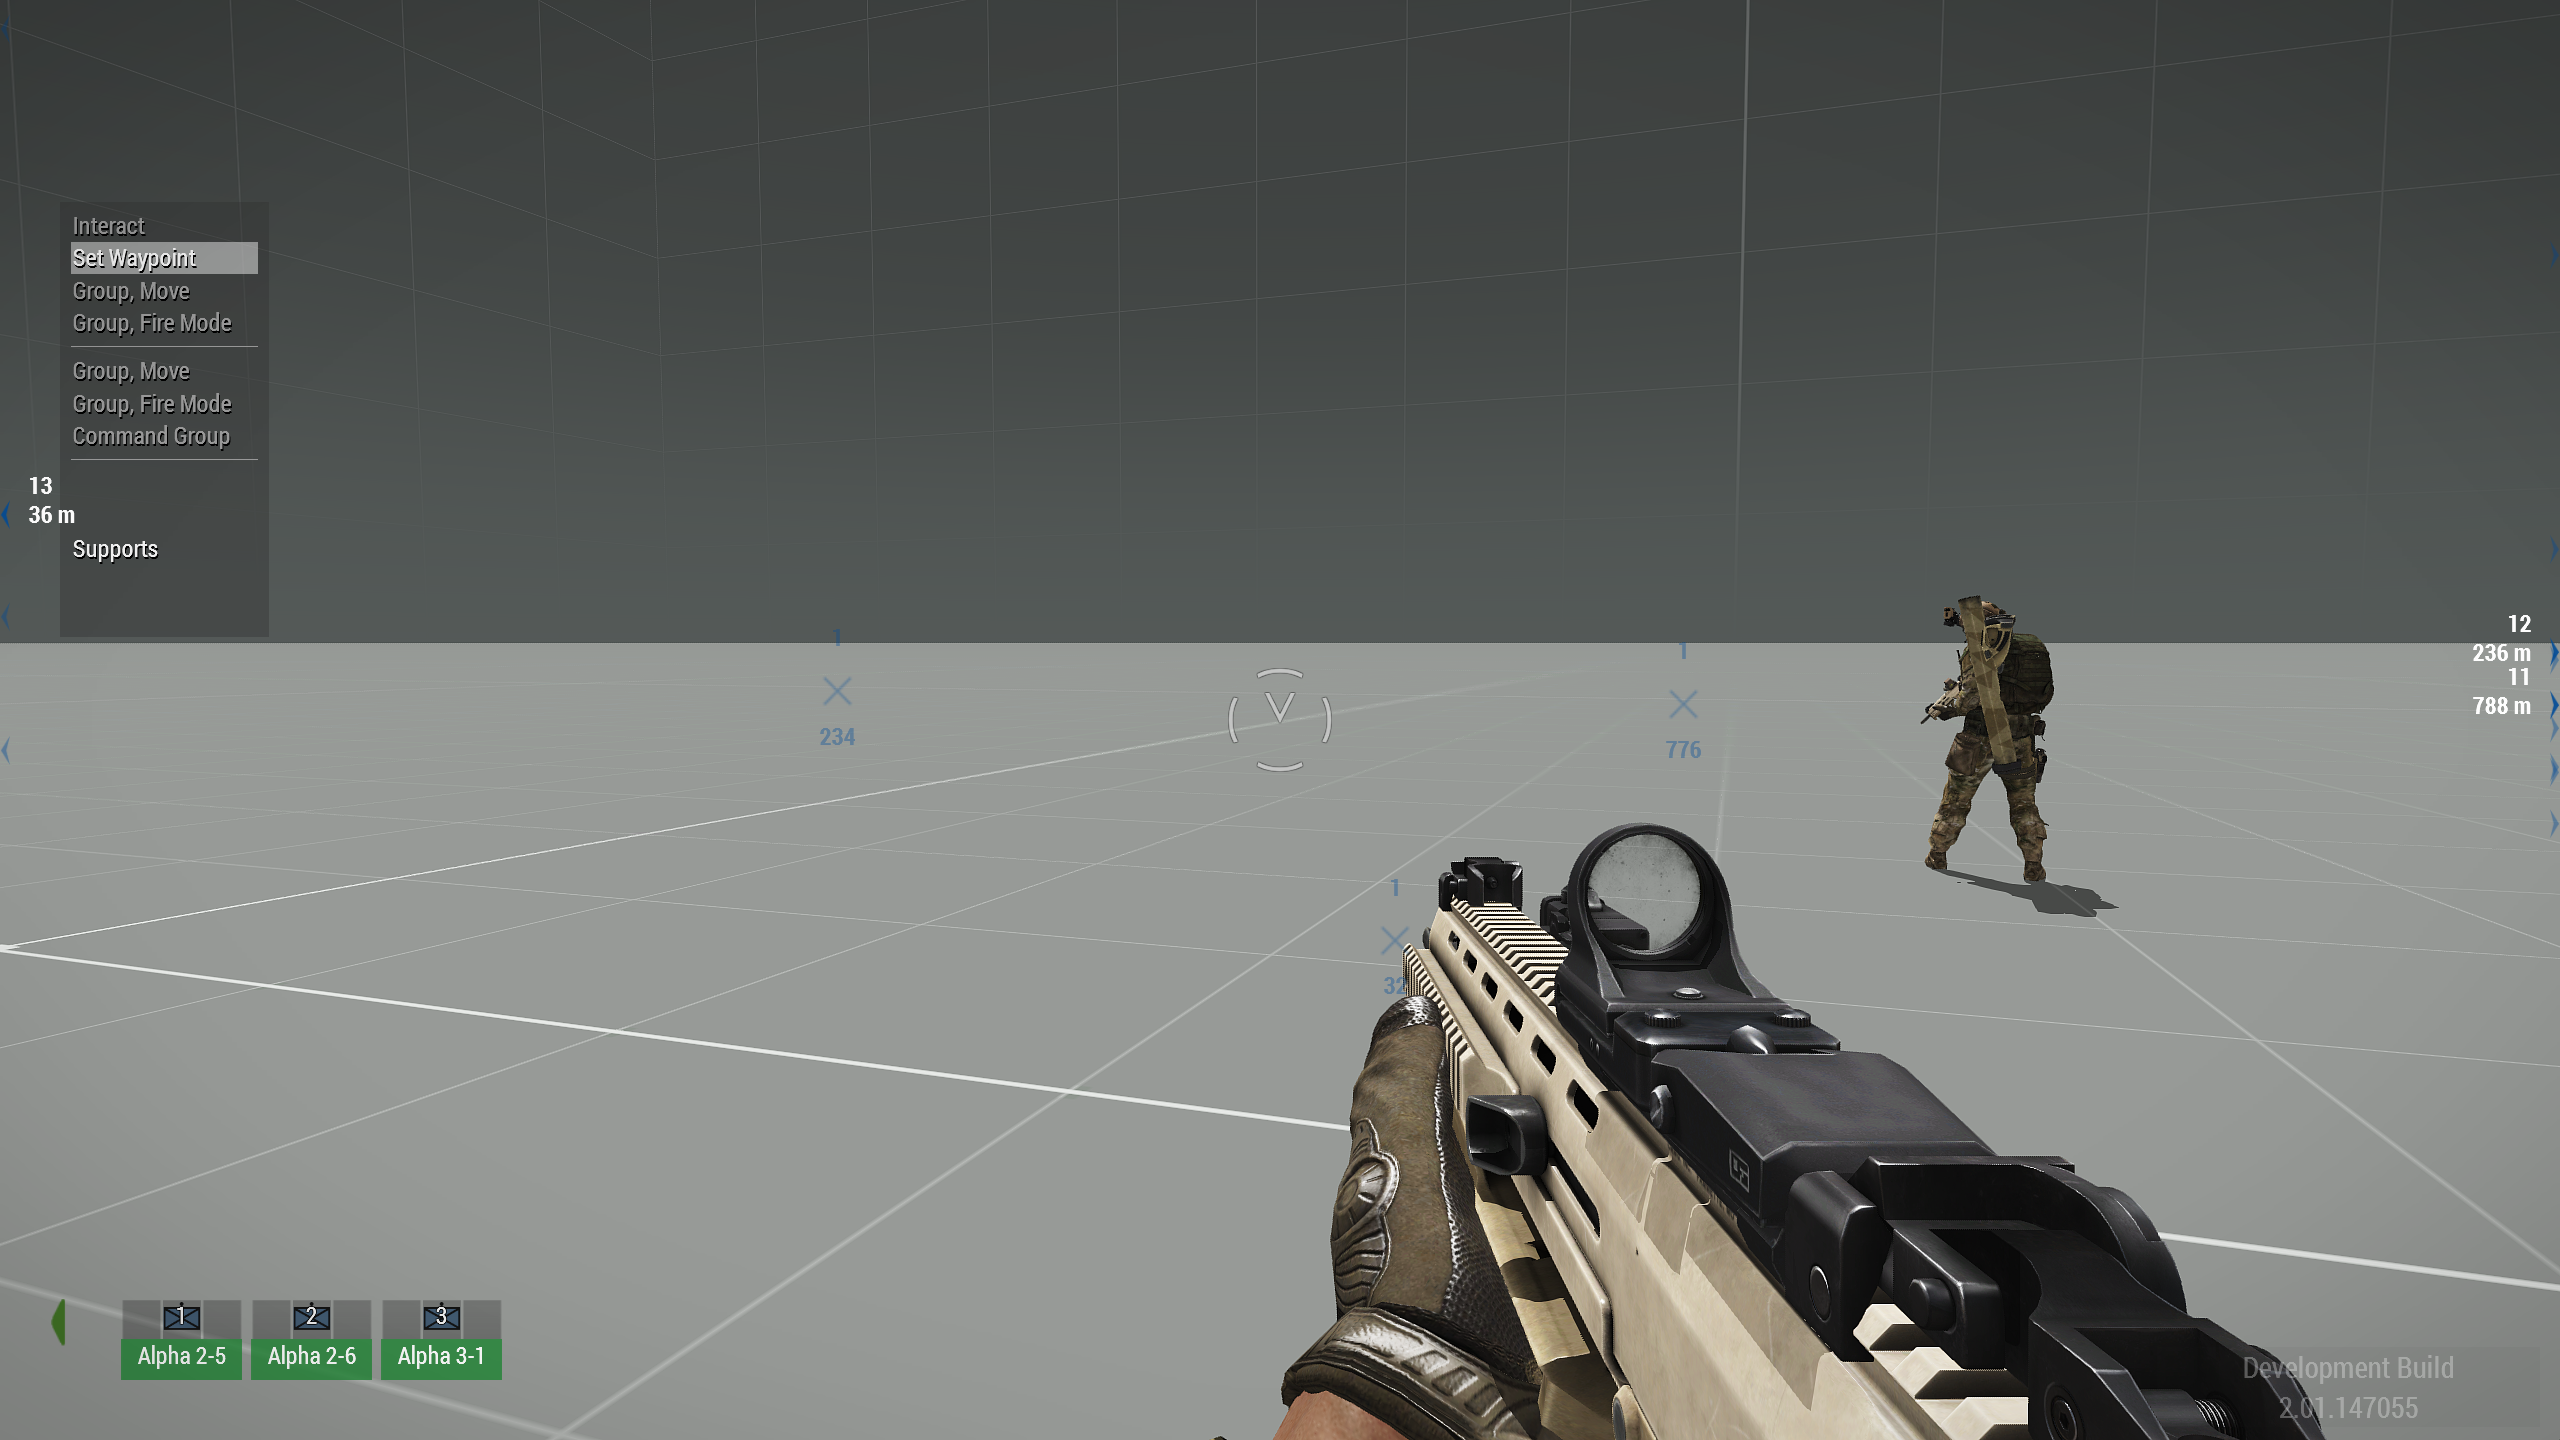
After pressing the preview button, you take control over the groups by pressing Left Ctrl + Space or the App Menu key. The command bar will now display the groups. Select them with F1 to F... and give them orders.
Requesting a SITREP
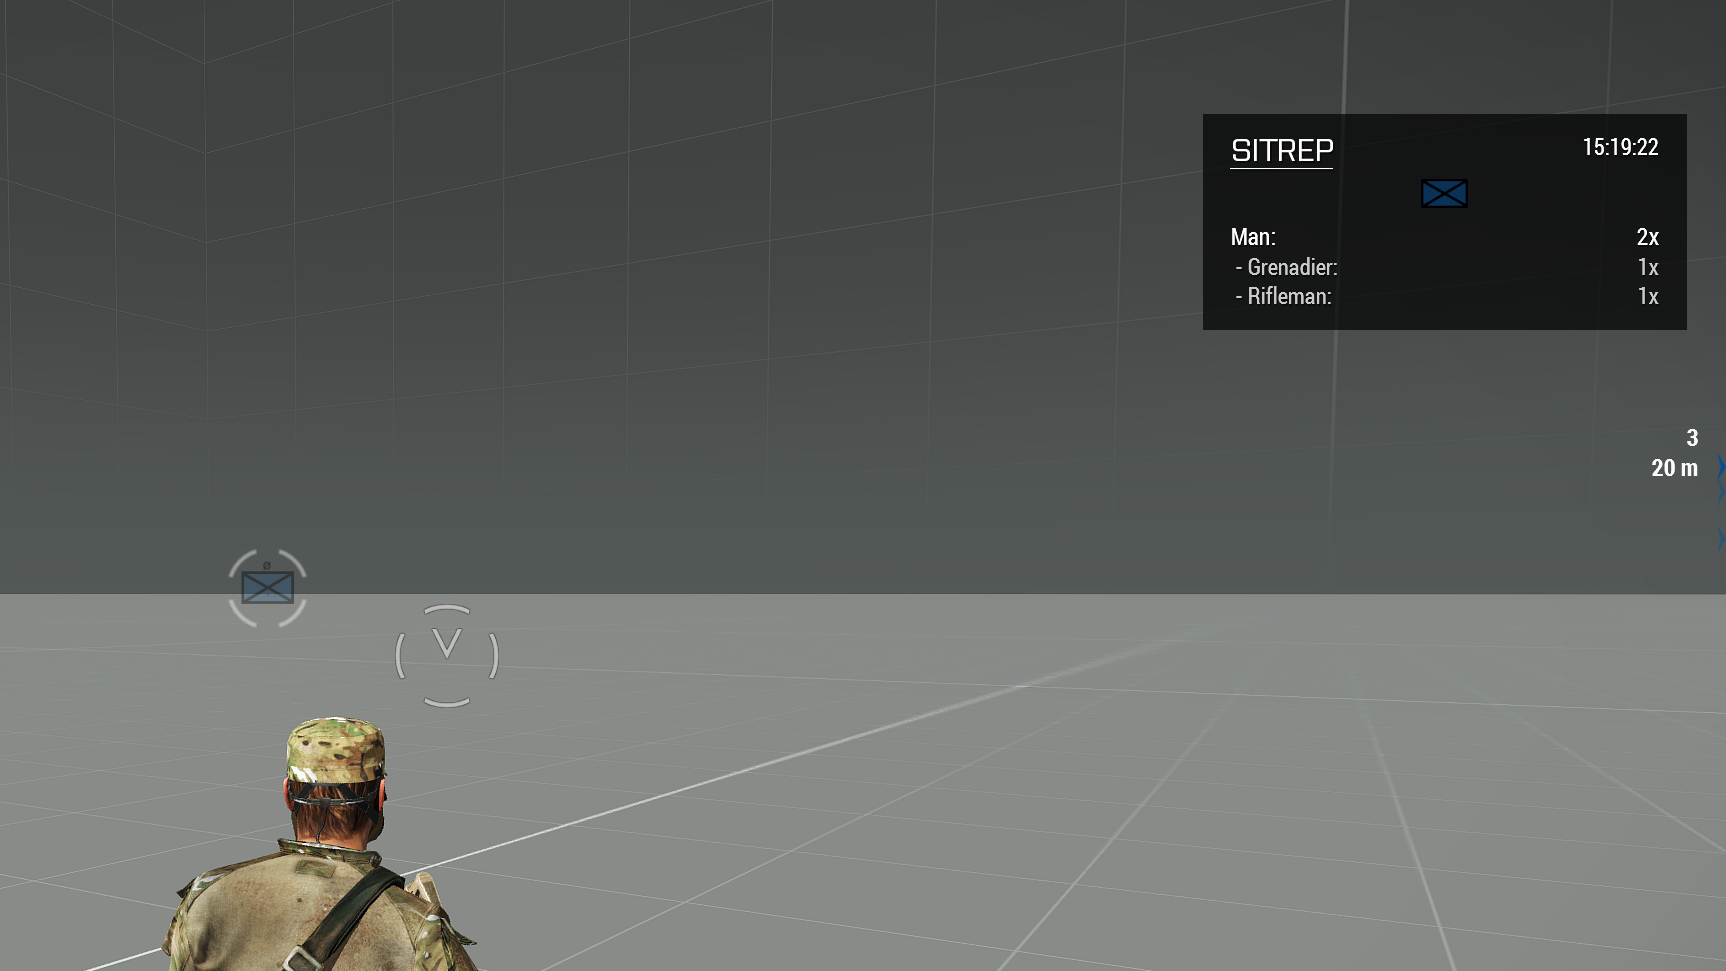
To request a SITREP, select a group with F1 to F..., press 0 and then 1. A hint will appear displaying the time, group icon and the members of the group.
In Map View
Groups can also be selected with opened map. Open the map, click on one of the group markers and then click anywhere on the map to command the group to move to this position.
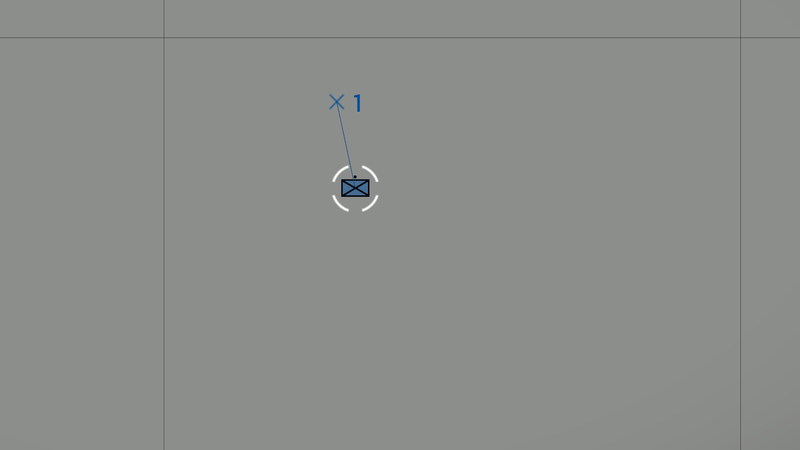
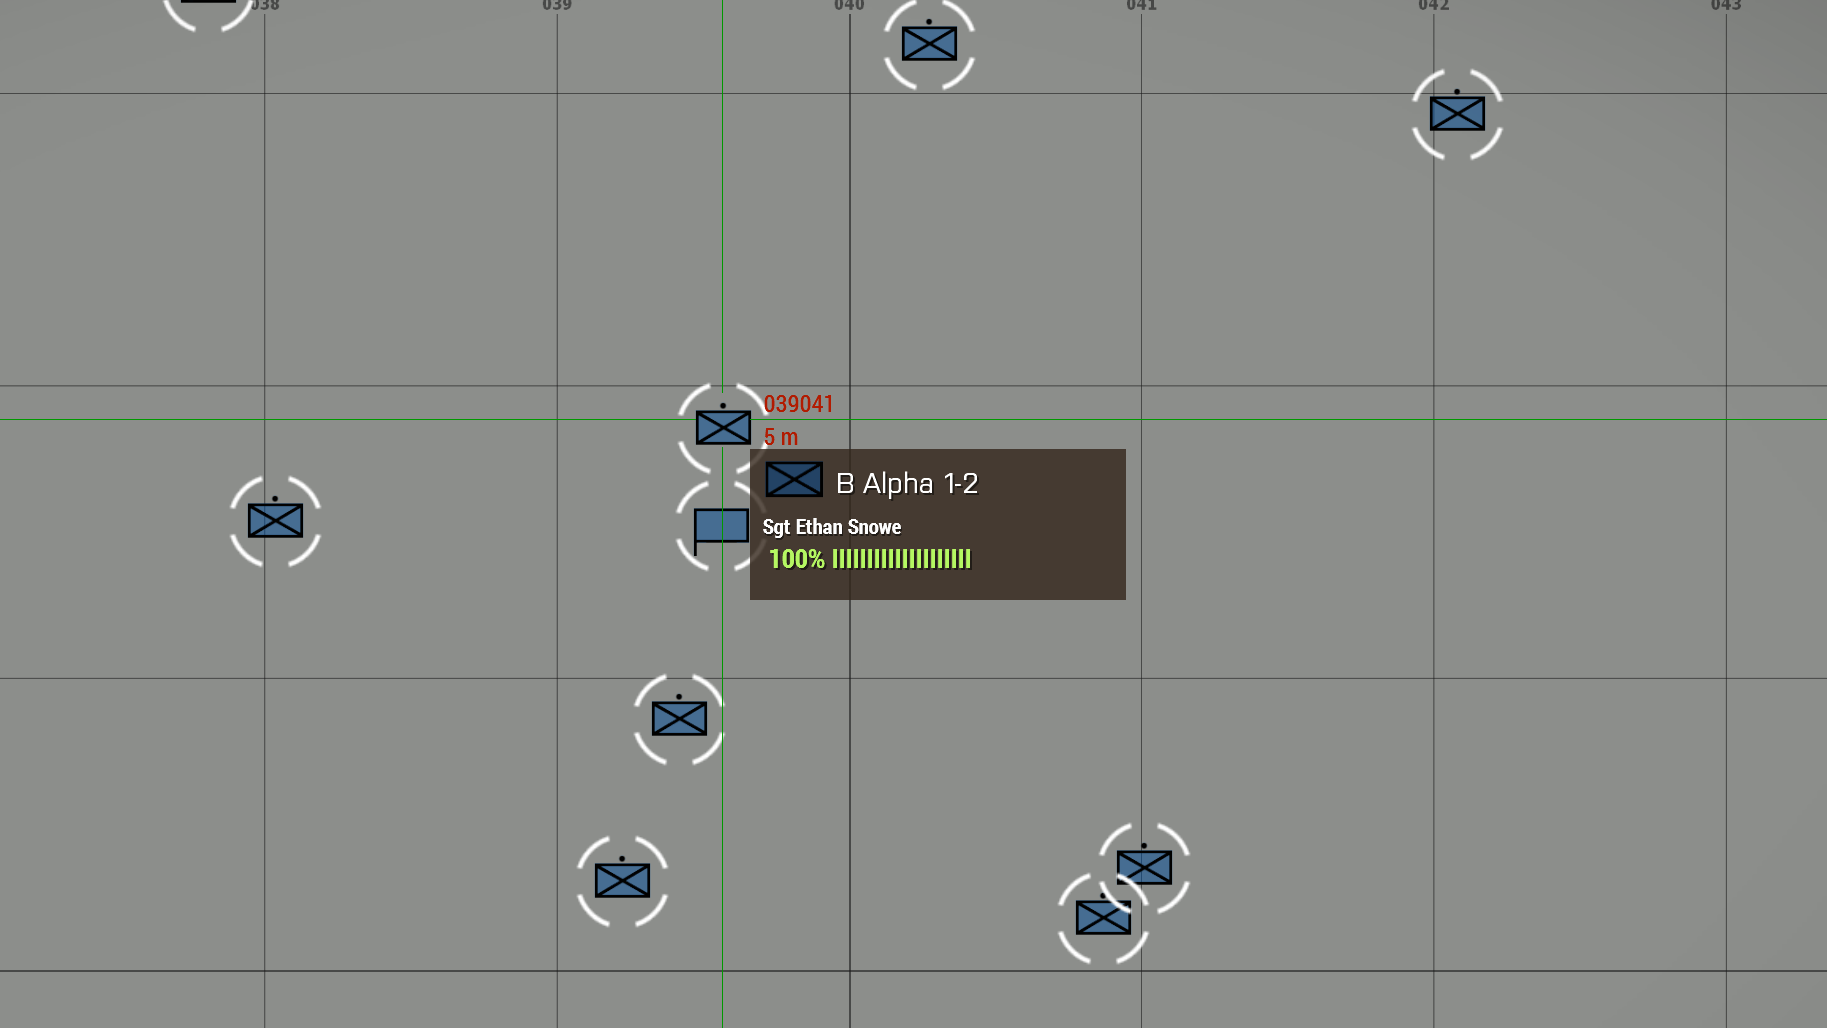
Hovering over the group markers in map view will also provide additional information such as condition and callsign of the group and name and rank of the group leader. Furthermore, current waypoints of the groups will also be shown on the map. They are indicated by an X symbol.
Advanced Waypoint Usage
When the map is opened, multiple waypoints can be place by holding Left Ctrl and pressing the left mouse button. Furthermore, waypoints can be dragged by selecting a waypoint and holding the left mouse button. Additionally, right clicking on a waypoint allows for further customisations such as:
| Property | Description / Available Values |
|---|---|
| Waypoint Type | Move, Cycle, Seek and Destroy, Guard, Unload, Load, Get Out, Get In |
| Combat Mode | Stealth, Combat, Aware, Safe, No Change |
| Formation | Usual waypoint formations |
| Speed | Limited, Normal, Full, No Change |
| Timeout | Group waits x minutes and proceeds to the next waypoint afterward |
| Wait Until | Group waits until a certain day time is reached and proceeds to the next waypoint afterward |
| Radio | ? |
| Create Task | Spawns code saved to High Command - Commander module's namespace _logic getVariable "onTaskCreated" |
| Cancel Waypoint | Deletes the waypoint |
Cycle Waypoint
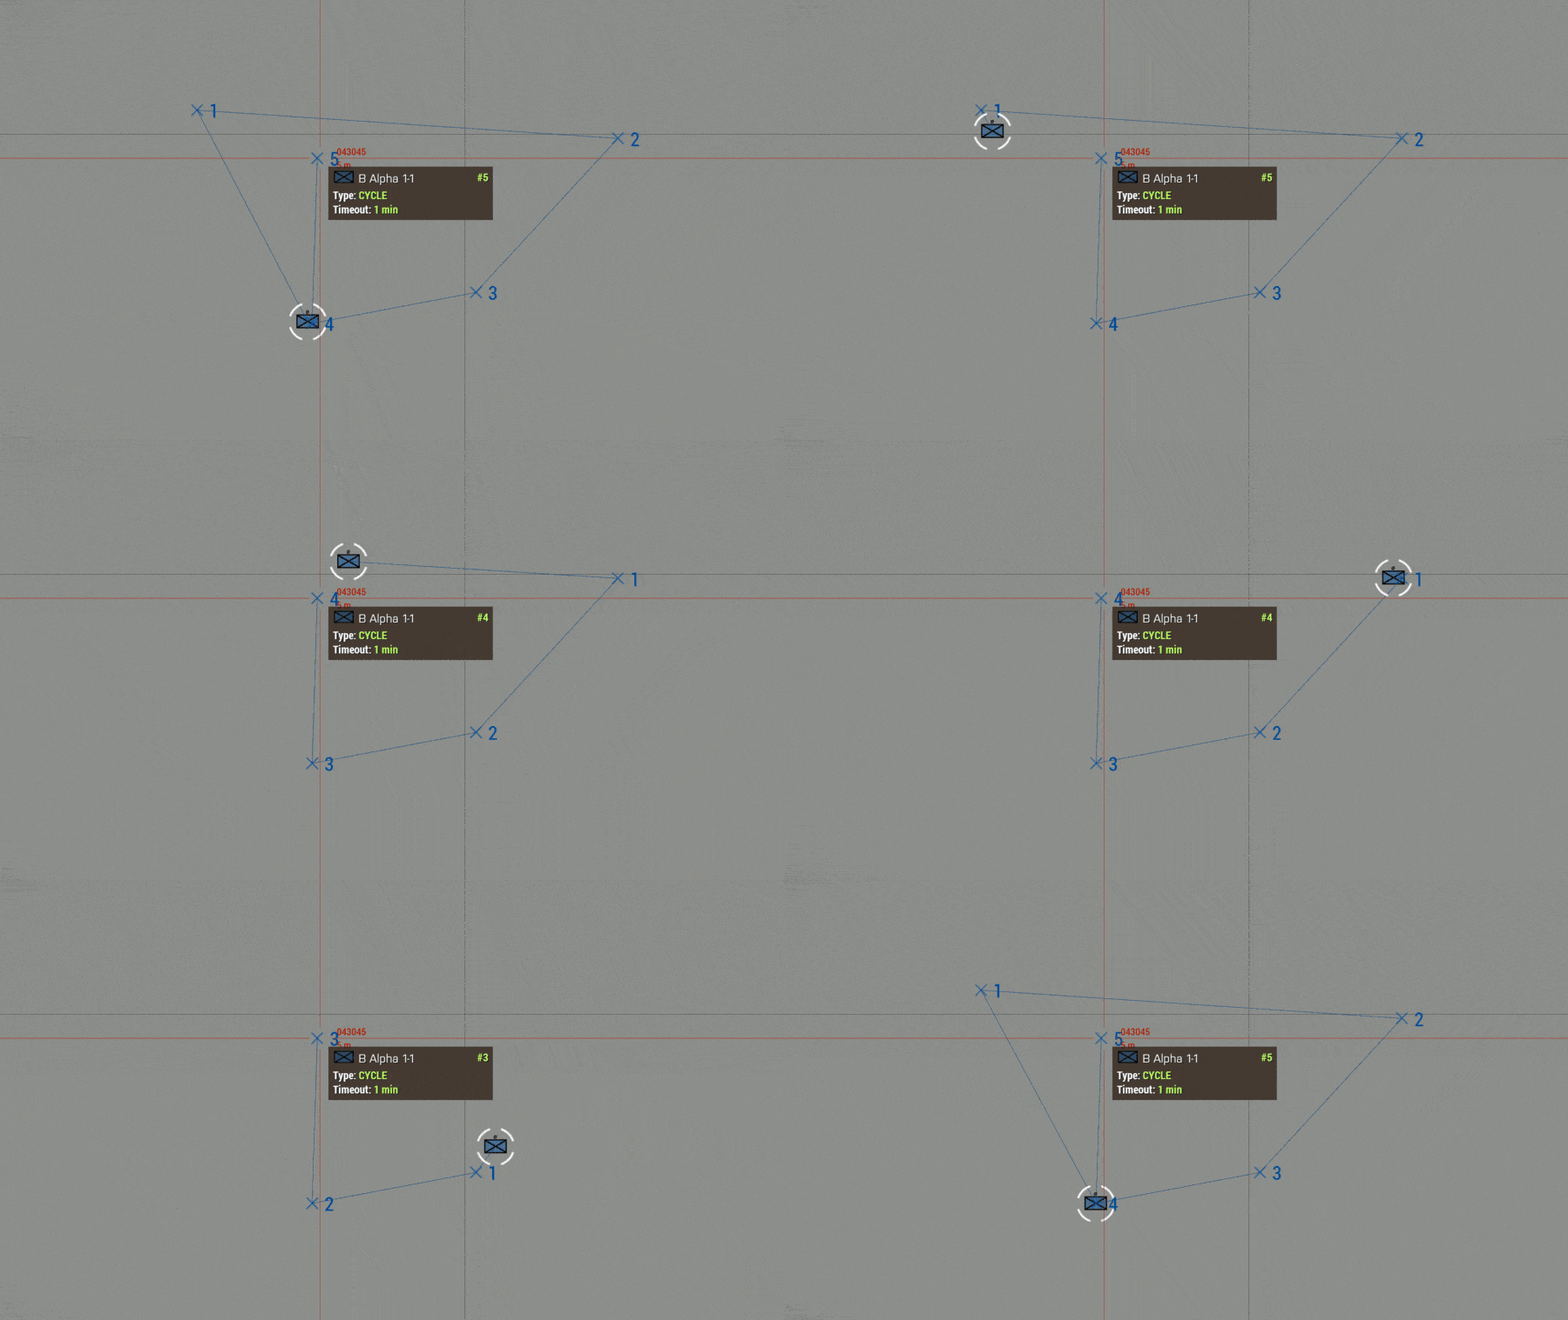
The cycle waypoint behaves a bit differently from what we are used to. The if a waypoint it set to cycle the group will actually never move toward it. Also timeouts and other waypoint properties are ignored. Instead, once the cycle waypoint is the last waypoint left, the previous waypoints are re-created.
Group Type Markers
In High Command, various unit types are indicated by an icon.
Type
Size
Scripting
The High Command functionality can also be manipulated via scripts.
Get commander of a group: hcLeader
Get group parameters: hcGroupParams
Remove all subordinate groups: hcRemoveAllGroups
Get selected groups: hcSelected
Remove a group from high command: hcRemoveGroup
Force select group(s): hcSelectGroup
Add a group to high command: hcSetGroup
Manipulate command bar: hcShowBar hcShownBar
Event Handlers: onCommandModeChanged onHCGroupSelectionChanged (stackable version)
All Scripting Commands
Scripts
- a3\modules_f\hc\data\scripts\hc.sqf
- a3\modules_f\hc\data\scripts\hc_gui.sqf
- a3\modules_f\hc\data\scripts\hc_gui_menu.sqf
- a3\modules_f\hc\data\scripts\hc_gui_stat.sqf
- a3\modules_f\hc\data\scripts\hc_local.sqf
- a3\modules_f\hc\data\scripts\hc_sound.sqf (Sounds are not implemented in Arma 3)
Special Module Variables
There are more way to customize the High Command experience and behaviour, however, they are sadly hidden for beginners. Let us take a look! The following variables can be set in the High Command - Commander module's namespace. Given our module's variable name is BIS_HC_1.
Adding multiple commanders
BIS_HC_1 setVariable ["commanders", Array, true];
Radio Triggers
Radio triggers can be made available by setting
BIS_HC_1 setVariable ["radios", [0, 1, 2, 3, 4, 5, 6, 7, 8, 9], true];
- 0: Alpha
- 1: Bravo
- 2: Charlie
- 3: Delta
- 4: Echo
- 5: Foxtrot
- 6: Golf
- 7: Hotel
- 8: India
- 9: Juliet
Chain of Command
Chain of Command can be enabled by setting
BIS_HC_1 setVariable ["chainofcommand", true];
Code for Create Task
The code executed when the Create Task (see table above) is selected for a waypoint can be set with
BIS_HC_1 setVariable ["onTaskCreated", Code, true];
Code for Task Assignment
BIS_HC_1 setVariable ["onTaskAssigned", Code, true];
Code for RMB Menu
BIS_HC_1 setVariable ["RMBmenu", Code, true];
Mods
Similar to many other Arma 3 features, High Command can be modded as well. Here are some modifications:
