Mondkalb's MultiMaterial Tutorial: Difference between revisions
Lou Montana (talk | contribs) m (Text replacement - " (={2,})([^ = ])(.*)([^ = ])(={2,}) * " to " $1 $2$3$4 $5 ") |
Lou Montana (talk | contribs) m (Text replacement - "y[ _]*\|[ _]*(arma[0-9]+)[ _]*\|[ _]+" to "y|$1|") |
||
| Line 256: | Line 256: | ||
--[[User:Mondkalb|Mondkalb]] 19:40, 20 May 2011 (CEST) | --[[User:Mondkalb|Mondkalb]] 19:40, 20 May 2011 (CEST) | ||
{{GameCategory|arma1| Modelling}} | {{GameCategory|arma1|Modelling}} | ||
{{GameCategory|arma1| Texturing}} | {{GameCategory|arma1|Texturing}} | ||
{{GameCategory|arma2|Tutorials}} | {{GameCategory|arma2|Tutorials}} | ||
Revision as of 14:08, 22 June 2021
MultiMaterial Tutorial
This tutorial will show you how to make use of the multi-material shader.
Step One: Preparing the Model
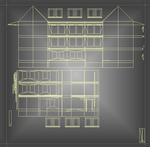
First on we need to create a proper UV-Map. This will give us a basis on which you can then later on "paint" where you want to have specified textures.
Step Two: Creating textures
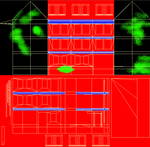
Once you created the UV-Map, export it as an EMF. Convert this EMF to JPG, TGA or something else your graphics software can read. Now paint plain colors where you want to apply textures. This is very similar to the creation of a layermask texture used for the creation of islands. The EMF will help you where to put what. When you're done, it could look like the picture to the left.
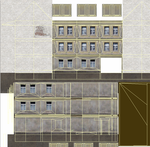
Next on create an MC texture using the exported EMF. The MC texture will be giving a special tint to the complete model. You can consider this the "real" texture, while the multiMaterial only defines textures that overlay to increase the resolution and fidelity of the applied texture. Similar to a Detail-map.
If you fancy Ambient Shadow - which you should - you can create one of those, too. See some of the BIS-Ambient shadow maps (Tagged either *_AS.paa or *_ADS.paa) to get a picture of what It should look like.
Step Three: RVMAT
Now we take on the RVMAT which is the heart of using the MultiMaterial Shader. Here's one of the RVMATs I am using for this Model & Tutorial:
ambient[] = {1.0,1.0,1.0,1.0};
diffuse[] = {1.0,1.0,1.0,1.0};
forcedDiffuse[] = {0.0,0.0,0.0,0.0};
emmisive[] = {0.0,0.0,0.0,1.0};
specular[] = {1.0,1.0,1.0,1.0};
specularPower = 60.2;
PixelShaderID = "Multi";
VertexShaderID = "Multi";
class TexGen0
{
 uvSource = "tex";
 class uvTransform
 {
  aside[] = {1.0,0.0,0.0};
  up[] = {0.0,1.0,0.0};
  dir[] = {0.0,0.0,0.0};
  pos[] = {0.0,0.0,1.0};
 };
};
class TexGen1
{
 uvSource = "tex";
 class uvTransform
 {
  aside[] = {1.0,0.0,0.0};
  up[] = {0.0,1.0,0.0};
  dir[] = {0.0,0.0,0.0};
  pos[] = {0.0,0.0,1.0};
 };
};
class TexGen2
{
 uvSource = "tex";
 class uvTransform
 {
  aside[] = {1.0,0.0,0.0};
  up[] = {0.0,1.0,0.0};
  dir[] = {0.0,0.0,0.0};
  pos[] = {0.0,0.0,1.0};
 };
};
class TexGen3
{
 uvSource = "tex";
 class uvTransform
 {
  aside[] = {1.0,0.0,0.0};
  up[] = {0.0,1.0,0.0};
  dir[] = {0.0,0.0,0.0};
  pos[] = {0.0,0.0,1.0};
 };
};
class TexGen4
{
 uvSource = "tex1";
 class uvTransform
 {
  aside[] = {1.0,0.0,0.0};
  up[] = {0.0,1.0,0.0};
  dir[] = {0.0,0.0,0.0};
  pos[] = {0.0,0.0,1.0};
 };
};
class TexGen5
{
 uvSource = "tex";
 class uvTransform
 {
  aside[] = {1.0,0.0,0.0};
  up[] = {0.0,1.0,0.0};
  dir[] = {0.0,0.0,0.0};
  pos[] = {0.0,0.0,1.0};
 };
};
class TexGen6
{
 uvSource = "tex";
 class uvTransform
 {
  aside[] = {1.0,0.0,0.0};
  up[] = {0.0,1.0,0.0};
  dir[] = {0.0,0.0,0.0};
  pos[] = {0.0,0.0,1.0};
 };
};
class TexGen7
{
 uvSource = "tex";
 class uvTransform
 {
  aside[] = {1.0,0.0,0.0};
  up[] = {0.0,1.0,0.0};
  dir[] = {0.0,0.0,0.0};
  pos[] = {0.0,0.0,1.0};
 };
};
class Stage0
{
//Black
texture="CA\Structures\Data\Plaster\plaster_damage_co.paa";
 texGen = "0";
};
class Stage1
{
//Red
 texture="MBG_NogovaBuildings\t\MBG_BarePlaster_01_CO.paa";
 texGen = "1";
};
class Stage2
{
//Green
texture="ca\structures\data\bricks\bricks_broken_dirt_co.paa";
 texGen = "2";
};
class Stage3
{
//Blue
 texture="CA\structures\Data\Concrete\concrete_bare2_co.paa";
 texGen = "3";
};
class Stage4
{
 texture="MBG_NogovaBuildings\t\dum_patrovy01b\MBG_Dum_patrovy01b_A_Mask_CO.paa";
 texGen = "4";
};
class Stage5
{
 texture = "#(argb,8,8,3)color(0.5,0,1,1,DTSMDI)";
 texGen = "5";
};
class Stage6
{
 texture = "#(argb,8,8,3)color(0.5,0,1,1,DTSMDI)";
 texGen = "6";
};
class Stage7
{
 texture = "#(argb,8,8,3)color(0.5,0,1,1,DTSMDI)";
 texGen = "7";
};
class Stage8
{
 texture = "#(argb,8,8,3)color(0.5,0,1,1,DTSMDI)";
 texGen = "3";
};
class Stage9
{
 texture="MBG_NogovaBuildings\t\dum_patrovy01b\MBG_Dum_patrovy01b_A_MC.paa";
 texGen = "4";
};
class Stage10
{
 texture="MBG_NogovaBuildings\t\dum_patrovy01b\MBG_Dum_patrovy01b_A_ADS.paa";
 texGen = "4";
};
class Stage11
{
texture="CA\Structures\Data\Plaster\plaster_damage_nohq.paa";
 texGen = "0";
};
class Stage12
{
 texture="MBG_NogovaBuildings\t\MBG_BarePlaster_01_NOHQ.paa";
 texGen = "1";
};
class Stage13
{
texture="ca\structures\data\bricks\bricks_broken_dirt_nohq.paa";
 texGen = "2";
};
class Stage14
{
texture="CA\structures\Data\Stucco\stucco_001_NOHQ.paa";
 texGen = "3";
};
This RVMAT is rather self-explanatory. Just keep in mind the following texGens apply to certain colors used in your mask-texture:
| texGen | Color |
|---|---|
| 0 | Black |
| 1 | Red |
| 2 | Green |
| 3 | Blue |
Step four: Applying the MultiMaterial
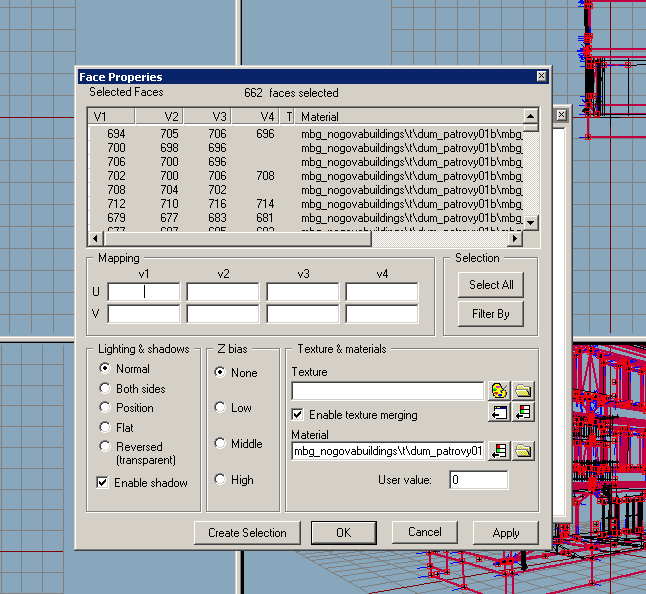
Now you need to select all of the faces of your model you want to use the new material. You can do this by either selecting specific faces or using the UV-Editor and the "select in model" function. (The latter being easier and faster). Once all faces selected, hit E and remove any applied texture, and add your material.
Step Five: Scaling textures
If you look at your model in Buldozer now, it will look pretty ugly, as the textures are rather huge and not properly aligned. To fix that, we need to tell the engine where to look for the UV-Coordinates defining the placement for textures, and where to look for UV-Coordinates defining the scale of the applied textures. (texGen=0..3) Simply create a new UV-Set to do so. Use the green plus-symbol in the UV-Editor:
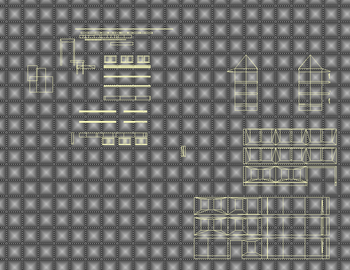
Once done that, copy all the contents of your UVSet 0 into the newly created UVSet 1. UVSet 1 will define where to put what texture, UVSet 0 will define the scale. So go back to UVSet 0, select everything and scale it up big time. One of the dotted squares represents a full size applied texture. This is why multimaterial allows for such awesome texture-fidelity.
This is UVSet 0. Leave UVSet 1 untouched!
Step Six: Being done
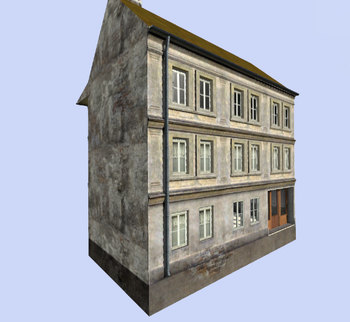
If everything went well, you should now see an awesome, high-res textured object:
--Mondkalb 19:40, 20 May 2011 (CEST)

