Reyhard/Sandbox/Character Gear Creation/Vest/Asset Preparation – User
No edit summary |
|||
| Line 5: | Line 5: | ||
Similar to headgear, you can use one of the existing models to position your character. | |||
There is one important thing to keep in mind - vests are able to influence model of the jacket and switch it to deflated version of the mesh. Right now, those deflated variants of the jackets are created by hand and they are made in a way, which simulates a jacket when vest is worn on top of it. | |||
In any | In '''Jacket_Deflated_Template.fbx,''' there is voxelized model of M88 jacket which you can use to adjust your mesh, so it fits nicely the character. '''Armored Vests''' in Reforger are by default without any pouches and it is possible to wear on top of it any available in game harness. If you want to keep your vest compatible with other harnesses available in game, it might be necessary to adjust how '''close is vest to the body.''' In Blender, you can for instance use '''[https://docs.blender.org/manual/en/latest/sculpt_paint/sculpting/introduction/general.html Sculpt Mode].''' | ||
Pay attention especially to rear parts of the body and ensure that jacket is not clipping through the vest. After few iterations, you should have model ready for skinning like on pic below.{{Messagebox|'''Tip''': You can revisit how the model fits the character after getting this model in-game first|✩|#88cc88}}[[File:armareforger-new-vest-adjusted-model.png|1200x1200px]] | |||
= Rigging = | = Rigging = | ||
| Line 19: | Line 20: | ||
===Importing skeleton=== | ===Importing skeleton=== | ||
[[File:armareforger-new-headgear-skeleton.png|thumb|'''Armature''' and '''Empty Objects''' necessary for equipment to be animated in game|link=https://community.bistudio.com/wiki/File:armareforger-new-headgear-skeleton.png]]Similar to Sample Helmet, first step will be copying skeleton from '''[https://github.com/BohemiaInteractive/Arma-Reforger-Samples/blob/main/SampleMod_NewCharacter/Assets/Characters/SampleCharacter/Character_Weights_Template.blend Character_Weights_Template.blend]''' to Blender instance containing vest. Exact steps are same on Sample Helmet tutorial and if everything went fine, you should end up with something like this. | [[File:armareforger-new-headgear-skeleton.png|thumb|'''Armature''' and '''Empty Objects''' necessary for equipment to be animated in game|link=https://community.bistudio.com/wiki/File:armareforger-new-headgear-skeleton.png]]Similar to Sample Helmet, first step will be copying skeleton from '''[https://github.com/BohemiaInteractive/Arma-Reforger-Samples/blob/main/SampleMod_NewCharacter/Assets/Characters/SampleCharacter/Character_Weights_Template.blend Character_Weights_Template.blend]''' to Blender instance containing vest. Exact steps are same on [[Arma Reforger:Character Gear Creation/Headgear/Asset Preparation#Importing skeleton|'''Sample Helmet tutorial''']] and if everything went fine, you should end up with something like this. | ||
[[File:armareforger-new-vest-skeleton-full.png|875x875px]] | |||
Again, it is important that model contains only '''Armature''' and '''[https://docs.blender.org/manual/en/latest/modeling/empties.html empty objects] from the template'''! | Again, it is important that model contains only '''Armature''' and '''[https://docs.blender.org/manual/en/latest/modeling/empties.html empty objects] from the template'''! | ||
* In total, '''163 bones/empty objects''' (''156 bones and 6 dummy objects'') should be present when model is imported into '''Workbench''' - see note in '''Importing model''' section | * In total, '''163 bones/empty objects''' (''156 bones and 6 dummy objects'') should be present when model is imported into '''Workbench''' - see note in '''Importing model''' section | ||
===Skinning asset=== | ===Skinning asset=== | ||
After skeleton was successfully added to the scene, next step will be skinning of the asset. Main differences compared to skinning of Sample Helmet are: | After skeleton was successfully added to the scene, next step will be skinning of the asset. Main differences compared to skinning of Sample Helmet are: | ||
| Line 38: | Line 40: | ||
Once reference mesh is in, you can follow instruction for [[Arma Reforger:Character Gear Creation/Headgear/Asset Preparation#Transfer weights|transferring weights]] which are mentioned in '''Headgear''' tutorial. | Once reference mesh is in, you can follow instruction for [[Arma Reforger:Character Gear Creation/Headgear/Asset Preparation#Transfer weights|transferring weights]] which are mentioned in '''Headgear''' tutorial. | ||
As an example, 6B2 was used as base for Transfer Weights | As an example, 6B2 was used as base for '''Transfer Weights''' functions. Since 6B2 vests doesn't have neither '''arm''' or '''groin protection''', those parts were moved to separate object called '''Addon_LOD0''' in the sample blend file. | ||
Following instructions listed on [[Arma Reforger:Character Gear Creation/Headgear/Asset Preparation#Transfer weights|Sample Headgear]] page, you should get quite good skinning on '''central part of the vest'''. | |||
When it comes to mesh located in '''Addon_LOD0''', you can use '''[https://github.com/BohemiaInteractive/Arma-Reforger-Samples/blob/main/SampleMod_NewCharacter/Assets/Characters/SampleCharacter/Character_Weights_Template.blend Character_Weights_Template.blend]''' to rest of the weights <gallery mode="nolines" widths="500" heights="300"> | |||
File:armareforger-new-vest-transfer-weights-from-vest.png|Transferring weights to '''Object_LOD0''' using 6B2 as source | |||
File:armareforger-new-vest-addon-skinning.png|Transferring weights to '''Addon_LOD0''' parts using Character_Weights_Template.blend file | |||
</gallery> | |||
====Tweaking skinning==== | ====Tweaking skinning==== | ||
[[File:armareforger-new- | [[File:armareforger-new-vest-vertex-groups.png|thumb|601x601px|'''Vertex Groups''' present in '''Object_LOD0''']] | ||
In both cases, it will be still required to tweak skinning in some areas and in '''[https://docs.blender.org/manual/en/latest/sculpt_paint/weight_paint/index.html Weight Paint] mode''' but since applying animation to vest in Blender is rather problematic thing (especially after rotation), it might be worth to go back to this stage once model is imported in game.{{Feature|important|Watch out - model of vest is not updated correctly after reimport until you either '''launch World Editor in Play Mode''' or use '''Reload Game Scripts''' (Ctrl+R) function.}} | |||
====Armature modifier==== | |||
After doing initial skinning there is one more thing to do in order to link vertex groups with skeleton and thus achieve animated asset: | |||
= | In '''Modifiers''' tab, add new [https://docs.blender.org/manual/en/latest/modeling/modifiers/deform/armature.html '''Armature''' modifier] via '''Add Modifier (1)''' button | ||
*In '''Object''' property, select '''Armature''' as object to deform with | |||
[[File:armareforger-new-headgear-aramture-modifier.png|link=https://community.bistudio.com/wiki/File:armareforger-new-headgear-aramture-modifier.png]]After that, you could quickly verify if asset is skinned by selecting '''Armature''' and switching to '''Pose Mode.''' In this mode you can try to move bones and see if mesh is following them. | |||
==Colliders== | |||
Vests in '''Arma Reforger,''' similar to helmets, are using actual colliders for protection of the character so its quite important to set it correctly. | |||
There is one major difference though - '''on vests areas protected by kevlar (''soft protection in general)'' are not using colliders.''' This is caused by the fact, that '''colliders can be only skinned to one bone''', which in case of more flexible parts makes it quite hard to create mesh which is properly going to protect you against incoming bullets. In such cases, general damage modifiers are used which are applied to certain hitzones on the parent character and they have their own disadvantages, since this protection is omnidirectional - more about that will be mentioned in Prefab Configuration part. | |||
For now, it is assumed that colliders will be necessary for following parts: | |||
* Front & rear armor plate | |||
* Side armor plates | |||
* Groin protection | |||
===Creating colliders=== | ===Creating colliders=== | ||
First step towards creating proper collider will be making of a new object, which should receive one of the [https://community.bistudio.com/wiki/Arma_Reforger:FBX_Import#Collider_shape colliders prefixes] (in this case '''UTM_''' prefix was used). | First step towards creating proper collider will be making of a new object, which should receive one of the [https://community.bistudio.com/wiki/Arma_Reforger:FBX_Import#Collider_shape colliders prefixes] (in this case '''UTM_''' prefix was used). | ||
Revision as of 16:41, 28 August 2023
Mesh Preparation
General
Vest creation is not so much different from headgear, so there is quite a lot of overlap. There are of course some differences nevertheless it is recommended to read Headgear tutorial before proceeding any further.
Similar to headgear, you can use one of the existing models to position your character.
There is one important thing to keep in mind - vests are able to influence model of the jacket and switch it to deflated version of the mesh. Right now, those deflated variants of the jackets are created by hand and they are made in a way, which simulates a jacket when vest is worn on top of it.
In Jacket_Deflated_Template.fbx, there is voxelized model of M88 jacket which you can use to adjust your mesh, so it fits nicely the character. Armored Vests in Reforger are by default without any pouches and it is possible to wear on top of it any available in game harness. If you want to keep your vest compatible with other harnesses available in game, it might be necessary to adjust how close is vest to the body. In Blender, you can for instance use Sculpt Mode.
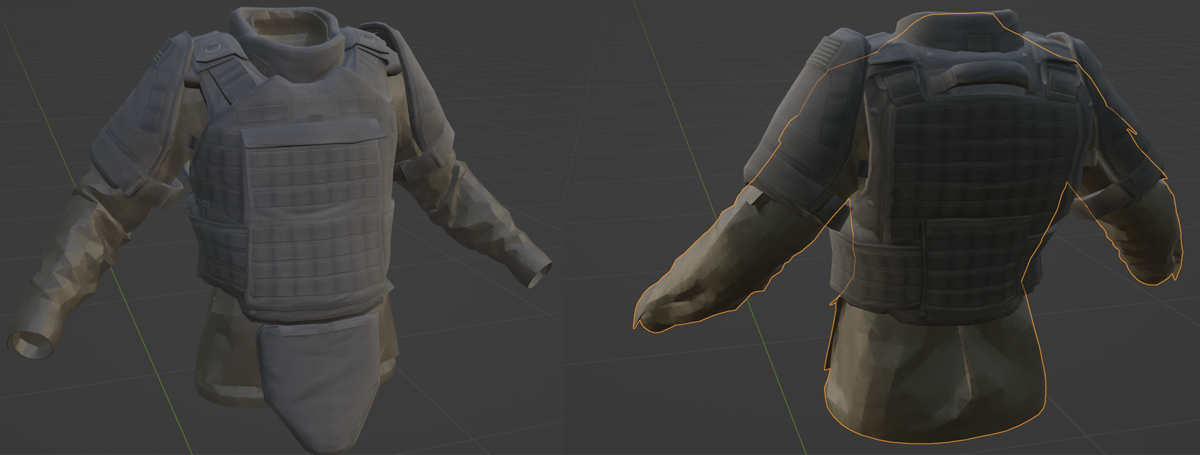
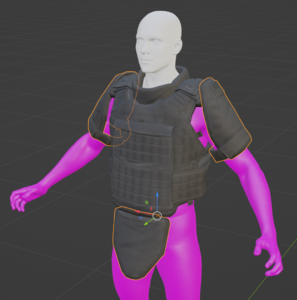
Pay attention especially to rear parts of the body and ensure that jacket is not clipping through the vest. After few iterations, you should have model ready for skinning like on pic below.
Rigging
Once vest is properly oriented and placed, it is possible to move towards the next step, which is rigging of the model. Unlike Sample Helmet, skinning of Arma 3 models will be way different around chest area so utilizing weights from A3 is not an option. Fortunately, weight transfer gives usually a good results and then only manual tweaks are necessary.
Importing skeleton
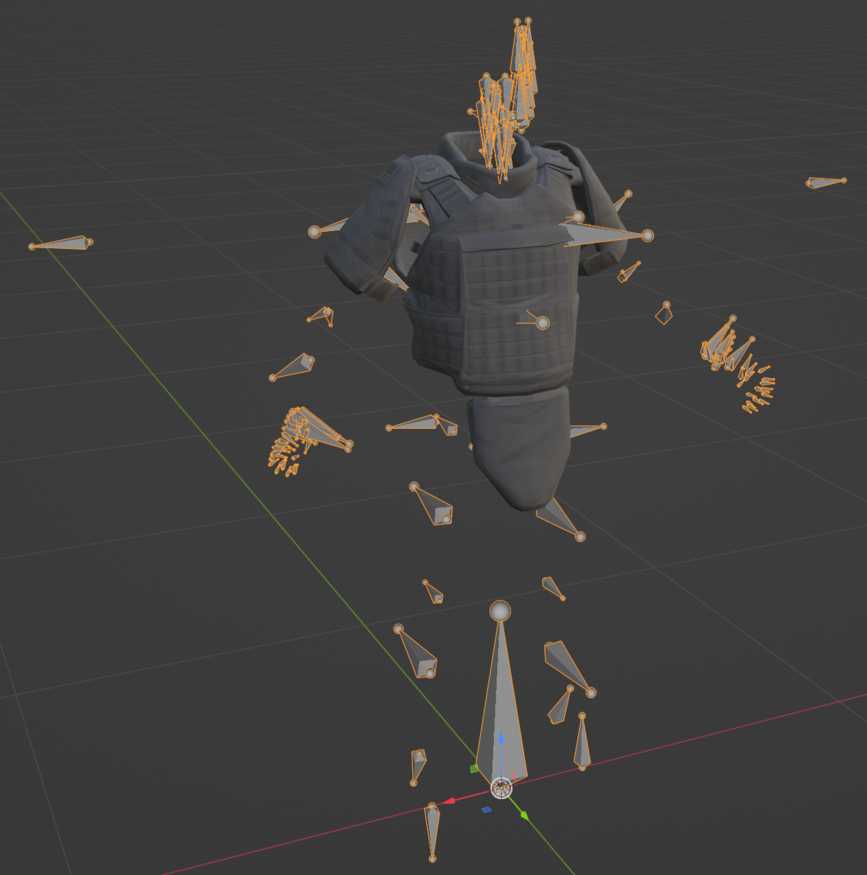
Similar to Sample Helmet, first step will be copying skeleton from Character_Weights_Template.blend to Blender instance containing vest. Exact steps are same on Sample Helmet tutorial and if everything went fine, you should end up with something like this.
Again, it is important that model contains only Armature and empty objects from the template!
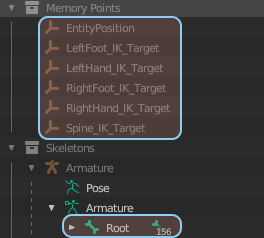
- In total, 163 bones/empty objects (156 bones and 6 dummy objects) should be present when model is imported into Workbench - see note in Importing model section
Skinning asset
After skeleton was successfully added to the scene, next step will be skinning of the asset. Main differences compared to skinning of Sample Helmet are:
- Vests are influenced by dozens of bones so initial transfer weight is a must unless you want to spend significant amount of time making your own skinning from scratch
- After transferring weights, some manual adjustments are usually required
- Weights for the vest can be transferred from either Character_Weights_Template.blend (for non blender users, there is Character_Template.fbx, which still needs to be rotated) or from other vests, like... Vest_SampleVest_01
- Using Sample Vest as base should yield better results in most cases - especially areas around armpits should look better
Of course, when Sample Vest was prepared, weights were transferred from another vest - namely 6B2 - therefore don't be surprised to see pictures of it in this tutorial.
Transfer weights
Once reference mesh is in, you can follow instruction for transferring weights which are mentioned in Headgear tutorial.
As an example, 6B2 was used as base for Transfer Weights functions. Since 6B2 vests doesn't have neither arm or groin protection, those parts were moved to separate object called Addon_LOD0 in the sample blend file.
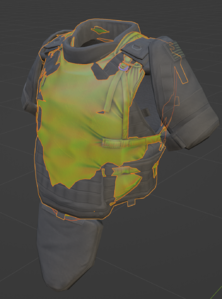
Following instructions listed on Sample Headgear page, you should get quite good skinning on central part of the vest.
When it comes to mesh located in Addon_LOD0, you can use Character_Weights_Template.blend to rest of the weights
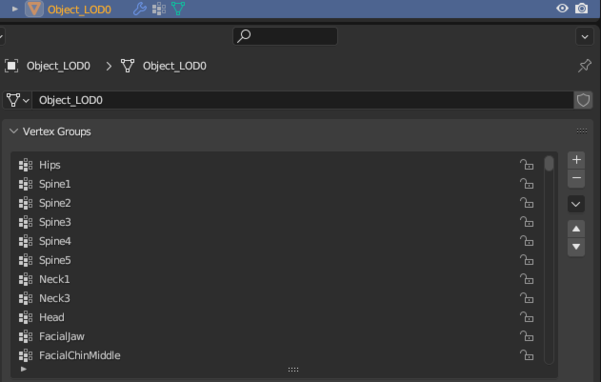
Tweaking skinning
In both cases, it will be still required to tweak skinning in some areas and in Weight Paint mode but since applying animation to vest in Blender is rather problematic thing (especially after rotation), it might be worth to go back to this stage once model is imported in game.
Armature modifier
After doing initial skinning there is one more thing to do in order to link vertex groups with skeleton and thus achieve animated asset:
In Modifiers tab, add new Armature modifier via Add Modifier (1) button
- In Object property, select Armature as object to deform with
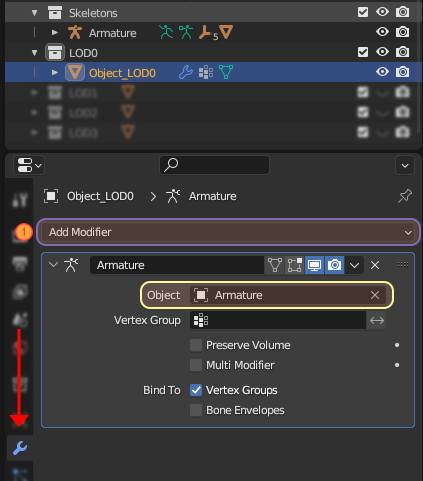 After that, you could quickly verify if asset is skinned by selecting Armature and switching to Pose Mode. In this mode you can try to move bones and see if mesh is following them.
Colliders
Vests in Arma Reforger, similar to helmets, are using actual colliders for protection of the character so its quite important to set it correctly.
There is one major difference though - on vests areas protected by kevlar (soft protection in general) are not using colliders. This is caused by the fact, that colliders can be only skinned to one bone, which in case of more flexible parts makes it quite hard to create mesh which is properly going to protect you against incoming bullets. In such cases, general damage modifiers are used which are applied to certain hitzones on the parent character and they have their own disadvantages, since this protection is omnidirectional - more about that will be mentioned in Prefab Configuration part.
For now, it is assumed that colliders will be necessary for following parts:
- Front & rear armor plate
- Side armor plates
- Groin protection
Creating colliders
First step towards creating proper collider will be making of a new object, which should receive one of the colliders prefixes (in this case UTM_ prefix was used).
Setting relations: Using Make Parent
Setting relations: Using Relations tab
Creating material
Material Research
Game Material creation
Once you have data, you can commence with creation of the material by performing following steps:
Materials & Layer Preset
Next step will be assigning of material and layer preset to the collider itself. You can do it via Enfusion Blender Tools Object Tools or manually (in case you are using different 3D software). Once you know how to change material and layer preset, do following things:
Creating Item variant
One of the final steps in equipment preparation is creating a special item variant of the model. Such model is visible when i.e. given piece of equipment is placed on the ground. This can be done in few steps listed below:
- Make copy of your helmet (FBX/Blend) and open it
Importing model
Last step in asset preparation is importing of model. Detailed procedure for importing mesh into Workbench can be found on FBX Import page and - if you want some practical example - also in Weapon Creation tutorial.
