Workbench Script Debugging – DayZ
Jacob Mango (talk | contribs) (Put more emphasis on a proper structure) |
Lou Montana (talk | contribs) m (Some wiki formatting) |
||
| (One intermediate revision by one other user not shown) | |||
| Line 42: | Line 42: | ||
<syntaxhighlight lang="batch"> | <syntaxhighlight lang="batch"> | ||
start /D "WorkbenchInstallationFolder" workbenchApp.exe "-mod=P:\ | start /D "WorkbenchInstallationFolder" workbenchApp.exe "-mod=P:\FirstMod" | ||
</syntaxhighlight> | </syntaxhighlight> | ||
Additional mods can be added by being delimited by a semi-colon. For example: ''-mod=P:\ | Additional mods can be added by being delimited by a semi-colon. For example: ''-mod=P:\FirstMod;P:\SecondMod''. | ||
== Connecting Workbench to DayZ == | == Connecting Workbench to DayZ == | ||
| Line 185: | Line 185: | ||
</syntaxhighlight> | </syntaxhighlight> | ||
{{GameCategory|dayz|Tutorials}} | |||
Latest revision as of 00:24, 25 April 2023
Using the diagnostic version of the game executable (DayZDiag_x64.exe), it is possible to connect Workbench tool to a running instance of the game client/server to debug scripts from the game and your mods.
Prerequisites
- If you are loading a mod, this tutorial assumes your mod is setup according to the structure in Modding Basics.
- You will require the official DayZ Tools where Workbench is located.
- You will have extracted the Project Drive as follows in the DayZ Modding Basics, Setting up the Project Drive
DayZ Setup
We can allow direct modification and hotloading of game scripts straight from the Project Drive to the game. To do so we have to create a symbolic link. Like in DayZ Modding Basics, Preparing FilePatching we have to run a command in the command line window.
- Go to your DayZ installation folder. It will be within the steamapps folder at 'common/DayZ'.
- Delete any folder called 'scripts' if they exist.
- Copy the full path.
- Open a command line window and run the following command, replacing 'DayZInstallationFolder' with the path you copied earlier.
mklink /J "DayZInstallationFolder\scripts" "P:\scripts"
- Navigate back to the DayZ installation folder, you should now see 'scripts' there. Enter the folder and you should see 'Scripts' and the files within it as you would see in the work drive.
Workbench Setup
- Launch Workbench through the DayZ Tools or navigate to 'common/Dayz Tools/Bin/Workbench/' within your steam folder.
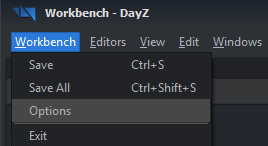
- From the menubar, click 'Workbench' and then in the dropdown click 'Options'.
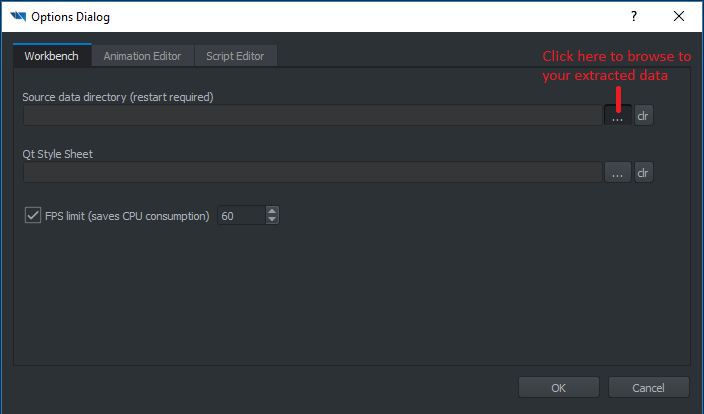
- Within the 'Workbench' tab, click on the '...' corresponding to Source data directory and select the 'P:\' drive or where you have extracted the game contents.
- Click 'Ok', and then when prompted for a restart, let it.
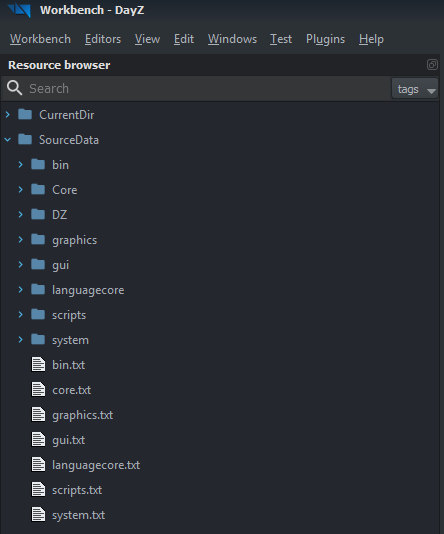
After restarting you should be able to see the project structure in the Workbench Resource Browser just as they appear on your Project Drive.
Loading Mods
Assuming you have setup your mod according to the Modding Basics then workbench will be able to work with your mod as if it was a vanilla script.
Open a command-line window and run the following command, replacing 'WorkbenchInstallationFolder' with the path Workbench is installed at.
start /D "WorkbenchInstallationFolder" workbenchApp.exe "-mod=P:\FirstMod"
Additional mods can be added by being delimited by a semi-colon. For example: -mod=P:\FirstMod;P:\SecondMod.
Connecting Workbench to DayZ
The DayZDiag_x64.exe is able to act as a client or as a server (with the addition of the -server command line parameter).
It takes all the other parameters like the base executable.
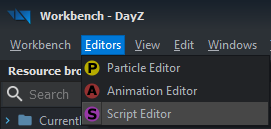
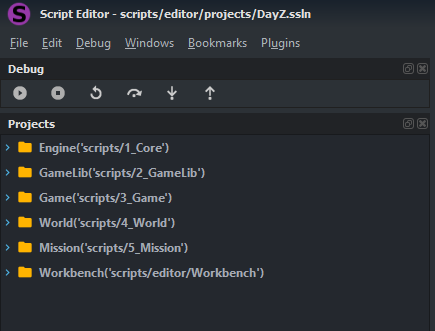
With workbench running, open the Script Editor module.
It has it's own Resource Browser but you can open .c files from the base Resource Browser by double clicking them, which automatically opens the Script Editor and loads the selected file.
When both the diagnostic executable and the Script Editor are running, it should automatically connect them, which will be announced by a brief popup window in the lower right part of your screen.
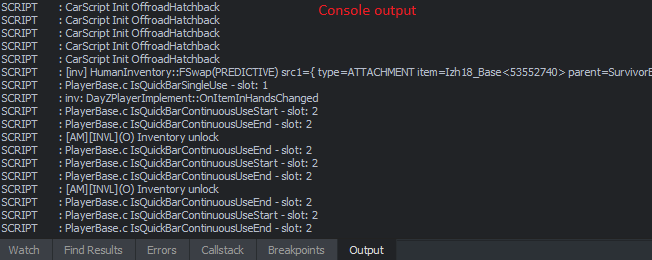
Now you will be able to see text Output that the diagnostic executable is printing for debug purposes and also debug your code by inserting breakpoints and step through the execution.
Note: If you only want to see the console output, then extracting and loading PBOs is not needed, Script Editor should connect to the diagnostic executable without them, but then only the console output is available.
Script Breakpoints
You can pause the script execution when it reaches a certain line in the script by inserting a Breakpoint - locate the line you are interested in and then by pressing F9 a red dot should appear to the left, indicating the execution will stop once it reaches that line.
If a yellow exclamation mark in a red circle appears instead, it means that that line of code is never really executed and the script will not stop there.
When the script reaches the indicated line, it will pause it's execution and show you where by a yellow arrow.
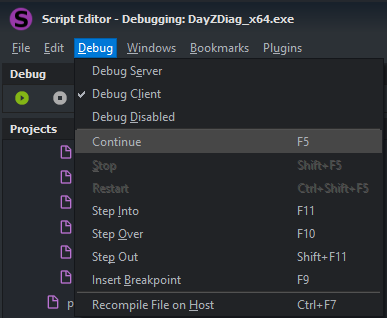
Basic controls and what you can do now are displayed in the top menu under Debug option. Here you also have to switch to the Debug Server option if you want to debug the script running on the server.
Note: You can also add and remove Breakpoints by left clicking where the red dots appear. Right clicking adds a blue Bookmark - these don't have any inherent function except marking script in interesting places so you can then easily navigate to them.
Advanced Configuration
Additional configuration options are possible using the dayz.gproj file in the Workbench directory.
FileSystem allows you to specify path where workbench looks for data which is needed for browsing files and creating ScriptModulePaths.
This is the source data directory which you are setting in workbench options, so path to your P: is not necessary if you have set it there instead.
Be aware of prefixes! When launching Workbench with -mod=YourUnpackedMod parameter to set the ScriptModulePaths automatically, FileSystemPath is used as part of the final path.
This means that if your mod folder is located in
P:\OtherMods\MyMod
and it's ScriptModulePath in config.cpp is
MyMod/scripts/etc
then your file system has to point to
P:\OtherMods
OR the path in config.cpp has to be updated to
OtherMods/MyMod/scripts/etc
in order to create correct full path(FileSystemPath+ScriptModulePath) which will work in Script Editor.
   FileSystem {
		 FileSystemPathClass {     // This is usually set in Workbench -> Options -> Source data directory instead
            Name "Project Drive"
            Directory "P:"
         }
		 FileSystemPathClass {     // Custom Dir for Mods
            Name "Mods folder"
            Directory "P:\OtherMods"
         }
		 FileSystemPathClass {     // Game dir
            Name "Steam folder"
            Directory "D:\SteamGames\steamapps\common\DayZ"
         }
ScriptModules are paths which are required for script editor functionalities.
They are automatically set when you launch Workbench with a -mod=YourUnpackedMod parameter, only set these if you require a custom setup
	 ScriptModules {
		ScriptModulePathClass {
			Name "core"
			Paths {
				"scripts/1_Core"
			}
			EntryPoint ""
		}
		ScriptModulePathClass {
			Name "gameLib"
			Paths {
				"scripts/2_GameLib"
			}
			EntryPoint ""
		}
		ScriptModulePathClass {
			Name "game"
			Paths {
				"scripts/3_Game"
			}
			EntryPoint "CreateGame"
		}
		ScriptModulePathClass {
			Name "world"
			Paths {
			 "scripts/4_World"
			 }
			EntryPoint ""
		}
		ScriptModulePathClass {
			Name "mission"
			Paths {
			 "scripts/5_Mission"
			 }
			EntryPoint "CreateMission"
		}
		ScriptModulePathClass {
			Name "workbench"
			Paths {
			 "scripts/editor/Workbench"
			 "scripts/editor/plugins"
			}
			EntryPoint ""
		}
	 }
