Terrain Tutorial – Arma 2
Jump to navigation
Jump to search
| Line 20: | Line 20: | ||
** ''4: The installer is basically self explanatory, the actual important process is to change the directory for each tool (see image below). | ** ''4: The installer is basically self explanatory, the actual important process is to change the directory for each tool (see image below). | ||
[[Image:Tutorial_tool_install_1.jpg]] | [[Image:Tutorial_tool_install_1.jpg]] | ||
''Make sure to define the respective path for each tool (e.g.: O:\BIS TOOLS 2\Oxygen 2, O:\BIS TOOLS 2\Visitor 3 .....and so on). | |||
** ''5: All tools should be installed now in respective directory (O:\BIS TOOLS\). Every Tool is stored in its own folder, as shown in the image below: | ** ''5: All tools should be installed now in respective directory (O:\BIS TOOLS\). Every Tool is stored in its own folder, as shown in the image below: | ||
[[Image:Tutorial_tool_install_2.jpg]] | [[Image:Tutorial_tool_install_2.jpg]] | ||
Revision as of 21:25, 30 August 2009
Introduction
This simple tutorial will explain the basic process of creating a Island in ArmA2.
What the tutorial will deal with:
- Setting up Visitor and the working directory / Project folder (namespace).
- Importing Landscape, Satellite Texture, and Objects.
- Binarizing your world properly.
- Proper Samplemap to work with.
Setup Editing Tools 2
- It´s pretty important to choose a proper place to install the BI Editing tools 2 before starting with anythings else (a clean empty partition is highly recommended).
- In this tutorial we will use Partition O:\
- 1: Download the BI Editing Tools 2
- 2: Create a foldier called BIS TOOLS 2 in your designated Partition (O:\BIS TOOLS 2\ in our example)
- 3: Open or extract the dowloaded zip file and start the BI_Editing_Tools_2_Setup.exe
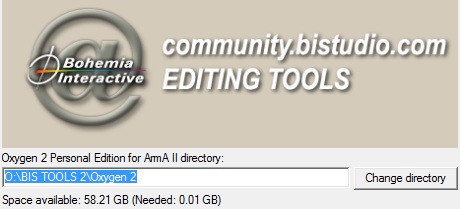
- 4: The installer is basically self explanatory, the actual important process is to change the directory for each tool (see image below).
 Make sure to define the respective path for each tool (e.g.: O:\BIS TOOLS 2\Oxygen 2, O:\BIS TOOLS 2\Visitor 3 .....and so on).
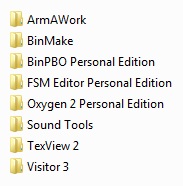
- 5: All tools should be installed now in respective directory (O:\BIS TOOLS\). Every Tool is stored in its own folder, as shown in the image below:
