Eden Editor: Connecting: Difference between revisions
mNo edit summary |
mNo edit summary |
||
| Line 6: | Line 6: | ||
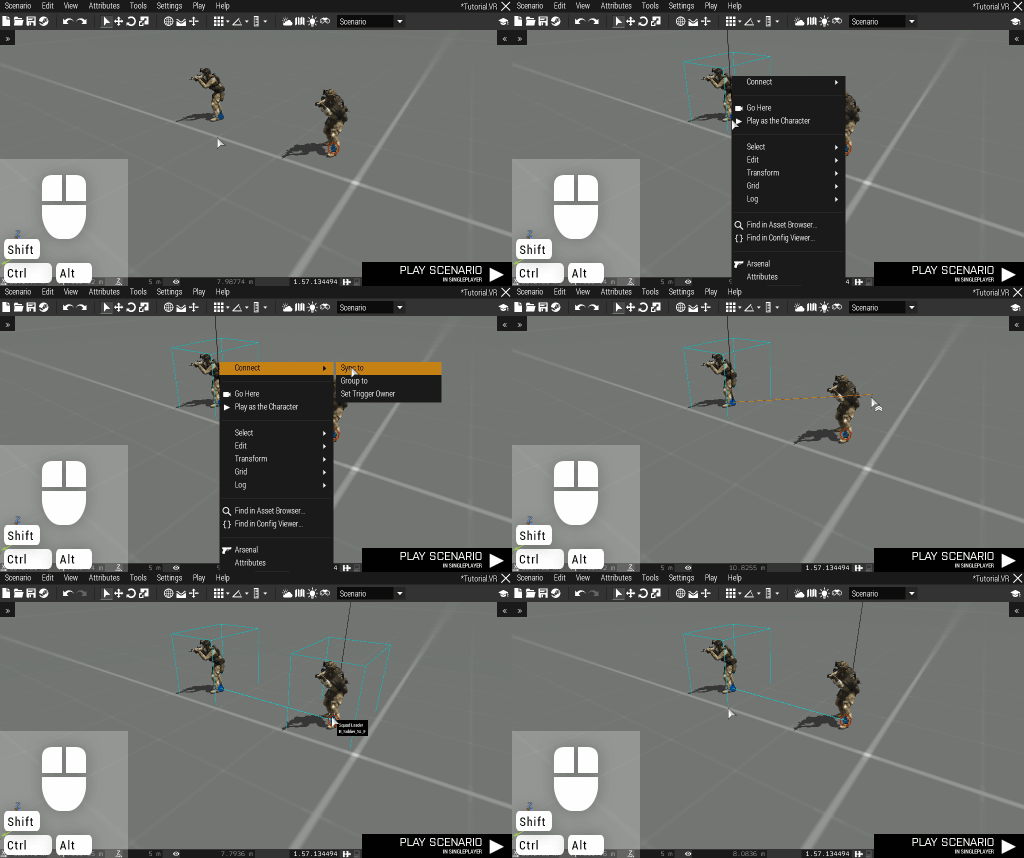
To connect entities together, click the '''right mouse button''' on an entity, expand the '''Connect...''' folder and pick a connection type to start the connecting operation. | To connect entities together, click the '''right mouse button''' on an entity, expand the '''Connect...''' folder and pick a connection type to start the connecting operation. | ||
Click the '''left mouse button''' on the desired target to connect all selected entities to the target. You can also press the '''right mouse button''' to cancel the operation. | Click the '''left mouse button''' on the desired target to connect all selected entities to the target. You can also press the '''right mouse button''' to cancel the operation. | ||
[[File:3den connectMenu.gif|center]] | |||
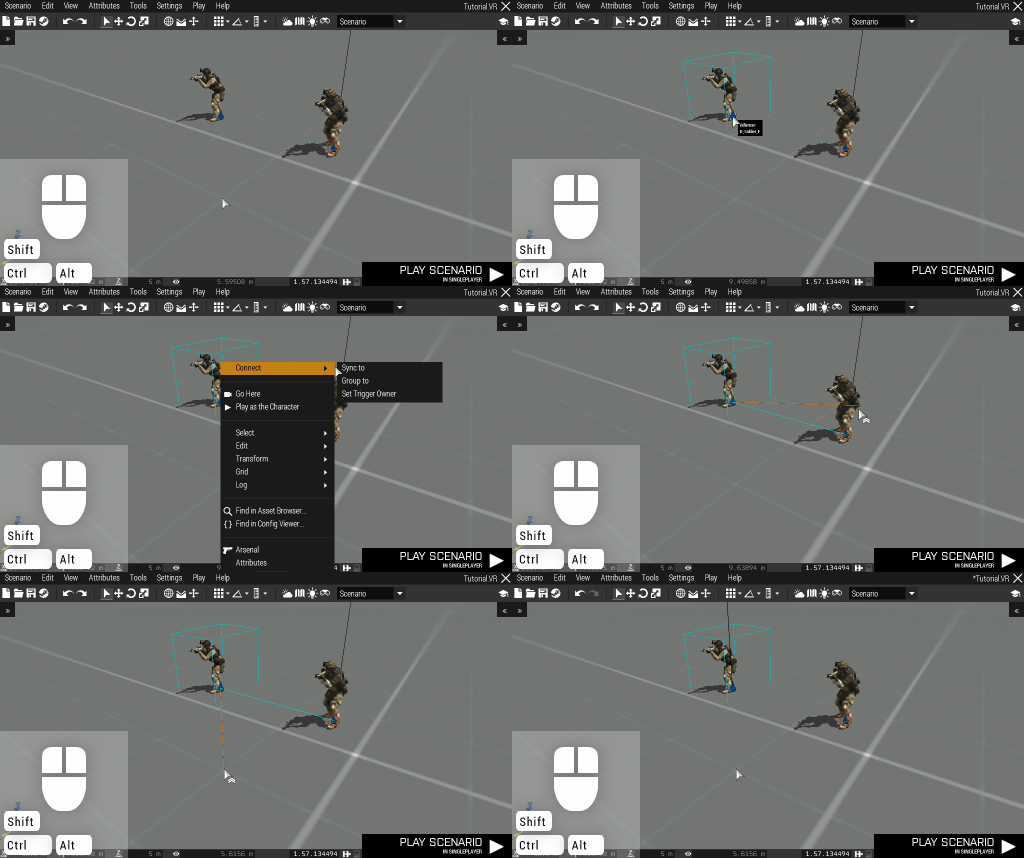
To remove an existing connection, hover over the connection line in the scene and press '''Delete'''. Alternatively, clicking into an empty space while connecting will remove any connection of the selected type. | To remove an existing connection, hover over the connection line in the scene and press '''Delete'''. Alternatively, clicking into an empty space while connecting will remove any connection of the selected type. | ||
[[File:3den connectEmpty.gif|center]] | |||
Connections are shown as lines both in the scene and on the map. Each connection type is represented by a different color. Unless selected, the line will be obstructed by the terrain and environmental settings. | Connections are shown as lines both in the scene and on the map. Each connection type is represented by a different color. | ||
{{Important|Unless selected, the line will be obstructed by the terrain and environmental settings.}} | |||
| Line 22: | Line 25: | ||
Characters grouped together become a group with a leader. Subordinates follow the leader and carry out issued orders. | Characters grouped together become a group with a leader. Subordinates follow the leader and carry out issued orders. | ||
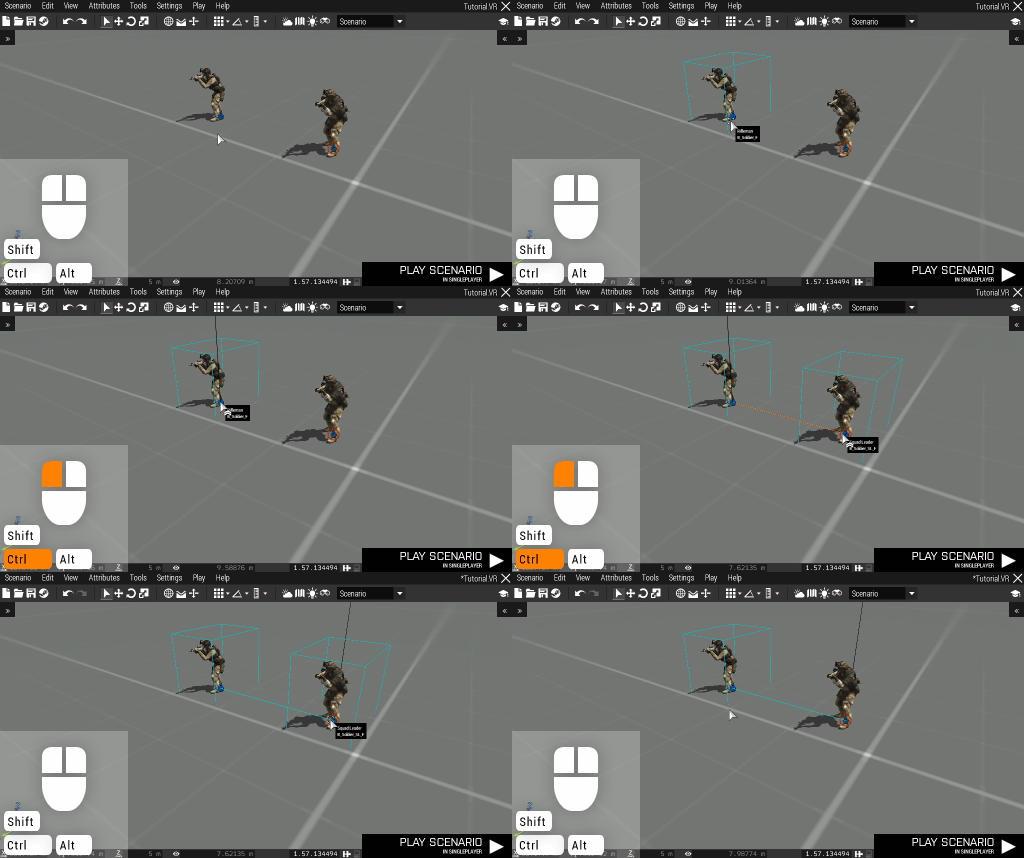
Grouping can also be quickly accessed by '''holding Ctrl''' and dragging a line from one character to another. | Grouping can also be quickly accessed by '''holding Ctrl''' and dragging a line from one character to another. | ||
[[File:3den connectGroup.gif|center]] | |||
Revision as of 14:58, 11 February 2016
Connecting can bind certain entities together and affect their functionality.
To connect entities together, click the right mouse button on an entity, expand the Connect... folder and pick a connection type to start the connecting operation.
Click the left mouse button on the desired target to connect all selected entities to the target. You can also press the right mouse button to cancel the operation.
To remove an existing connection, hover over the connection line in the scene and press Delete. Alternatively, clicking into an empty space while connecting will remove any connection of the selected type.
Connections are shown as lines both in the scene and on the map. Each connection type is represented by a different color.
We will now take a look at the available connection types.
Grouping
Character & Character
Characters grouped together become a group with a leader. Subordinates follow the leader and carry out issued orders. Grouping can also be quickly accessed by holding Ctrl and dragging a line from one character to another.
Syncing
Character & Object
A generic connection without any inherent functionality. Often used by scripted systems. One of the connected entities has to be a character, otherwise the connection will not be recognized once the scenario starts.
Setting Trigger Owner
Trigger & Character
Trigger owner changes its activation from being side based (e.g., activated by BLUFOR) to object based (e.g., activated by the owner or its group members).
Setting Random Start
Object & Marker
When the scenario starts, an object will appear randomly either on its default position, or on the position of any connected marker. Each restart will bring different results.
Setting Waypoint Activation
Waypoint & Trigger
A Waypoint will only be completed once all the connected triggers are activated. This is useful, for example, for sending reinforcements once enemy locations are cleared.


