Reyhard/Sandbox/Character Gear Creation/Vest/Asset Preparation – User
Mesh Preparation
General
Vest creation is not so much different from headgear, so there is quite a lot of overlap. There are of course some differences nevertheless it is recommended to read Headgear tutorial before proceeding any further.
Similar to headgear, you can use one of the existing models to position your character. In Character_AnimationRig_Example.blend, there is a mesh of character with jacket, pants, boots, helmet & ALICE harness. In case of vest, we will be only interested in copy pasting Jacket model to the scene with our model we want to adjust.
Since animation rig is rotated by 180 degrees, it will be necessary to rotate this asset by
Keep in mind that this model shouldn't be used for weight transfer nor its skeleton should be used as a base for you character. As name suggest, this file contains rig for creating animations, so it has dozens of extra bones assisting with creation of new animations.
In any case, this model should be quite similar to deflated variant of uniforms which are used, when item in Armored Vest slot is equipped.
Rigging
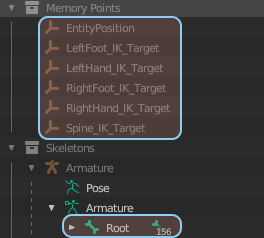
Importing skeleton
Importing skeleton into scene where you have your helmet can be done in few simple steps:
Skinning asset
Once skeleton is present in the scene, it is possible to start process of skinning mesh to the bones. This can be using one of two methods listed below
Transfer weights
Currently, only Basebody_Male_Head_01.xob has its face skinned and there are no facial animations yet it in-game, so it's rather tricky to verify if weights are working correctly. In any case, weights transfer is
Manual skinning
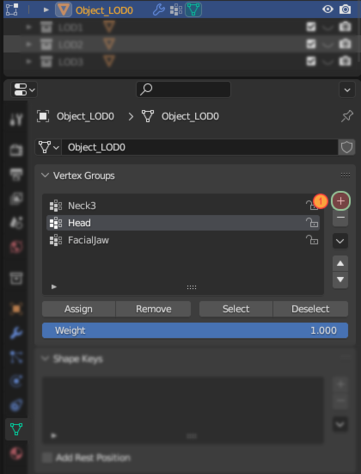
If you don't want to use transfer weight tool or you quickly want to test if helmet is working in game, then you can skin the helmet manually. To do so, perform following actions:
Armature modifier
Once asset is skinned with one of the above methods, there is one more thing to do in order to link vertex groups with skeleton and thus achieve animated asset:
Colliders
Helmets in Arma Reforger are using actual colliders for protection of the character so its quite important to set it correctly.
Creating colliders
First step towards creating proper collider will be making of a new object, which should receive one of the colliders prefixes (in this case UTM_ prefix was used). For instance, sometimes it is feasible to create nice collider out of regular mesh by removing all unnecessary elements and then decimating it below ~150 faces. Other option is to create mesh from scratch which shouldn't be that big task in case of helmet but it might be bit more time consuming so choice is up to creator.
Setting relations: Using Make Parent
Any object can be quite easily parented via Make Parent action. To do so, perform following steps:
- Select collider object
- Select Armature as second object with Left ⇧ Shift +
 combo
combo - Switch to Pose Mode with both objects selected
- Select Head bone
- Tip: you can turn on bone names for easier navigation!
- Open Menu Search ( ↹ Tab using Industry Compatible Keymap )
- Search for Make Parent & select it
- Select Bone in Set Parent To menu
- In Make Parent menu in bottom left corner select Keep Transform option
Setting relations: Using Relations tab
- Create a new object and in Relations tab set relation to Head
- Reposition collider to correct location
- If collider is suddenly very small, make sure that scale of the armature is correct
Creating material
Material Research
Game Material creation
Once you have data, you can commence with creation of the material by performing following steps:
Materials & Layer Preset
Next step will be assigning of material and layer preset to the collider itself. You can do it via Enfusion Blender Tools Object Tools or manually (in case you are using different 3D software). Once you know how to change material and layer preset, do following things:
Creating Item variant
One of the final steps in equipment preparation is creating a special item variant of the model. Such model is visible when i.e. given piece of equipment is placed on the ground. This can be done in few steps listed below:
- Make copy of your helmet (FBX/Blend) and open it
Importing model
Last step in asset preparation is importing of model. Detailed procedure for importing mesh into Workbench can be found on FBX Import page and - if you want some practical example - also in Weapon Creation tutorial.

