Secondary Operations Manager – Arma 2
Note: this page is a work-in-progress! More info to follow as soon as possible.
Introduction
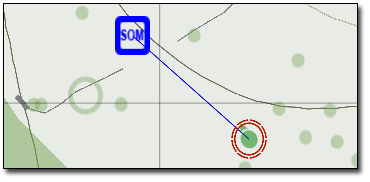
Secondary Operations (SecOps) may be likened to side quests in RPG games. They are simple missions that can take place anywhere in the gameworld. The Secondary Operations Manager (SOM) handles the starting of random SecOps and also manages Support Requests such as artillery.
Quickstart
A quick-start could be as such:
Add Sec-Op Manager Create a Radio Alpha trigger, name it BrokenArrow, whilst putting Broken Arrow in the text box.
In the "on act" field put: [["transport", "aerial_reconnaissance", "supply_drop", "tactical_airstrike", "artillery_barrage","gunship_run"], player] call BIS_SOM_addSupportRequestFunc;
This allow you to call support from Broken Arrow by simply pushing the 0 radio option.
Configuration
Replacing the Default Vehicles
Should you wish to replace the default support vehicles with your own (such as replacing the transport UH-1Y with a CH-47), use the following in your SOM/init.SQF:
- Transport Helo:
SOM_Name setVariable ["TSS_vehicle_custom", Helo_Name]; //Where SOM_Name is the name of your SOM module, and Helo_Name is the name of your chosen helo.
Note: The helo of your choice must be manned and present on the map (it is not spawned)
Functions
Request SecOp
Request a SecOp from the manager.
[<secop | String>, <priority | Boolean>, <SOM reference | Object>] call BIS_SOM_requestSecOpFunc
- secop: Name of the SecOp as String ("ambush", "attack_location", "trap", "rescue", "patrol", "escort", "defend_location", "destroy", "search"). See class names in CfgSecOps.
- priority: True will start the SecOp at once, false will put it in a queue for later.
- SOM reference: The reference to the manager.
Example:
Starts Ambush SecOp at once. BIS_SOM is module name.
["ambush", true, BIS_SOM] call BIS_SOM_requestSecOpFunc;
Advanced topics
New SecOps
SecOp parameters
SecOp does getVariable "settings" when it initializes. Values are: pool (default: ["ambush","attack_location","trap","rescue","patrol","escort","defend_location","destroy","search"]), HQ toggle (true), callsigns (leader of group, leader speech used, hq, hq speech: ["ALPHA", ["Alpha"], "H.Q.", ["HQ"]]), initialDelay (30), autoReinforce (true), secOpSpacing (30), randomActivation (0.7), and secOpDistances ([300, 700]).
Example:
this setVariable ["settings", [[], true, ["Razor", ["Razor"], "H.Q.", ["H.Q."]], 120, false]];
Taken from the War Welcome Mission
Note: For "leader speech", you can use multiple keywords to make a unique callsign, eg.
Example:
this setVariable ["settings", [[], true, ["Romeo and Juliet is behind team blue not far from team red in Nadezhdino", ["Romeo", "and", "Juliet", "is", "behind", "blueTeam", "notFarFrom", "from", "redTeam", "in", "Nadezhdino"], "H.Q.", ["H.Q."]], 120, false]];
SecOp phasescripts
Using ARTY with the Secop Manager
The Secop manager or (SOM) is currently the simplest way to take advantage of the artillery system. To use this, you must have a Secop Manager gamelogic synced to the player. If you want to use SOM with a real artillery battery, you must have constructed a battery using either real or virtual artillery.
To add the artillery barrage to the list of Secop requests, you need to decide which ones should be available. As of the time of this writing, there are 9 fire mission templates loaded into the Secop manager which are available as Secop fire missions:
- Immediate suppression, high explosive - Fire 10 rounds as fast as the battery can.
- Immediate smoke - Fire 6 smoke shells.
- Immediate suppression, Willie Pete - Same as Immediate HE, but with WP.
- Illumination mission - One flare munition every 10 seconds for 3 minutes.
- LASER - Fire two laser guided HE shells.
- SADARM – Stagger three SADARMs ten seconds apart.
- HE Fire For Effect - Bombard with continuous HE for one minute.
- WP Fire For Effect – Bombard with continuous WP for one minute.
- Adjust fire - Fire two HE rounds at the target.
When using a physical or virtual artillery battery, a list of one or more of these FM types (by ID) will need to be included. For instance, if I wanted to have SOM call on my artillery battery (with RIPPER as the Artillery Module logic), I would run the following:
[["artillery_barrage"], player, [[RIPPER, [7,8,9]]], [true]] call BIS_SOM_addSupportRequestFunc;
The above will allow the two fire for effect missions and the adjust fire mission to be called by the SOM. The last parameter "[true]" means the SOM will not expire if you do not use it for X seconds. Once used, you will need to re-add the arty support request if you want to fire arty again.
However, the SOM will also run fire missions without an artillery battery specified. When you add this type of support request, it will utilize spawned virtual artillery pieces set in spawn mode, so you don't need to worry about the position of the battery—SOM will generate it automatically. Adding this type of support request is accomplished without passing parameters to the SOM as follows:
[["artillery_barrage"], player, [[]], [true]] call BIS_SOM_addSupportRequestFunc;
The SOM will handle all communications between the player and the HQ entity. Remember to only provide fire missions that are available for that Artillery battery (for instance, don't give the Grad an Illumination mission) or you will get an error.
Now after this explanation heres a step by step to add your artillery using SOM:
1.Put a SOM module on the map
2.in its int field copy this:
this setVariable ["settings", [[], true, nil, nil, false]];
to stop custom missions
3.link it to your soldier (using F5)
4.create a trigger and in it copy this :
[["artillery_barrage"], player, [[]]] call BIS_SOM_addSupportRequestFunc;
this will add the support function Artilley to your comm Menu (default 0 )
( i advise creating the trigger as a repeated trigger to add artilley when you need it )
