Terrain Tutorial – Arma 2
Jump to navigation
Jump to search
| Line 30: | Line 30: | ||
* ''2: In diesem '''P:\''' Laufwerk erkennen wir den ordner '''CA''' dort befinden sich schon ein paar entpackte pbos unter anderem die Roads2. | * ''2: In diesem '''P:\''' Laufwerk erkennen wir den ordner '''CA''' dort befinden sich schon ein paar entpackte pbos unter anderem die Roads2. | ||
* ''3: Als erstes sollte man sich überlegen welche Objekte man in die Map verbauen will, für dieses Tutorial bleiben wir erstmal bei einer geringen Anzahl an verschiedenen Objekten. | * ''3: Als erstes sollte man sich überlegen welche Objekte man in die Map verbauen will, für dieses Tutorial bleiben wir erstmal bei einer geringen Anzahl an verschiedenen Objekten. | ||
===== Preparing your Project Foldier ===== | |||
==== Setup Visitor 3 ==== | ==== Setup Visitor 3 ==== | ||
Revision as of 23:07, 30 August 2009
Introduction
This simple tutorial will explain the basic process of creating a Island in ArmA2.
What the tutorial will deal with:
- Setting up Visitor and the working directory / Project folder (namespace).
- Importing Landscape, Satellite Texture, and Objects.
- Binarizing your world properly.
- Proper Samplemap to work with.
Setup Editing Tools 2
- It´s pretty important to choose a proper place to install the BI Editing tools 2 before starting with anythings else (a clean empty partition is highly recommended).
- In this tutorial we will use Partition O:\
- 1: Download the BI Editing Tools 2
- 2: Create a foldier called BIS TOOLS 2 in your designated Partition (O:\BIS TOOLS 2\ in our example)
- 3: Open or extract the dowloaded zip file and start the BI_Editing_Tools_2_Setup.exe
- 4: The installer is basically self explanatory, the actual important process is to change the directory for each tool.
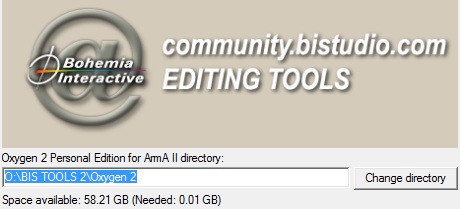
- Make sure to define the respective path for each tool (e.g.: O:\BIS TOOLS 2\Oxygen 2, O:\BIS TOOLS 2\Visitor 3 .....and so on).
- 5: All tools should be installed now in respective directory (O:\BIS TOOLS\). Every Tool is stored in its own folder.


Preparing your Project Foldier
- 1: Die Toolinstallation emuliert das Laufwerk P:\ abgeleitet von unserem O:\BI TOOLS 2\ArmAWork\ Ordner
- 2: In diesem P:\ Laufwerk erkennen wir den ordner CA dort befinden sich schon ein paar entpackte pbos unter anderem die Roads2.
- 3: Als erstes sollte man sich überlegen welche Objekte man in die Map verbauen will, für dieses Tutorial bleiben wir erstmal bei einer geringen Anzahl an verschiedenen Objekten.
Preparing your Project Foldier
Setup Visitor 3
- Run the O:\BI TOOLS 2\Visitor 3\Visitor3.exe
- You are forced to accept the license agreements of Visitor 3 unless you can use the full content of the Program.