Terrain Tutorial – Arma 2
Jump to navigation
Jump to search
| Line 22: | Line 22: | ||
** ''5: All tools should be installed now in respective directory (O:\BIS TOOLS\). Every Tool is stored in its own folder. | ** ''5: All tools should be installed now in respective directory (O:\BIS TOOLS\). Every Tool is stored in its own folder. | ||
[[Image:Tutorial_tool_install_2.jpg]] | [[Image:Tutorial_tool_install_2.jpg]] | ||
** ''BI's Tools Drive informations | ** ''BI's Tools Drive informations | ||
** ''This tool will create a P:\ drive on your hard drive using the SUBST command, it only associates a Folder to a Virtual ** ''Drive, default folder path is "My Documents\ArmAWork", you can change it in installation options. | ** ''This tool will create a P:\ drive on your hard drive using the SUBST command, it only associates a Folder to a Virtual ** ''Drive, default folder path is "My Documents\ArmAWork", you can change it in installation options. | ||
** ''IF YOU ARE USING P:\ DRIVE FOR A DIFFERENT DEVICE YOU CAN CHANGE THE DRIVE NAME IN "\ArmAWork\mapdisk.bat" AND | ** ''IF YOU ARE USING P:\ DRIVE FOR A DIFFERENT DEVICE YOU CAN CHANGE THE DRIVE NAME IN "\ArmAWork\mapdisk.bat" AND | ||
** ''IN OXYGEN2PE (File->Options) AND IN VISITOR3 (Tool->SystemPreferences). | ** ''IN OXYGEN2PE (File->Options) AND IN VISITOR3 (Tool->SystemPreferences). | ||
Revision as of 23:23, 30 August 2009
Introduction
This simple tutorial will explain the basic process of creating a Island in ArmA2.
What the tutorial will deal with:
- Setting up Visitor and the working directory / Project folder (namespace).
- Importing Landscape, Satellite Texture, and Objects.
- Binarizing your world properly.
- Proper Samplemap to work with.
Setup Editing Tools 2
- It´s pretty important to choose a proper place to install the BI Editing tools 2 before starting with anythings else (a clean empty partition is highly recommended).
- In this tutorial we will use Partition O:\
- 1: Download the BI Editing Tools 2
- 2: Create a foldier called BIS TOOLS 2 in your designated Partition (O:\BIS TOOLS 2\ in our example)
- 3: Open or extract the dowloaded zip file and start the BI_Editing_Tools_2_Setup.exe
- 4: The installer is basically self explanatory, the actual important process is to change the directory for each tool.
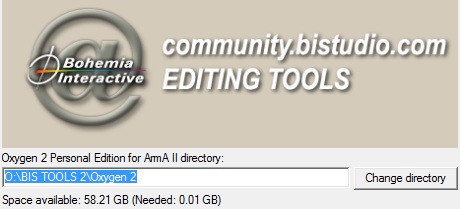
- Make sure to define the respective path for each tool (e.g.: O:\BIS TOOLS 2\Oxygen 2, O:\BIS TOOLS 2\Visitor 3 .....and so on).
- 5: All tools should be installed now in respective directory (O:\BIS TOOLS\). Every Tool is stored in its own folder.


- BI's Tools Drive informations
- This tool will create a P:\ drive on your hard drive using the SUBST command, it only associates a Folder to a Virtual ** Drive, default folder path is "My Documents\ArmAWork", you can change it in installation options.
- IF YOU ARE USING P:\ DRIVE FOR A DIFFERENT DEVICE YOU CAN CHANGE THE DRIVE NAME IN "\ArmAWork\mapdisk.bat" AND
- IN OXYGEN2PE (File->Options) AND IN VISITOR3 (Tool->SystemPreferences).
Preparing your Project Foldier
- Die Toolinstallation emuliert das Laufwerk P:\ abgeleitet von unserem O:\BI TOOLS 2\ArmAWork\ Ordner
- Als erstes sollte man sich überlegen welche Objekte man in die Map verbauen will, für dieses Tutorial bleiben wir erstmal bei einer geringen Anzahl an verschiedenen Objekten.
- In diesem P:\ Laufwerk erkennen wir den ordner CA dort befinden sich schon ein paar entpackte pbos unter anderem die Roads2.
Extracting Pbos with Mikeros Toolsuite
- Dowload the latest Versions of ExtractPbo and DePbo at DevHeaven
- Move the DePbo.dll from the dowloaded DePbo into the ..Windows\System32 Foldier (Wie beschrieben in der readme.DePbo.txt)
Setup Visitor 3
- Run the O:\BI TOOLS 2\Visitor 3\Visitor3.exe
- You are forced to accept the license agreements of Visitor 3 unless you can use the full content of the Program.