Warfare 2 Manual
Arma Warfare 2 is a blend of a team-based multiplayer mission and realtime strategy present in Arma 2, Arma 2: Operation Arrowhead and Arma 2: Combined Operations. Two sides (BLUFOR vs. OPFOR) fight for control of the whole map. The side that loses their headquarters loses the game. Players capture cities to gain resources (supply points). Another resource - money - is gained from killing enemies and also in part from capturing cities. Each side has one commander, who can build a base and various buildings within and around it. Those are either structures providing vehicles and barracks or defense buildings and barriers. As long as you have enough money, you can use the base's respective structures to produce soldiers, weapons and vehicles. These add to your team and you can command them normally. Defensive structures can be used to defend the base and the units stationed there. Players of each side are divided into 8 teams. The commander can give these teams missions and can specify tasks for the teams.
This unique game mode can be played in many ways: either as a fully dynamic large singleplayer scenario, or as a huge multiplayer battle, either in cooperation with others against the AI, or as an enormous team-deathmatch scenario with commanders and group leaders manned by the players.
Warfare 2 comes with many improvements and innovations compared to its predecessor. Arma 2's extended mission parameters allow for changing many scenario features, enabling users to turn the default mission into a brand new kind of battlefield in a matter of seconds. In the new 3-sided scenarios, all three sides (BLUFOR, OPFOR, Resistance) can take part in in the battle, with possibility to negotiate cease-fires and alliances. Commanders can now decide whether the captured cities produce supplies or turn into the well-defended fortresses, adding a new element of strategy.
Starting the Scenario
The Warfare scenarios are started as normal multiplayer missions. However, unlike most other MP scenarios, you can change many mission parameters influencing the gameplay. In the lobby an admin can change the mission parameters as follows:
- Time until mission ends - Duration limit for scenario in minutes, can be set to infinite. Mission automatically ends after time has passed. Victory goes to the side with the highest score.
- Score needed for victory - Game ends when one side achieves the set score. Score is the total points for everyone on the side.
- Towns needed for victory - The first side to capture this amount of towns will win.
- Capturable towns present - Amount of town objectives that will be present in the mission. Reducing this value can improve performance and also help shorten the game length.
- Fast time - Time acceleration ratio. With the acceleration on, mission will rapidly cycle through day and nights.
- Minimum starting distance - This is the minimum distance each side will start from each other. Larger values usually make it harder to find the enemy base and also make longer games. However, each side will start at a closer distance if there are less towns on the map.
- Misc settings - You can turn of civilian populations in towns or disable grass.
- Neutral town opposition - Amount of neutral forces guarding the uncontested towns. Higher values can reduce performance but will also make the game more challenging.
- Side color scheme - When set to Red/Green/Blue, each side is colored by its respective colour (e.g. BLUFOR is always blue), with Red/Green setting, friendly groups and locations are marked green, opposing force is marked red.
- Mission starting time - Customize what time of day the mission begins. Mission start can be set to various times of day, to its default value set in mission editor or to a random value.
- Support available - You can enable or disable supports (artillery) and adjust how expensive they are.
- Town defense range - Range at which units in town will spawn when enemies are near. Higher values improve immersion but also lower performance. The default value is recommended.
- Town defense time - Time that town defenses remain before being removed (after enemy presence is gone). Higher values improve immersion but also lower performance. The default value is recommended.
- Cooperative mission - This game mode is meant for players that want to play against an AI-controlled side. All players should join one side. Any AI-only sides will then be given more teams and resources to make the game more challenging. Increasing Neutral Town Opposition will also increase the amount of teams on an AI side.
- Limited warfare - This game mode will limit the amount of resources players can earn. However, each player will start with a lot more money. Players must also try to make good decisions with the resources they have since it will be difficult to acquire more. Towns will produce less income and there will be no supply trucks. Since resources are limited, casualties will also have a stronger effect on the outcome. Salvaging destroyed vehicles will generate more income than normal, and static defenses are a little cheaper.
Available Warfare Scenarios
All Warfare scenarios have game type CTI. Following MP Warfare scenarios are available in the line of Arma 2 games. Name, factions and required games and DLCs are listed; A2 – Arma 2, OA – Arma 2: Operation Arrowhead, A2CO – Arma 2: combined Operations, BAF – British Armed Forces DLC.
- 01: War Welcome - USMC vs. ChDKZ insurgents on Utes - A2
- 04: Civil War - CDF vs. ChDKZ on Chernarus - A2
- 05: Superpowers - USMC vs. Russia on Chernarus - A2
- When Diplomacy Fails - USMC vs. Russia vs. NAPA guerillas on Chernarus - A2
- CTI 16 Mountain Warfare - US Army vs. Takistani Army on Takistan - OA
- CTI 24 Mountain Warfare - US Army vs. Takistani Army vs. guerillas on Takistan - OA
- CTI 16 Crimson Lance - BAF vs. Takistani militias on Takistan - OA+BAF
- CTI 24 Operation Serpent - BAF vs. ChDKZ insurgents on Chernarus - A2CO+BAF
Basic Setups
There are two basic setups of a Warfare battle:
- Two-sided - BLUFOR and OPFOR are fighting sides with 8 playable positions each. Independent (Resistance) forces guard the town objectives.
- Three-sided - There are 3 playable sides with 8 playable slots each: BLUFOR, OPFOR and Independent. This setup features the option of diplomatic negotiations.
The Basics
There are two roles: team leaders and commanders. A team leader usually completes tasks/missions like capturing towns. They may also build defenses in towns, deliver supplies, or attack the enemy. There is one commander for each side, who is selected from the side's human team leaders or is represented by AI center based on a vote. The commander is responsible for building the base and its defenses, creating missions for players (main capture town missions), and controlling the AI teams.
Game Objectives
Main objective of your side is to locate and destroy the enemy base. However, there may be additional objectives set in mission parameters (score reached, amount of towns controlled) which may lead to victory.
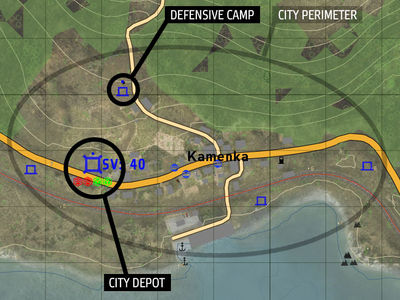
On the team leader's level, the advance of a faction is realized through the mission assignments, which objectives are mainly to capture a town. Each town has a Center and several adjacent defensive Camps.
Destroying the Enemy Base
Remember that destroying the HQ building alone does not mean the base is destroyed. All base structures (vehicle supply points, barracks etc.) count in as parts of the base, and need to be destroyed as well.
Capturing Camps
To capture a camp, walk into it on foot (you cannot capture while inside a vehicle). Camps provide a respawn location if you die in the town. They allow you to construct defenses near them and buy gear. Additionally, camps speed the rate of capture when you occupy the town's Depot. Defenses at camps in captured towns can also be manned by the town's defense garrison. The garrison's size is dependent on the Supply Value of the town. Fast Travel can be interrupted at enemy towns by capturing one of their camps.
Capturing Towns
To capture a town, occupy the area around the depot and eliminate any enemy presence. The more troops you have present, the faster it will capture. Towns with high Supply Value take longer to capture. Capturing towns are essential to winning the game. They are a fast travel location on the map. You can repair/rearm/refuel your vehicles or buy an empty jeep for transportation. They provide income and supplies. Without towns your side cannot get the supplies needed to expand the base. If your base does not have advanced factories then capture more towns. A town's Supply Value (SV) is upgraded by Supply Trucks that drive from the base or towns with a higher SV. Higher SV speeds up Fast Travel, makes the town harder to capture, and provides better defenses for the town.
Completing Tasks/Missions
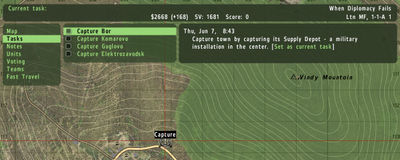
| The commander will assign Tasks/Missions for you to complete. Awards for events such as town/camp captures are always greater when they are your assigned task. You can assign yourself to a task from the journal or the map. |
Warfare Economy
There are 2 basic types of resources in Warfare:
- Money ($) - Used to purchase weapons and expand teams by troops and vehicles, and to build defensive structures. Generated by fulfilling missions (e.g. capturing towns) and destroying opposing forces. Team leader also receives share from the side's general income generated by supply trucks and salvage trucks (per salvaged wreck). It is possible to transfer money to other teams.
- Supplies (S) - Used to build the base structures. Generated by AI-driven supply trucks travelling between the deployed HQ and a captured town depot. Amount of generated supplies depends on Supply Value of a town, which grows in time and depends on town's production setting.
Starting Walkthrough
- In the beginning of a Warfare scenario, you start in your base. You are 1 of the 8 team leaders.
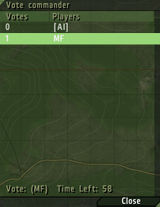
- At first, you are prompted to vote for commander. Vote for experienced player or for AI (in case your side agrees on leaving the management on AI commander).
- The commander starts building the first structures: deploys HQ building, barracks or light vehicle supply point. These structures allow you to build your team.
- The key objective of this game is to capture towns. You probably get a mission to capture a town from your side's commander soon after the scenario starts. You may check the status of Tasks as usual.
- You start with small amount of money, which can be used to purchase few subordinates or upgrade your weapons kit. Use [MouseWheel] to bring up Action Menu offering these options.
- There are several unarmed vehicles in your base. Use them as means of transport to your first objective.
- Before running straight to the center of objective, plan a bit and approach cautisously. There can be local resistance or even the opposing force capturing or guarding the objective.
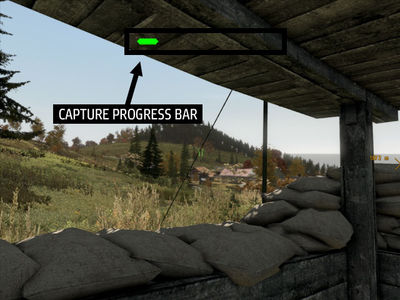
- The town consists of several capturable locations: central depot and several defensive camps. Capture a camp first to get control of a respawn location. You may observe the status of capture on a progress bar displayed on your screen; upon capturing a location, you get prompted by hint.
- Once the first camp is captured, you may continue with rest of camps, or go directly for the depot.
- After you captured your first city, you can fast-travel back to base and enroll some troops and vehicles, advance to your next objective, protect your territory or start looking for your ultimate objective: the enemy base.
- It takes time to learn about all the possibilities Warfare offers, but you don't need to worry about all the features at the very start - everything in Warfare can be left to AI. Ater few games, you will find yourself commanding artillery from a distant fire support base onto enemy base you observe hidden in the woods, or develop strategy of your side and govern the battle in the role of commander. This manual will help you in understanding the background rules and knowing the interfaces for the advanced features, so use it well.
Team Leader Role
This chapter contains the reference on all the Warfare interfaces which you would use when playing in any role, with particular focus on the functions and interfaces used mutually by the team leaders and the commander. If you are completely new to Warfare, we recommend to play the advanced tutorials in ARMA 2: Operation Arrowhead (especially Team Command, High Command, Supports, Construction Interface) and check the Starting Walkthrough provided in this manual.
Getting Started
|
Respawning
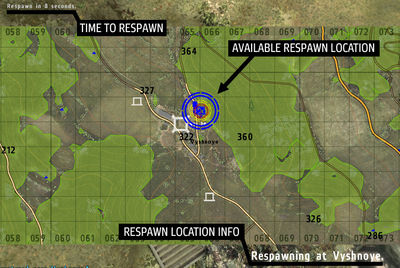
| In case you don't survive a shoot-out, you will respawn at your base. If you are in a town and friendly camps are nearby you may also choose to respawn at one.
After you get killed, a map interface appears. Click on any places marked yellow to choose the place to respawn. |
Fast-Travel
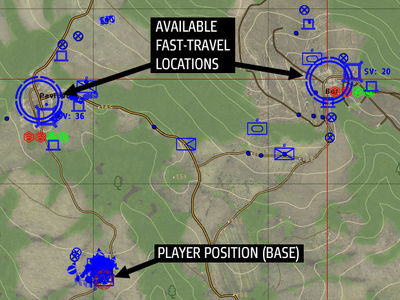
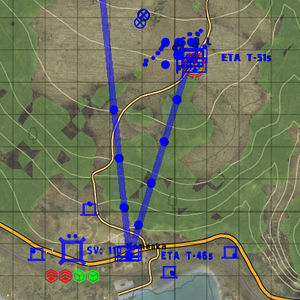
| This option can be used to quickly travel to another destination controlled by your side. To initiate Fast Travel you must be within range of a valid starting location and have a valid destination.
These can be the base or any captured or allied towns. Your whole team with range is transported this way, but transporting more troops and vehicles makes this action more expensive. |
Support Indication
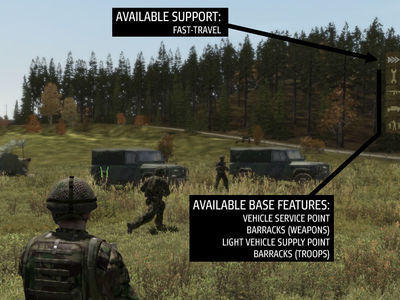
| There are semi-transparent items indicating availability of various supports and services on the right edge of your screen. White icons mark supports, khaki icons mark the base features, e.g. available types of purchases. |
The Base
Structures
- MHQ/HQ - The most important structure in the game! Defend it at all costs. Without it, the commander cannot build a base. Destroying the enemy HQ/MHQ is a very effective way to cripple their growth. In it is mobile form it is known as the MHQ. Only the commander should drive this vehicle. If you need a vehicle then buy one or use a free pool vehicle (usually empty trucks or jeeps at the base).
- Base Vehicle Pool - At game start these are usually the only vehicles available beside the MHQ (leave that for the commander only!). If they get destroyed (or are abandoned) they will eventually respawn at the base. These can be used freely by players for transportation.
- Barracks and Vehicle Supply Points - These are constructed near the HQ. If you are within range, you can access them from the action menu (Buy Units or Buy Weapons) or with the [T key] (or whatever you have assigned to the Teamswitch key). Use them to buy soldiers and vehicles or get gear.
- Vehicle Service Point - Will resupply the base's static defenses. You can also drive up to it and wait to be repaired, refueled, or re-armed.
Overview of base structures can be found in the Base Structures section.
Building Your Team
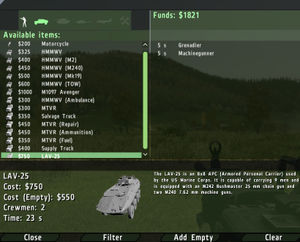
Soldiers for your team can be „bought“ in Barracks, which are usually part of your base. Vehicles can be isued to your team at a respective vehicle supply point, captured camp, or town depot.
|
Purchasing Your Gear
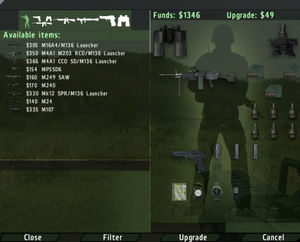
You can purchase additional weapons and equipment via the Buy Gear menu. It can be opened at a Barracks or captured camp.
|
Constructing Auxiliary Bases
You can create a camp by deploying a Repair Truck from the construction screen. Once created, you can purchase very minimal, unarmed vehicles or upgrade the camp to a Forward Operating Base (FOB) or Fire Support Base (FSB). Once upgraded, a camp will allow you to build Static Defenses. The FSB will also allow you to construct mortars and artillery to call Fire Missions. The FOB will create a Vehicle Service Point. Camps are also a respawn point, allow purchasing of gear, and healing.
Constructing Defenses
You can build Static Defenses at the HQ, at a camp, or with a Repair Truck. Defenses are cheaper to construct within a captured town. A town can also automatically man defense(s) with it is garrison. You can disable this with the Action Menu when near a defense. Building defenses in towns at strategic points can be an effective way to hinder an enemy's attempt to take your town.
Additional Interfaces
Map
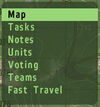
From here you can see your towns or recon information. Go the map to access many of the game's features.
|
Camp Menu
If you right-click on one of your camps, you can access the construction interface to remotely build defenses at that camp.
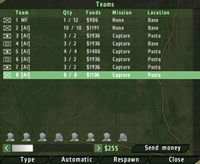
Teams Menu
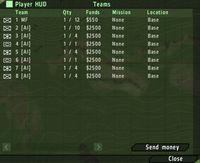
From here, you can see the status of all teams including approximate location, mission, funds, and team size. At the bottom of the screen you will also see individual units and their status (Green - healthy, Yellow - wounded, Red - critical).
|
Diplomacy
In a 3-sided mission there can be diplomatic states between the sides. View these by selecting Diplomacy from the map.
positions before canceling the agreement!
|
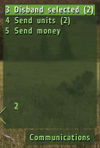
Communication Menu
This can be accessed by pressing 0-8.
|
Commander Role
The most important roles of the commander are base construction and creating missions. A base is needed so teams can buy equipment. Missions are needed to give teams objectives. A commander should not neglect these duties. It is usually more effective for the commander to stay at base and manage than to go out on missions personally. You should ensure there are Capture missions for towns. And when teams complete these missions you should create new ones. You can also use High Command to issue direct orders.
The Base Construction
MHQ Deployment
The Mobile HQ must be deployed in order to build a Base. Sometimes, as the commander, you may decide to relocate your MHQ to a different location before building a base. Only the commander can lock or unlock the MHQ.
Construction
This is one of the most important roles of the commander. There are two categories: Base Buildings and Defenses. Only the HQ can build Base Buildings and only the Commander can use the HQ for this. Base Buildings require Supplies. Defenses can be built by anyone. They can be built with the HQ, a repair truck, or at captured camps. They require funds to build. You should construct a barracks and light factory as soon as possible so players and AI teams can purchase equipment to complete their objectives.
Construction Interface for building the base structures is available near a deployed HQ building. Base structures can be repaired [Ins] or demolished [Del] as needed.
Subordinate Teams
Setting Teams
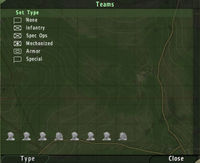
As the commander, you have the option to change the roles of AI teams. Infantry and Mechanized are good roles early in the game. Later, when your teams have more funds, Armor is a good choice. To change team types, go to the Teams menu from the map.
Teams Menu
| From here you can see the status of all the teams, including approximate location, mission, funds, and team size.
At the bottom of the screen you will also see individual units and their status (Green - healthy, yellow - wounded, red – critical).
|
High Command
The commander can use High Command to order teams. When the HC Bar is enabled, it is also possible to right-click on the map to create missions or open the City Menu by right-clicking on a captured town's Depot.
Tasks and Missions
Creating Tasks/Missions
| Creating missions gives the players and AI teams objectives to follow and allows you to guide the overall strategy for your side. To create a new task/mission go to the map, turn on High Command, and then right-click on the desired location. A menu will open and allow you to create a mission there. If you click on a hostile town's depot you can create a Capture mission. You can cancel a mission by right-clicking on it and selecting cancel.
Tasks can be created for players and AI. Teams gain rewards for completing tasks. It is also a useful way to control the strategy of teams. If there are no tasks then the AI teams will do nothing unless ordered to with HC. You should always create some capture missions for nearby towns. If there are lots of AI teams it can be a good strategy to create very few capture tasks at a time so they will concentrate all their forces on one task at a time. Be sure to monitor the status of tasks and create new capture missions when the old ones are completed. Tasks/missions are different from HC orders. A task is available to all teams and many teams may choose the same task. AI teams will chose nearby tasks. If you order an AI team with HC, it will wait a few minutes before choosing a new task. You can re-enable it to take tasks again with the Automatic option in the Teams menu.
|
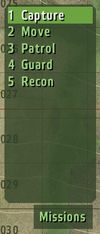
Mission Types
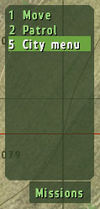
- Move - The task is completed when a team moves to the position. Any AI teams nearby will move to this position if they have completed their previous task.
- Patrol - The task is completed/expires in 5 minutes have elapsed. AI teams will randomly patrol the area.
- Capture - To create this mission you must right-click on a hostile or neutral town's depot. The task is completed when the town's depot is captured. AI teams will patrol the area for enemies before capturing the depot. AI Infantry teams may also try to capture some camps before approaching the depot.
- Recon - The task is completed when a team reaches the area to recon. One one AI team will accept a Recon mission at a time, so you do not have to worry about all of your forces moving to the position. Only Mechanized or Spec Ops AI teams will take this mission.
- Guard - This task has an infinite life. You must cancel it manually to remove it. Only one AI team will accept a Guard mission at a time. This can be a useful way to increase the defenses of a town, base, or any strategic point.
Additional Strategy Interfaces
Diplomacy Menu
| When playing 3 Sided Warfare in multiplayer, you have access to the Diplomacy Menu. From here you can view your status with the other sides. Normally they will be hostile but you can request a change in status.
Just click on the side's request button to send the request. This is only available if the other side has a human Commander. If you have been offered an alliance or cease-fire, you can click the accept button.
|
City Menu
| With the HC Bar enabled, right-click on a captured town's Depot and select City Menu. You can click on the icons to set the town's preference toward supplies (more income earned) or defenses (larger garrison and more defense teams).
A garrison is a team of soldiers that will occupy static defenses in the town. If a town is captured the garrison will attempt to recapture it. It is a good idea to set town's on the border of your territory to a high defensive value. |
Buildings and Vehicles
City Structures
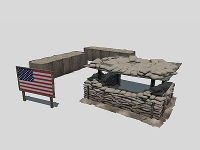
| Camp - If you die near a captured camp, you can respawn at it. You can construct defenses or buy weapons at the camp.
It also speeds up town capturing. Owning a camp in an enemy town will disrupt their ability to fast-travel to that location. | |
| City Depot - Usually located at the town center. You can buy vehicle repairs, re-arm, or refuel. You can also buy an empty light vehicle for transportation.
Being close to a captured depot will allow you to fast-travel to your base or another friendly town if they are nearby. |
Base Structures
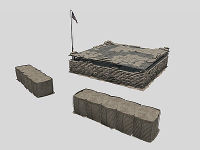
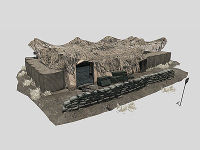
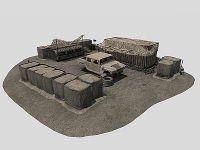
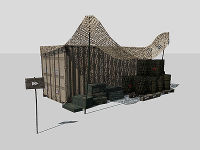
| Barracks - Produces soldiers and personal weapons. Usually takes form of a tent with camouflage netting and added protection (sandbags, H-barriers). | |
| Light Vehicle Supply Point - Builds most wheeled vehicles and some lightly armored vehicles. This structure features torso of particular faction's basic car. | |
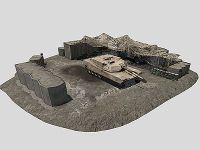
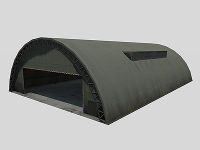
| Heavy Vehicle Supply Point - Builds heavy, armored vehicles such as tanks. This structure features torso of a main battle tank. | |
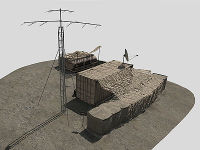
| Helipad - Builds helicopters. Helipad can be recognized by antenna attached to a cargo container with comms equipment. | |
| Vehicle Service Point - Drive up to it and wait for it to repair/re-arm, and refuel your vehicle. It will also re-arm nearby static defenses when they run out of ammunition. | |
| Airport - If the mission has a capturable airport, it can be used to buy fixed-wing aircraft. |
Warfare Vehicles
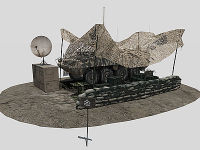
| MHQ - Most important vehicle in the game! When it deploys, it becomes the HQ, which constructs supply trucks and salvagers. The HQ is also needed to construct a base so if this is destroyed it can cripple the owning side. For each side, Mobile HQ is represented by an APC modified by additional antennas and often armed by a light machinegun; shown deployed. | |
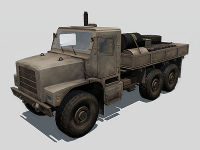
| Repair Truck - In addition to repairing vehicles, they work as construction vehicle to make defenses. | |
| Salvage Truck - Salvages vehicles. The base automatically constructs one AI-controlled salvager. If you purchase a salvage truck you can enable your AI to auto-salvage from the truck's Action Menu. | |
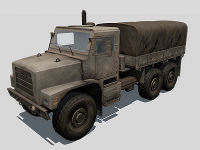
| Supply Truck - The base automatically builds a few of these. They travel between towns and the base and increase the supply value of towns, generating funds in the process, and making towns harder to capture.
You can drive your own Supply Trucks to earn more funds. Your own supply trucks also have an Action Menu option to enable automatic supplying to towns (requires AI driver). |
Tips & Tricks
The offence is the best defence. Be aggressive and try to find any way to hurt your opponent's fighting force, logistics, or to confuse him.
Try to capture some cities ASAP. You need Supply Points! Building Barracks and Light factory is very simple and only 400 SP is needed for it. The Heavy Factory is very expensive and gaining enough resources can take a while. Do not let yourself get caught unprepared for an armor or airborne attack!
At the beginning of the game build a Barracks and a Light Factory immediately. Your teams need to grow fast in the beginning so do not waste money on base defences just yet - defences will be more important later in the game.
The commander should send all teams to combat ASAP - they need money for equipment. Teams intended for use in heavy attack missions later (in Armored roles for example) should be on the front line immediately, earning money for equipment.
Do not forget to defend your cities. The resistance is strong and attacks from unexpected directions. The best command control is achieved when all teams have at least one human player (leader). With Humans in the lead, you do not have to control the teams via simplistic, broad orders.
Work with the supply vs. defence ratio of the captured towns. Setting the border cities to be 100% defensive may hinder the production of supplies, but may be enough to prevent enemy AI teams to penetrate deeper into your territory.
City defences and bunkers are perfect places to threaten the enemy forces from, especially if you don't have a big team and vehicles. With a little resources, you can build static weapons which could even take part in attacking enemy base. Static weapons can be disassembled as usual.
Disrupt enemy logistics, protect yours. Supply trucks are light and vulnerable targets, and without them, enemy can soon find himself out of supplies and money. Even a small team behind enemy lines can cause a significant loss or delay of resources.
Communicating with the other players naturally leads to better results. If you are using AI-led teams, always assign them an appropriate mission. If one of your teams needs to use expensive weapons or equipment (e.g. helicopters) remember you can transfer the funds to them. Sometimes a team needs specific equipment in a hurry and saving resources along can take a long time.
Position of the enemy main base can be estimated based on the number of hints. Observe the supply trucks, and see where the enemy groups come from. Once you are aware of the general direction, you may send in a patrol team or reconnoiter the suspected areas by yourself.
Relocate the base if necessary. If your base has been found and is under constant pressure of enemy attacks, you can always pack your Mobile HQ vehicle and relocate the base. While this usually hurts your budget, you may get precious time to orchestrate the final blow against the enemy base and turn the situation.

