Using Road Tool in Terrain Builder – DayZ
Overview
Roads in DayZ are (unlike Arma 3) done using road prefabs (parts), which is the same method applied in Arma 2 and previous titles. This unfortunately means that creating a complex road network can take considerate amount of time.
There are basically two ways you can use to create the road network:
- Use road network tool in Terrain Builder
- Place road parts manually
If you face the task of creating a road network on your terrain, I recommend do use combination of both ways - use road tool for the longer pieces of road network (in-between settlements) and place individual road parts (just like any other object) manually when working on a road network within a settlement. From the game point of view, it does not matter if you create the road network using the tool or by placing parts manually. Its all individual objects like any other map object.
Road tool ideally needs a work-drive with extracted game data (both can be setup in DayZ Tools Launcher). Once you have this setup, it is necessary to download following files and place them into dz\structures\roads\parts (confirm overwrite of existing files). If you are interested in using roads from Enoch (Livonia) terrain, then download following files and place them into dz\structures_bliss\roads\parts.
How to define a road type
First of all, make sure you have your (or sample) terrain project loaded in Terrain Builder. After that, make sure you have Window - Road types checked. In this window, make sure you click following button.
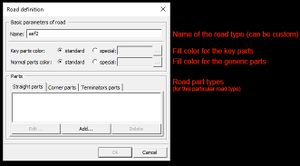
Following window will pop up, allowing you to define a new road type.
Each road type consists of 3 different types of road parts:
- Straight parts - standard straight parts (usually comes in 6, 12, 25 meter version).
- Corner parts - standard corner parts (comes in various lengths and angles).
- Terminator parts - end part (6 meter part where the road fades away).
There is also special type - a crossroad, but about that a bit later.
If you decide to use standard road parts, take a look at your work-drive and look into DZ\structures\Roads\Parts. Here, you can see all the different models (*.p3d files), which usually begin with a road code-name.
Following types are available:
You also have an option to use Enoch (Livonia road types). Look into DZ\structures_bliss\Roads\Parts to locate 3 road types and their parts.
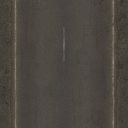
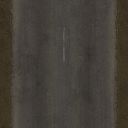
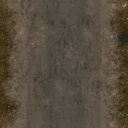
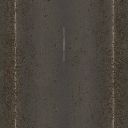
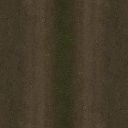
| Name | Texture | Width | Notes |
|---|---|---|---|
| asf1enoch | 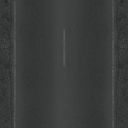 |
12m | Major asphalt road. |
| asf2enoch | 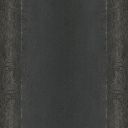 |
9m | Mid asphalt road. |
| mudenoch | 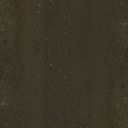 |
5m | Less used dirt road (forests, fields). |
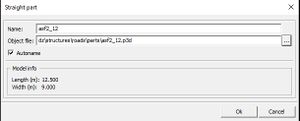
Back to the define new road type window. Now it is time to add road parts for a selected type. Parts with one number usually mean that it is straight part. Parts with two numbers mean its corner part and part with word konec mean terminator part. Once you click add button, you will be prompted with following window.
You should add all the available road parts for a selected road type as it will provide a better control over general road direction.
Placing a road
First, you need to select a road type. You can do that by clicking on one of the added road types in the Road types window.
After choosing one, you can click following button in the upper toolbar.
Doubleclicking into the 2D viewport of Terrain Builder will prompt following "add road wizard".
- You will asked to choose which road part type will be the key part. Usually, you want to begin with a terminator part.
- Coming up next is choosing exact part from selected road part type.
- And finally, you can specify (tweak) the position and rotation - usually not necessary to change, because you can move road part by holding LMB or rotate it by holding LSHIFT + RMB.
After you went through the wizard, key part is created. Keep in mind that this one wont be visible in Buldozer. For that, you are going to need to add more road parts to it. So lets see how that is done.
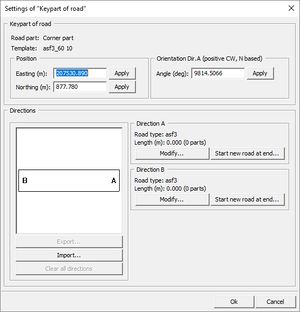
Doubleclicking on the road key part will prompt following window.
Here, you can modify position and rotation again (if necessary, but like I mentioned, its easier to do using shortcuts).
Most important part is however directions part itself. Here, you can see that selected key part has x amount of directions (each marked with a letter). At each direction, you can either add more road parts (this is what you will commonly use) or start a new road (usually handy when you dont want to create too long pieces). So lets click on modify some direction. Following window will open.
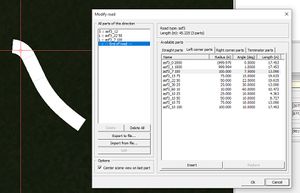
As you can see, there are tabs with all available parts for the selected road type (selected before the key part creation process). Note that corner is divided into left and right (because corner parts can be rotated). You can choose whatever part you want and double-click it. You will immidietaly see, that the part got added into the left list. You can keep doubleclicking to add more. You can also click into the list to add parts in between. You can also center scene view on the lastly placed part and finally, you can also check your progress on the road in Buldozer (assuming you have it open).
After you are satisfied with the progress, you can click ok button and again in the key part menu to confirm changes to this key part.
Sharing road network between multiple people
Because terrains are often a team effort, there is an option to import / export already made road pieces. This requires that all team members have the same types of roads defined (which they should since the settings is saved in the project file along with roads). Import/Export process needs to be done per individual key part so the position, road type + part, rotation needs to be shared first and the other side needs to have the key part prepared in advance. You can export individual parts (attached to the key part) by clicking Export button in key part window. The other side then can (on the newly created key part) click import and select appropriate file.
How to define a crossroad
Key part can also exist in a form of a crossroad. These allow usually a better connection in between different road network pieces. There are several types available in the road part folder (DZ\structures\Roads\Parts) - all beginning with kr_ and they are either T or X shape (3 or 4 possible directions). These crossroads can be selected during the key part creation wizard and are defined in the upper menu under Roads > Define roads and crossroads.

