Spearhead 1944 Field Manual
Bayonets
Melee System
Bayonets must be fixed to rifles to be used, they're fixed as a muzzle attachment. To fix the bayonet, open your inventory screen and drag it to the appropriate position on your rifle. Or In Virtual Arsenal, select the muzzle attachments category and select the bayonet.
The following rifles can have bayonets.
- Kar 98k (S84/98 III Bayonet)
- Kar 98k (1944) (S84/98 III Bayonet)
- M1 Garand (M1 Bayonet, M1905 Bayonet)
- M1903A3 Springfield (M1 Bayonet, M1905 Bayonet).
Melee System
With the bayonet fixed, change firemode ("1" or "F") to switch to the bayonet striking mode. Press fire ("Prim. Mouse Btn." or "XBox Right Trigger") to strike with the bayonet or change the firemode again to switch back to the regular fire mode.
You can perform a bayonet thrust in any stance while stationary or moving. When the bayonet blade strikes an object, it will inflict damage on that object. The rifle is briefly pulled back before the thrust accelerates forward rapidly and will come to a stop at the apex of the thrust. The rifle will then be retracted into the starting position. The bayonet blade will inflict more damage the faster it's moving in the thrust. The beginning and retraction of the thrust are slower than the middle of the thrust. The speed of the attacker and the speed of the victim in relation to the direction of the bayonet thrust will also factor into the damage dealt.
To aim the bayonet thrust, you must attempt to strike your opponent with the blade of your bayonet. The crosshair may not be entirely accurate with the bayonet thrust. A good soldier can train with the bayonet thrust animation and become proficient in no time. With manual bolting (See SPE - Options), you can switch to bayonet mode before cycling the bolt to execute a timely follow-up bayonet strike after firing.
Small Arms
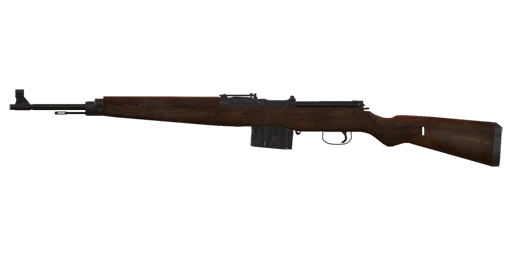
Gewehr 43
The Gewehr 43, or Karabiner 43, was a successor to the Gewehr 41. Its intended role was to increase the firepower of the individual riflemen who were using bolt-action Kar 98k rifles at the time. The Gewehr 43 improved on the G41 by adding a detachable 10-round box magazine, which could still be fed from Kar 98k stripper clips when required. Captured SVT-38s and SVT-40s were reverse-engineered to develop the gas operating system used for the Gewehr 43, replacing the bang system used on the early G41.
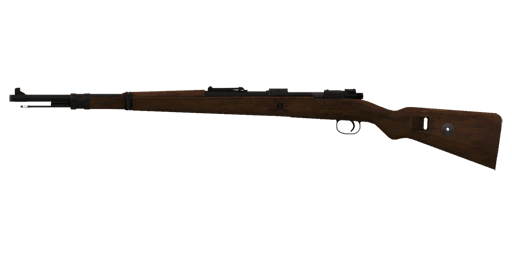
Kar 98k
Karabiner 98 Kurz, or Kar 98k, is a bolt action rifle that was used by the German army during World War II. It's chambered in 7.92 by 57 mm Mauser, also known as 8 mm Mauser. Fed from 5-round stripper clips. The Kar 98k can accept a bayonet or rifle grenade adaptor. Kar 98ks with higher-than-normal accuracy were fitted with a telescopic sight and used as sniper rifles.
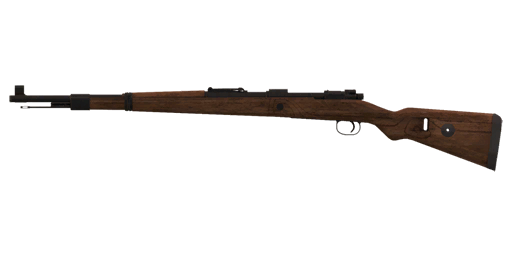
Kar 98k (1944)
Karabiner 98 Kurz, or Kar 98k, is a bolt action rifle that was used by the German army during World War II. It's chambered in 7.92 by 57 mm Mauser, also known as 8 mm Mauser. Fed from 5-round stripper clips. The Kar 98k can accept a bayonet or rifle grenade adaptor. Kar 98ks with higher-than-normal accuracy were fitted with a telescopic sight and used as sniper rifles.
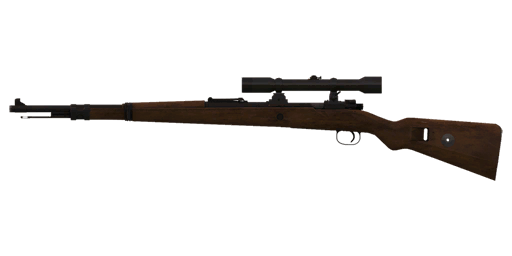
Kar 98k (ZF39)
Karabiner 98 Kurz, or Kar 98k, is a bolt action rifle that was used by the German army during World War II. It's chambered in 7.92 by 57 mm Mauser, also known as 8 mm Mauser. Fed from 5-round stripper clips. The Kar 98k can accept a bayonet or rifle grenade adaptor. Kar 98ks with higher-than-normal accuracy were fitted with a telescopic sight and used as sniper rifles.
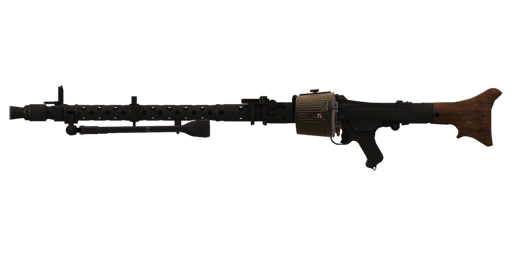
MG 34
The MG 34 introduced a new concept, the universal machine gun. The MG 34 could be used as a light machine gun when fired from the bipod, a medium machine gun when mounted on a tripod for sustained fire, or mounted on vehicles on pintle mounts or in tanks as the coaxial machine gun. The MG 34 fires 7.92 x 57 mm Mauser rounds in non-disintegrating metal-linked belts. When used in the light role, it used a 50-round Gurttrommel, also known as a 'Belt Drum'.
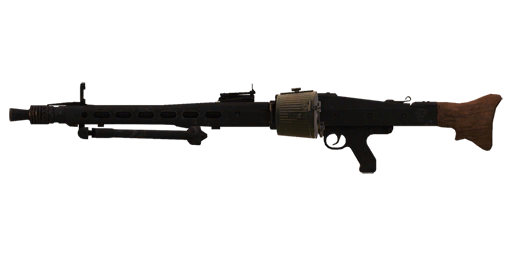
MG 42
The MG 42 was the result of an effort to produce an easier-to-manufacture and lighter machine gun for the German military. The allies nicknamed the MG 42 the buzzsaw due to the sound it made while firing at a high rate of fire. The MG 42 shares many characteristics with its predecessor, the MG 34, but is lighter and has a higher rate of fire. The MG 42 can only utilize the 50-round drum magazines in the light role. The MG 42 couldn't replace the MG 34 as a machine gun for tanks due to its barrel change procedure.
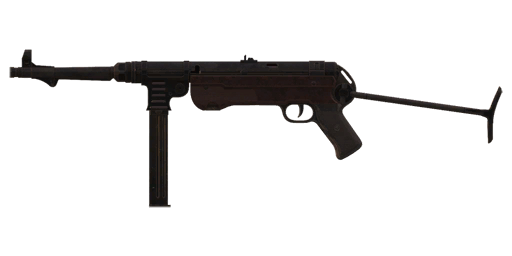
MP 40
The standard-issue German submachine gun was the MP 38/MP 40. Sometimes erroneously called the Schmeisser by Allies. The MP 38 was replaced by the MP 40, a simplification of the manufacturing process. The MP 40 is chambered in 9x19 parabellum and fed from a 32-round stick magazine. The MP 40 operates from an open bolt and is blowback operated. Although fully automatic only, it can be fired accurately in short bursts with its low rate of fire. Platoon and squad leaders often carried the MP 40, as well as paratroopers, pioneers, and designated soldiers in the infantry squads.
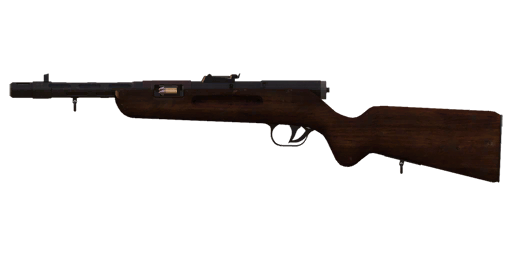
MP 35/I
The MP 35 was a German submachine gun designed for the commercial/export market during the inter-war period, available in a multitude of calibers, barrel lengths, and configurations. With the outbreak of World War II, it was pressed into service by various German police, security services, and paramilitary forces. The MP 35 design is typical of submachine guns of the period, featuring a wooden stock and mostly milled metal parts. It includes a side-loaded magazine, loaded from the right rather than the left, a 'bolt-action' style cocking handle at the rear of the receiver, and a trigger with an additional lever enabling semi-automatic or, when activated, full-automatic fire.
StG 44
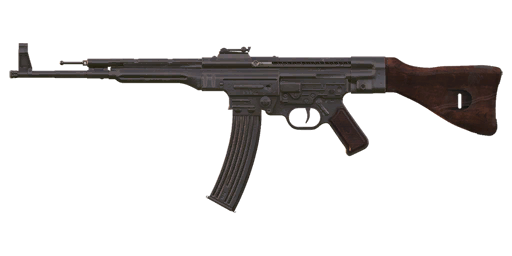
The Maschinenpistole 44, later renamed the Sturmgewehr 44, was a revolutionary new design that can be considered the first assault rifle. It combined the accuracy and stopping power of a rifle with the rate of fire and magazine capacity of a submachine gun. Intended to replace the Kar 98k, MP 40s, and G43s in service, although it never fully did. The Sturmgewehr 44 utilized a new cartridge, the 7.92 x 33 mm Kurz, which was in itself a shortened rifle round. The Sturmgewehr 44 is select fire with Semi and fully automatic. It's fed from 30-round detachable box magazines.
Flammenwerfer 41
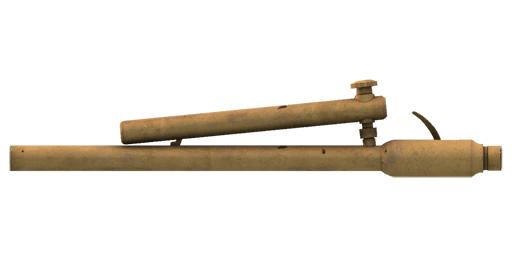
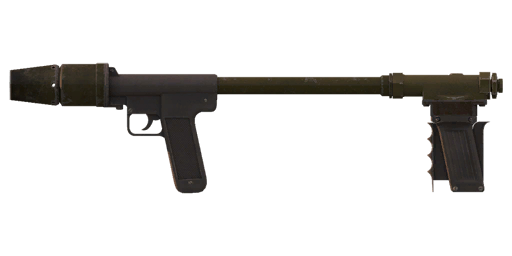
The Flammenwerfer41, or FW41, was the standard flamethrower used by Germany during the Second World War. It was intended to replace the older, heavier FW35, but both were used concurrently up until the end of the war. The flamethrower consists of a handheld nozzle with a hydrogen torch attached above it, with a hose connecting to the propellant and fuel tanks carried on the back of the soldier. The hydrogen torch included a small battery-powered igniter system and would ignite the stream of propellant and fuel.
Later versions of the FW41 removed the hydrogen torch and instead opted for a 'cartridge' system for fuel ignition similar to that of the Soviet and American flamethrowers. The stream of fire goes out to around 30-40 m and causes significant damage to infantry and can burn out fortified positions.
M1 Carbine
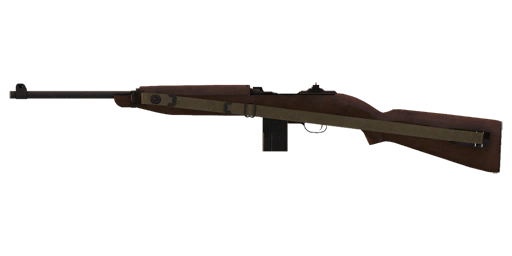
The M1 Carbine is a personal defense weapon that was standard issue to support personnel in the US Army. Adopted into use in 1941 to supplement the M1 Garand for troops not directly involved in front-line combat, such as radiomen, bazooka gunners, mortar men, or truck drivers. The M1 Carbine is chambered in .30 Carbine and fed from a 15-round detachable box magazine. It's semi-automatic only and lacks the stopping power and range of full-sized rifle rounds, although it's smaller, lighter, and easier to handle. In order to easily exit aircraft, US paratroopers were issued an M1A1 Carbine with a folding stock.
M1 Garand
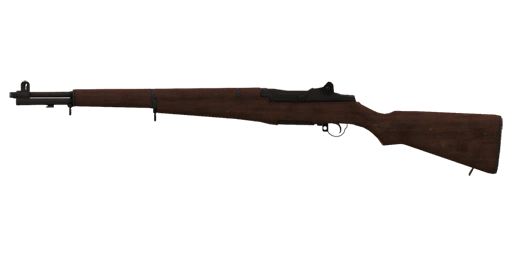
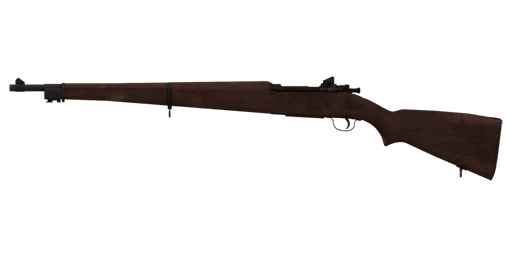
The M1 Garand is the standard issue service rifle of the US Army. Adopted into service in 1936, the M1 replaced the bolt action M1903 Springfield as the US service rifle. The M1 Garand is a .30-06 caliber semi-automatic rifle fed from 8-round en-bloc clips. The clips are ejected automatically when empty creating a distinctive 'ping' noise. The M1 10-inch bayonet can be fitted on the Garand. Alternatively, the M7 grenade launcher adapter can be mounted to allow the rifle to fire rifle-grenades.
M1903A3 Springfield
The M1903 Springfield was the standard issue US service rifle leading into World War II. The Springfield is a bolt action rifle chambered in 30-06 and fed by 5-round stripper clips. A bayonet can be mounted. It was used by United States Marines during the early conflicts before being replaced by the semi-automatic M1 Garand. The M1903A4 continued to see service as the standard issue sniper rifle during the remainder of World War II. The M1903A4 is equipped with a 2.75x telescopic sight.
M1903A4 Springfield
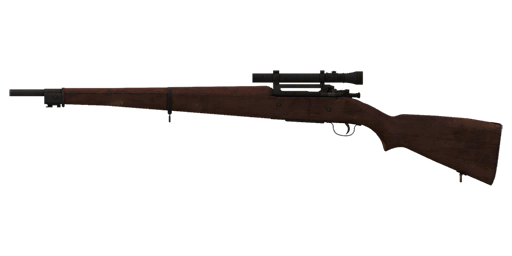
The M1903 Springfield was the standard issue US service rifle leading into World War II. The Springfield is a bolt action rifle chambered in 30-06 and fed by 5-round stripper clips. A bayonet can be mounted. It was used by United States Marines during the early conflicts before being replaced by the semi-automatic M1 Garand. The M1903A4 continued to see service as the standard issue sniper rifle during the remainder of World War II. The M1903A4 is equipped with a 2.75x telescopic sight.
M1918A2 BAR
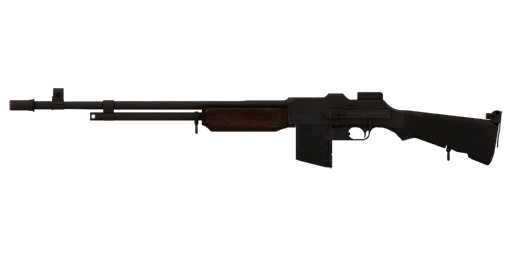
Although the weapon did see some action in World War I, the BAR didn't become standard issue in the US Army until 1938, when it was issued to squads as a portable light machine gun. The BAR is chambered in 30-06 and fed from 20 round box magazines. Bipod legs were provided, although troops found them somewhat cumbersome and unwieldy and occasionally removed them in the field. The BAR fulfilled US Army requirements but wasn't able to provide the sustained firepower of other light machine guns field by other nations at the time. The US doctrine allowed for this shortcoming with the increased firepower of the individual rifleman fielding semi-automatic rifles. The BAR is large and difficult to shoulder but more manageable compared to other LMGs.
M1919A4
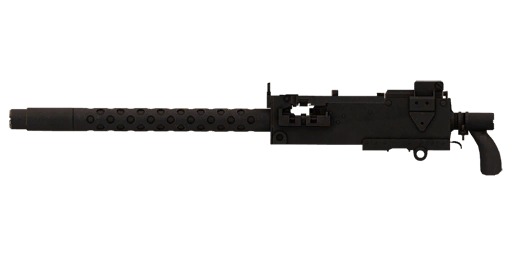
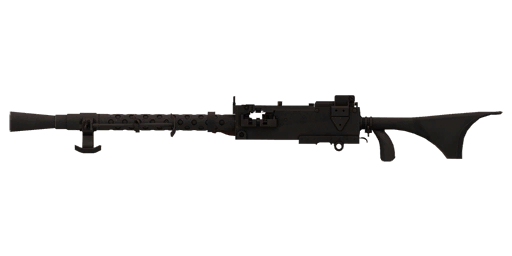
The M1919 was the standard medium machine gun used by the US Army during World War II. It saw use as a medium machine gun in the A4 configuration and was later upgraded to operate as a light machine gun in the A6 configuration. It was also mounted on vehicles as hull machine guns, coaxial machine guns, and pintle mounts. The M1919 is chambered in 03-06 and fed from cloth belts. The A4 can be fired from a handheld position but isn't very effective unless mounted on a tripod. The A6 version can be fired from the shoulder or deployed on the bipod but can't be mounted on the tripod.
M1919A6
The M1919 was the standard medium machine gun used by the US Army during World War II. It saw use as a medium machine gun in the A4 configuration and was later upgraded to operate as a light machine gun in the A6 configuration. It was also mounted on vehicles as hull machine guns, coaxial machine guns, and pintle mounts. The M1919 is chambered in 03-06 and fed from cloth belts. The A4 can be fired from a handheld position but isn't very effective unless mounted on a tripod. The A6 version can be fired from the shoulder or deployed on the bipod but can't be mounted on the tripod.
M2 Flamethrower
The M2 Flamethrower was an American man-portable backpack flamethrower that was used in World War II. The flamethrower consists of a handheld nozzle, a backpack fuel tank, and fuel inside the tank. The fuel flows from the tank through the hose through the nozzle and is propelled 20-30 m. An igniter in the wand sets the fuel on fire as it leaves the wand. The stream of fire causes significant damage to infantry and can burn out fortified positions.
M1A1 Thompson
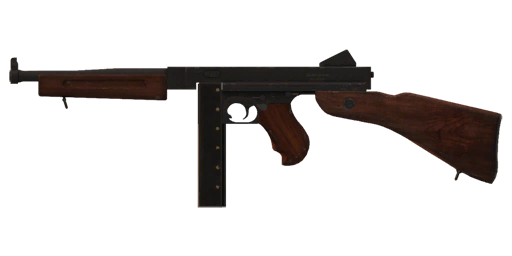
The Thompson was the standard issue Sub-machine gun for the US Army at the time of entering World War II. It was replaced by the much simpler and easier-to-manufacture M3 Grease gun close to the end of World War II. Commonwealth forces also saw widespread use of the Thompson sub-machine during the early parts of WW2. The design dates back to the end of WW1, the Thompson first saw notoriety in the hands of law enforcement and gangsters. The Thompson is chambered in .45 ACP and fed from 20 or 30-round magazines. The M1928 and M1928A1 sub-machine guns were also capable of accepting 50-round drum magazines. Those earlier models were replaced with the M1 and M1A1 Thompson submachine guns.
M3A1 Grease Gun
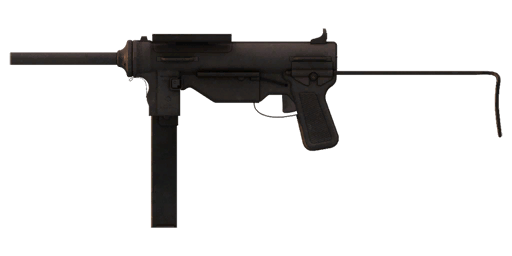
The M3 Grease Gun began to replace the Thompson submachine guns during World War II. It shares the same .45 ACP round but fed from a different 30-round box magazine. The M3 Grease gun was the result of an effort to provide a replacement for the Thompson that was easier to manufacture. The M3 was nicknamed the `Grease Gun` or `Greaser` by troops in the field due to its resemblance to the mechanic's tool.
FM Mle. 1924 M29
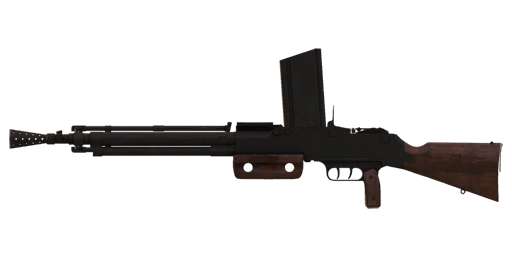
After the First World War, the French army sought a replacement for the rapidly developed and produced Chauchat. With lessons learned from the Chauchat's development and the war, Lieutenant Colonel Reibel, with the backing of the Manufacture d'Armes de Châtellerault, proposed a weapon partially derived from the BAR. This weapon featured a new 7.5 mm cartridge, integrated bipod, and pistol grip and was fed from a top-mounted 25-round detachable box magazine. It featured two separate triggers, the front for semi-automatic fire and the rear for automatic fire. The new machine gun was accepted and adopted in 1924 as the Fusil-Mitrailleur Mle 1924, entering production in 1925. In 1929, problems with the new ammunition being too similar in dimension to the 7.92x57 Mauser led to the cartridge being modified to 7.5x54 mm, and re-barreled guns were renamed Fusil-Mitrailleur Mle 1924 M29, which continued to see service well into the 1960s.
Sten Mk II
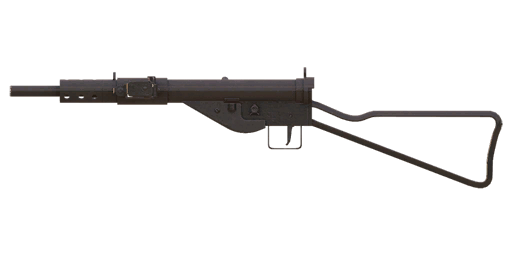
The Sten, or Sten gun, is a widely fielded sub-machine gun utilized by the United Kingdom. It features a distinct nine o'clock mounted 32-round detachable box magazine. It's chambered in the 9x19 parabellum round. The MkII was easily produced with an extremely simplified design featuring a wire frame stock.
Sten Mk II (Suppressed)
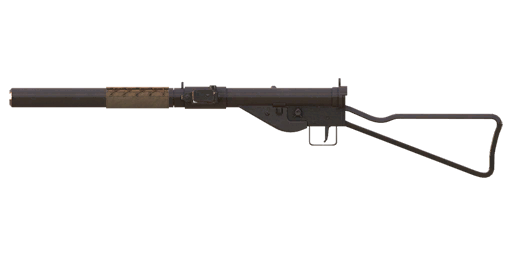
The Sten, or Sten gun, is a widely fielded sub-machine gun utilized by the United Kingdom. It features a distinct nine o'clock mounted 32-round detachable box magazine. It's chambered in the 9x19 parabellum round. The MkII was easily produced with an extremely simplified design featuring a wire frame stock.
Fusil Mle. 208 12G
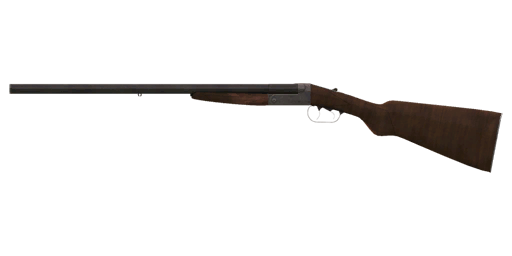
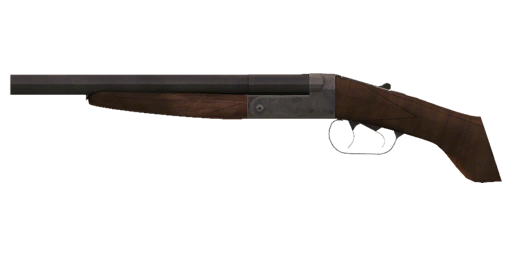
The Fusil Mle. 208 'Robust' is a double-barrel shotgun that traces its lineage to an extremely popular design of French long guns that have been built since 1913. It was available in many different calibers, sizes, and fitting arrangements, and various versions of it continued to be made well into the 1980s.
Fusil Mle. 208 12G (Sawed-Off)
The Fusil Mle. 208 'Robust' is a double-barrel shotgun that traces its lineage to an extremely popular design of French long guns that have been built since 1913. It was available in many different calibers, sizes, and fitting arrangements, and various versions of it continued to be made well into the 1980s.
No.3 Mk.1* Enfield
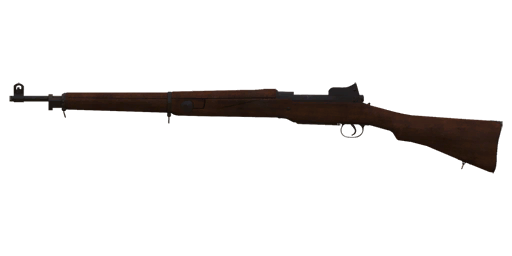
The Pattern 14 Enfield rifle, adopted by the British Army in 1914, was a bolt-action rifle designed for service during World War I. Manufactured primarily in the United States due to British production constraints, it featured a Mauser-style action and fired the .303 British cartridge. Though initially intended as a stopgap measure, it saw extensive service on the Western Front. Despite being overshadowed by the Lee-Enfield, its accuracy and reliability were highly regarded. Post-war, the rifle was renamed No. 3 Mk 1 and found use in World War II as a rear-guard and sniper rifle in British Service. Outside British service, it was a common sight amongst Resistance forces due to it frequently being provided in Allied airdrops. While not as iconic as its successor, the Pattern 14 Enfield played a significant role in early 20th-century conflicts.
MAS Mle. 36
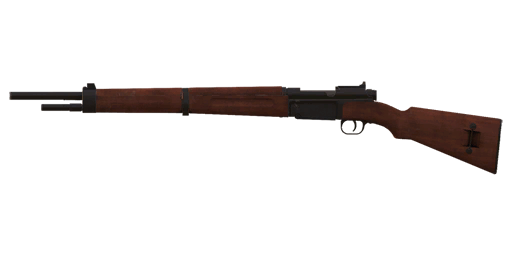
The MAS Modᅢᄄle 36 rifle was adopted by France in 1936 with the intention of being an economical, simple rifle for rear-echelon troops, while the more complex semi-automatic MAS-40 would serve as France's standard infantry rifle. This plan was cut short by the German invasion and the MAS-36 was pressed into frontline service. Despite its simple appearance, the MAS-36 was greatly influenced by some of the best bolt-action rifles of the First World War and, as a result, incorporates design features that improve ergonomics as well as overall usability in field conditions. It features an integral bayonet, a 'dog-legged' bolt handle for faster operation, and feeds from 5-round stripper clips.
FG 42 Ausf. E
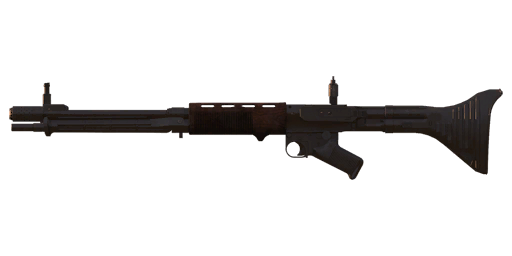
The FG 42, or Fallschirmjᅢᄂgergewehr 42, was a revolutionary German automatic rifle developed during World War II for elite paratroopers. Introduced in 1942, it featured select-fire capability, a folding bipod, a side-mounted magazine, and a unique bolt system allowing it to be fired from either an open or closed bolt for automatic and semi-automatic fire, respectively. Despite its advanced design, production challenges limited its use, and as a result, it saw limited action, primarily with Fallschirmjᅢᄂger units on both the Eastern and Western Fronts. Its design saw further use after the war as many of its features were incorporated in the American M60 Machinegun.
Brno-Enfield Mk II
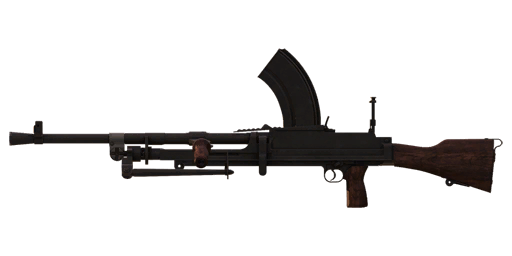
The Brno-Enfield Light Machine Gun is a joint British-Czechoslovakian firearm that gained prominence during World War II. Adopted in the late 1930s, it served as the primary infantry support weapon for the British and Commonwealth forces. Renowned for its reliability, accuracy, and ease of use, it fired the .303 British cartridge from a top-mounted magazine. The Brno-Enfield LMG saw action across various theaters of the war, earning a reputation for its effectiveness and durability. Outside of Commonwealth use, it was frequently seen in the hands of both the French Resistance and supporters of the Vichy government due to many Brno-Enfield guns being left by British forces in the Dunkirk evacuation, as well as it being common amongst Allied airdrops intended for the Resistance.
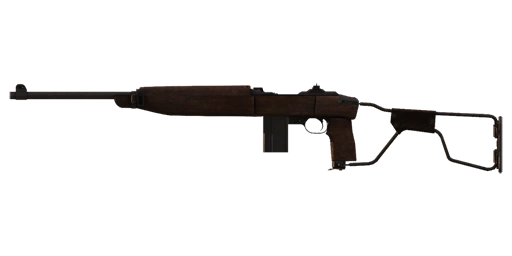
M1A1 Carbine
The M1 Carbine is a personal defense weapon that was standard issue to support personnel in the US Army. Adopted into use in 1941 to supplement the M1 Garand for troops not directly involved in front-line combat, such as radiomen, bazooka gunners, mortar men, or truck drivers. The M1 Carbine is chambered in .30 Carbine and fed from a 15-round detachable box magazine. It's semi-automatic only and lacks the stopping power and range of full-sized rifle rounds, although it's smaller, lighter, and easier to handle. In order to easily exit aircraft, US paratroopers were issued an M1A1 Carbine with a folding stock.
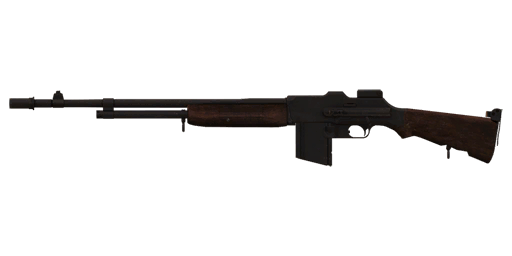
M1918A2 BAR (Converted)
Although the weapon did see some action in World War I, the BAR didn't become standard issue in the US Army until 1938, when it was issued to squads as a portable light machine gun. The BAR is chambered in 30-06 and fed from 20 round box magazines. Bipod legs were provided, although troops found them somewhat cumbersome and unwieldy and occasionally removed them in the field. The BAR fulfilled US Army requirements but wasn't able to provide the sustained firepower of other light machine guns field by other nations at the time. The US doctrine allowed for this shortcoming with the increased firepower of the individual rifleman fielding semi-automatic rifles. The BAR is large and difficult to shoulder but more manageable compared to other LMGs.
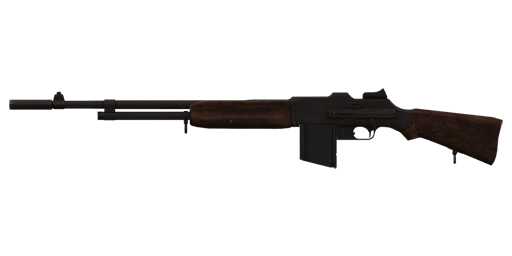
M1918 BAR
Although the weapon did see some action in World War I, the BAR didn't become standard issue in the US Army until 1938, when it was issued to squads as a portable light machine gun. The BAR is chambered in 30-06 and fed from 20 round box magazines. Bipod legs were provided, although troops found them somewhat cumbersome and unwieldy and occasionally removed them in the field. The BAR fulfilled US Army requirements but wasn't able to provide the sustained firepower of other light machine guns field by other nations at the time. The US doctrine allowed for this shortcoming with the increased firepower of the individual rifleman fielding semi-automatic rifles. The BAR is large and difficult to shoulder but more manageable compared to other LMGs.
M37 Trench Gun 12G
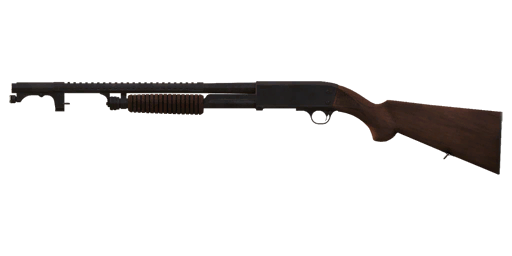
The Model 37 shotgun is a pump-action shotgun known for its reliability and simplicity. Introduced in 1937, it became popular among hunters, sports shooters, and military and law enforcement agencies. Its distinctive bottom-loading and ejection system and solid steel receiver contributed to its durability. Used extensively by American troops in World War II, Korea, and Vietnam, it earned a reputation for its ruggedness and effectiveness in combat. Its continued production and popularity in civilian and law enforcement markets underscore its enduring legacy as a versatile and dependable shotgun. This version features a heatshield with a bayonet lug for military service.
M37 Riot Gun 12G
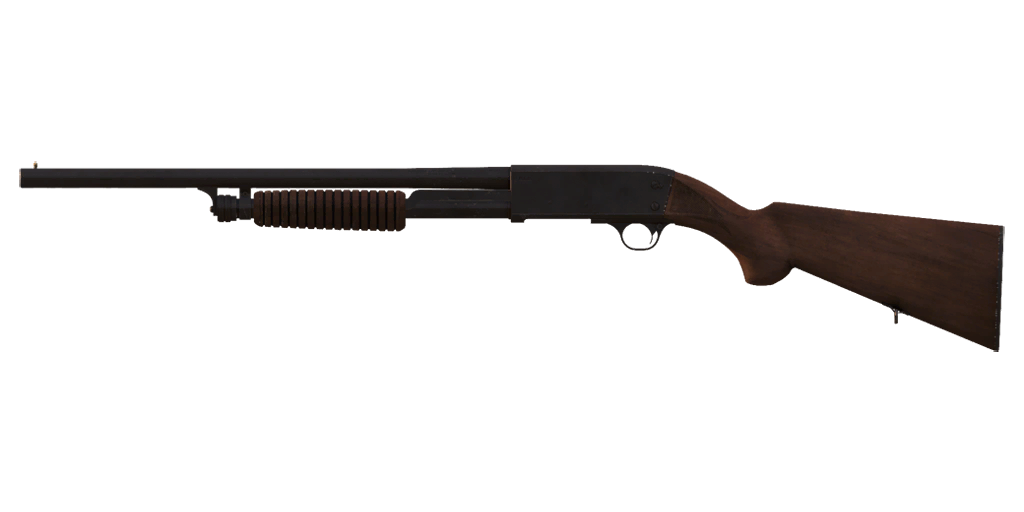
The Model 37 shotgun is a pump-action shotgun known for its reliability and simplicity. Introduced in 1937, it became popular among hunters, sports shooters, and military and law enforcement agencies. Its distinctive bottom-loading and ejection system and solid steel receiver contributed to its durability. Used extensively by American troops in World War II, Korea, and Vietnam, it earned a reputation for its ruggedness and effectiveness in combat. Its continued production and popularity in civilian and law enforcement markets underscore its enduring legacy as a versatile and dependable shotgun.
Premium Content
Spearhead 1944
Rifle Grenades
Rifle Grenade System
Rifles can mount a muzzle attachment to launch rifle grenades. To attach the adapter, open your inventory screen and drag the adapter to the appropriate muzzle attachment position on your rifle. Or in Virtual Arsenal, select the muzzle attachments category and select the adapter from the list.
- With the adapter fixed, change firemode ("1" or -No content provided-) to switch to the grenade launching mode. Using the action menu, you can load a rifle grenade from your inventory. Press fire ("Prim. Mouse Btn." or "XBox Right Trigger") to launch the rifle grenade.
Changing firemode back to the rifle will unload any currently loaded rifle grenades and may require manual cycling of the action to unload the grenade firing cartridge.
Rifle Grenade System
M1 rifle grenade launchers are mounted on the M1903A3 Springfield.
Ammunition
- Mk2 Rifle Grenade - FRAG Anti-Infantry Grenade 4 second fuse
- M9A1 - Anti-Tank Grenade Impact Fuse.
Rifle Grenade System
M7 rifle grenade launchers are mounted on the M1 Garand.
Ammunition
- Mk2 Rifle Grenade - FRAG Anti-Infantry Grenade 4 second fuse
- M9A1 - Anti-Tank Grenade Impact Fuse.
Rifle Grenade System
M8 rifle grenade launchers are mounted on the M1 Carbine.
Ammunition
- Mk2 Rifle Grenade - FRAG Anti-Infantry Grenade 4 second fuse
- M9A1 - Anti-Tank Grenade Impact Fuse.
Rifle Grenade System
Schiessbecher rifle grenade launchers are mounted on the Kar 98k or Kar 98k (1944)
Ammunition
- Spr.Gr.30 - HE/FRAG Anti-Infantry Grenade Impact Fuse
- PzGr.30 - Light Anti-Tank Grenade Impact Fuse
- PzGr.40 - Heavy Anti-Tank Grenade Impact Fuse.
Pistols
M1911A1 .45
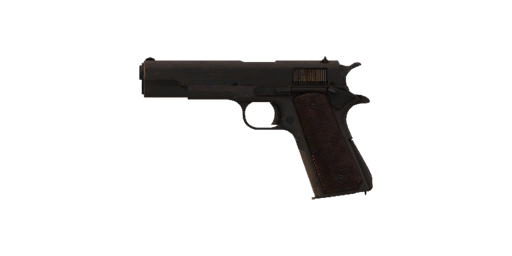
The M1911A1 was the standard issue sidearm during World War II. It's a single-action, semi-automatic, magazine-fed, recoil-operated pistol. It's chambered in the .45 ACP cartridge fed from a 7-round magazine. The M1911 trades off low magazine capacity for stopping power.
Luger, Pistole 08
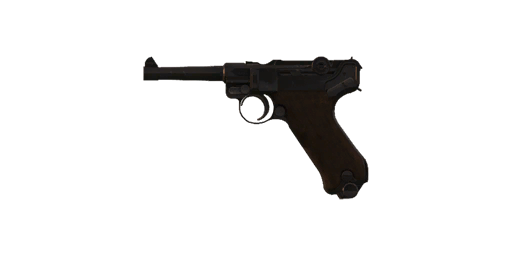
The P08 Luger continued to see use during World War II despite being replaced by the P38 Walther in 1939. The Luger is a toggle-locked, recoil-operated, semi-automatic pistol. It's fed from an eight-round magazine in 9 x 19 mm parabellum. The P-08 Luger was preferred by officers over the P38 and was used throughout the war. The Luger was a sought-after war trophy by Allied soldiers.
Launchers
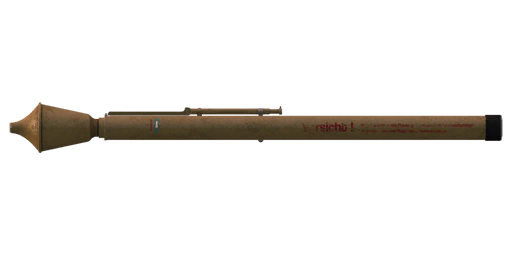
Faustpatrone 30
The Panzerfaust, or 'tank fist,' was a single-shot disposable anti-tank weapon widely used by the Wehrmacht. The Faustpatrone 30 was the first version which has a smaller 100 mm warhead. The Panzerfaust 30 has a larger 149 mm warhead. These versions' sights have a fixed 30 m zero and a relatively short range. The Panzerfaust 60 has an adjustable sight with 30 m, 60 m, and 80 m settings. The Panzerfaust, despite being short range was able to defeat most tanks and could be used extremely effectively in close terrain to destroy advancing armored vehicles.
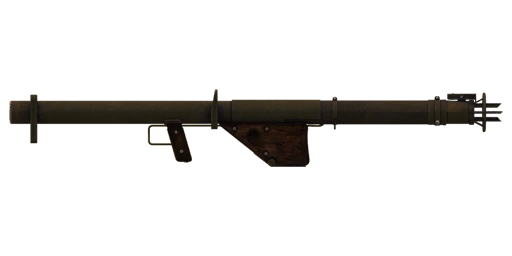
M1A1 Bazooka
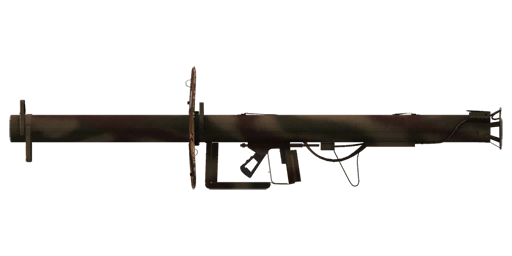
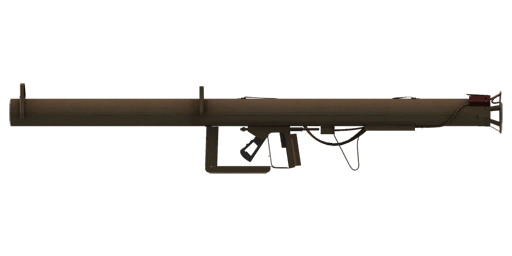
The M1A1 Bazooka is a shoulder-fired anti-tank rocket launcher employed by the US Army during World War II. It was also provided to Allies via lend-lease. The Bazooka used an electric impulse to launch a 2.36-inch HEAT warhead. The M6A1 HEAT rocket was able to penetrate up to 3 inches of armor. The Bazooka has a limited effective range due to the trajectory of the rocket.
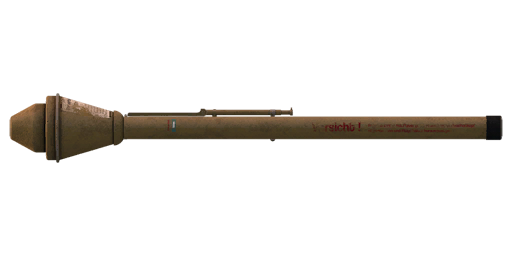
Panzerfaust 30
The Panzerfaust, or 'tank fist,' was a single-shot disposable anti-tank weapon widely used by the Wehrmacht. The Faustpatrone 30 was the first version which has a smaller 100 mm warhead. The Panzerfaust 30 has a larger 149 mm warhead. These versions' sights have a fixed 30 m zero and a relatively short range. The Panzerfaust 60 has an adjustable sight with 30 m, 60 m, and 80 m settings. The Panzerfaust, despite being short range was able to defeat most tanks and could be used extremely effectively in close terrain to destroy advancing armored vehicles.
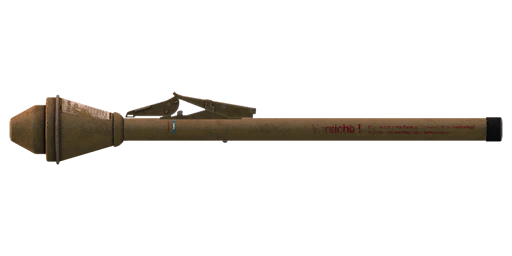
Panzerfaust 60
The Panzerfaust, or 'tank fist,' was a single-shot disposable anti-tank weapon widely used by the Wehrmacht. The Faustpatrone 30 was the first version which has a smaller 100 mm warhead. The Panzerfaust 30 has a larger 149 mm warhead. These versions' sights have a fixed 30 m zero and a relatively short range. The Panzerfaust 60 has an adjustable sight with 30 m, 60 m, and 80 m settings. The Panzerfaust, despite being short range was able to defeat most tanks and could be used extremely effectively in close terrain to destroy advancing armored vehicles.
RPzB 54 Panzerschreck
The Panzerschreck, also known as the Raketenpanzerbᅢᄐchse 54, was a German anti-tank rocket launcher developed during World War II. Utilizing a rocket-propelled shaped charge, it was effective against most armored vehicles of the era, with it only struggling against the frontal armor of the heaviest examples. Unlike the American-made Bazooka that inspired its design, the Panzerschreck's rocket engine continues to burn after it leaves the barrel, requiring the operator to wear protective equipment. This later version of the weapon features a blast shield and no longer requires protective equipment.
RPzB 43 Panzerschreck
The Panzerschreck, also known as the Raketenpanzerbᅢᄐchse 54, was a German anti-tank rocket launcher developed during World War II. Utilizing a rocket-propelled shaped charge, it was effective against most armored vehicles of the era, with it only struggling against the frontal armor of the heaviest examples. Unlike the American-made Bazooka that inspired its design, the Panzerschrecks rocket engine continues to burn after it leaves the barrel, requiring the operator to wear protective equipment.
M9 Bazooka
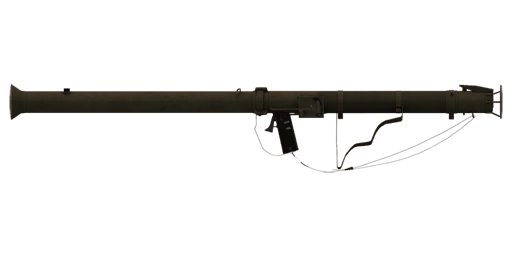
The M9 Bazooka was another iteration of the American anti-tank rocket launchers commonly referred to as 'Bazookas'. Influenced by the German Panzerschreck, it opted for a magneto sparker system to ignite the rocket motor, allowing for more reliable ignition and no longer requiring the use of batteries. This new ignition system also came with a new rocket design, the M6A3, which featured a 'blunt' warhead and new fin assembly, allowing for more reliable penetration and better flight stability. It also incorporated an improved design aperture sight and the ability to disassemble the launch tube into two pieces allowing for easier carrying and stowage, something made very necessary by the increased overall length and weight of the weapon.
M9A1 Bazooka
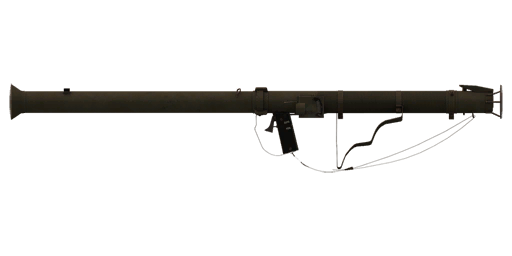
The M9A1 Bazooka was another iteration of the American anti-tank rocket launchers commonly referred to as 'Bazookas'. It is an upgrade from the M9 model and replaces the aperture sight with a T90 Optical Reflector sight, as well as multiple manufacturing improvements.
Towing
Turrets
Certain static weapons can be moved and towed to the front line for faster mobilization. In order for the weapon to be towed, a transport vehicle must be put in place for the 'Hitch to Vehicle' option and icon to appear on the action menu. When activated, the static weapon will be put into its 'towed' animation and is ready to be towed.
The following static weapons can be towed.
- leFH18
- PaK 40
- 57 mm M1 Gun
- M45 Quadmount.
Vehicles Info
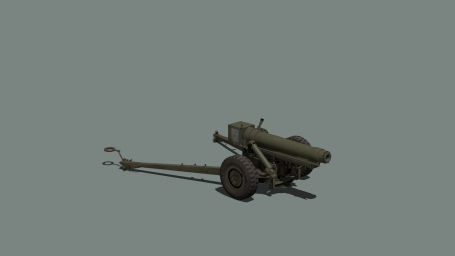
M3 105 mm Howitzer
The 105mm Howitzer M3 was a US-made howitzer originally designed for use by airborne troops; however, it was also issued to cannon companies of infantry regiments. The gun was produced between 1943 and 1945, with over 2,500 guns built, and it was used in combat during the Normandy campaign. Assessments following its use determined it did not live up to expectations due to its relatively short range of 6.63 km compared to the 11.4 km of the M2 it was replacing. Despite this, it was also supplied via lend-lease to several countries and continued to be used in the Korean War by the Republic of Korea.
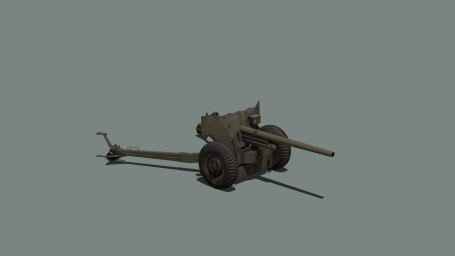
57 mm Gun M1
Developed initially by the British as the '6 pounder', US forces began manufacturing the newly designated 57 mm M1 in early 1942. A towed anti-tank gun, the M1 saw service in many Allied units throughout the war. The bocage of Northern France limited the M1's effectiveness as maneuverability was difficult. However, it was still employed as the main AT gun for US infantry until late into the war.
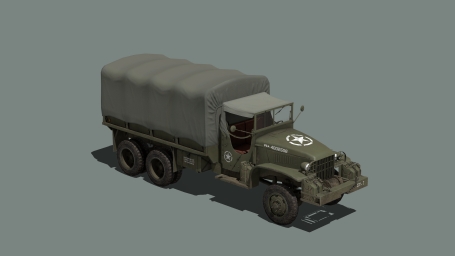
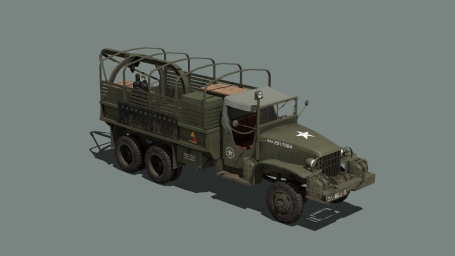
G-508 CCKW 353
The G-508 CCKW was a highly successful standardized truck design used by the US Army through most of WW2 in very large numbers. A total of well over 500,000 vehicles were built in a large number of variants for specialized purposes. It served as the backbone for Allied supply lines during the Normandy campaign and gained fame as part of the Red Ball Express. The vehicle eventually began to be phased out and replaced by the M35 in the 1950s but continued to see use well into the 60s.
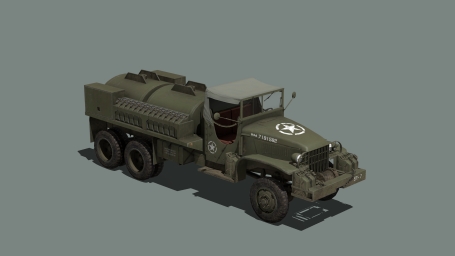
G-508 CCKW 353 (Fuel)
The G-508 CCKW was a highly successful standardized truck design used by the US Army through most of WW2 in very large numbers. A total of well over 500,000 vehicles were built in a large number of variants for specialized purposes. It served as the backbone for Allied supply lines during the Normandy campaign and gained fame as part of the Red Ball Express. The vehicle eventually began to be phased out and replaced by the M35 in the 1950s but continued to see use well into the 60s.
G-508 CCKW 353 (Repair)
The G-508 CCKW was a highly successful standardized truck design used by the US Army through most of WW2 in very large numbers. A total of well over 500,000 vehicles were built in a large number of variants for specialized purposes. It served as the backbone for Allied supply lines during the Normandy campaign and gained fame as part of the Red Ball Express. The vehicle eventually began to be phased out and replaced by the M35 in the 1950s but continued to see use well into the 60s.
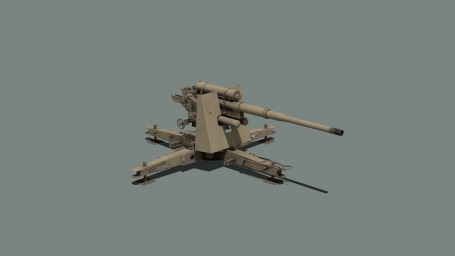
FlaK 36
An 88 mm anti-aircraft and anti-tank gun, the Fliegerabwehrkanone, or 'aircraft defense cannon,' led to the generic term for AA fire, 'Flak.' The carriage the gun was fitted to enable the weapon to be fired as an improvised anti-tank weapon in a very short amount of time. The gun design itself would later see use in Tiger 1 heavy tanks.
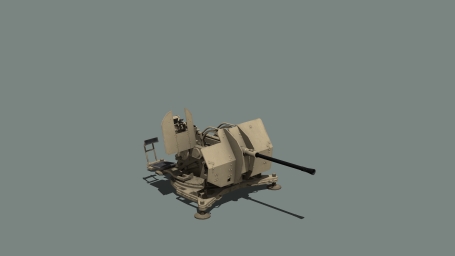
FlaK 38
The FlaK 38 was a 20 mm anti-aircraft gun that was first introduced in 1934 as the FlaK30. By the war's end, over 40,000 had been produced, more than any other artillery piece.
The FlaK 38 was a simplified version of the FlaK 30, featuring a higher rate of fire and lower overall weight. Later in the war, the FlaK 38 would spawn its own variants, including a 4-barrelled version - the FlaKvierling 38.
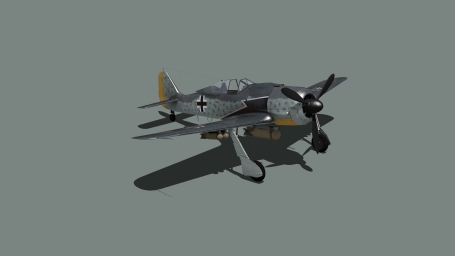
Fw 190 F-8
The F-8 was a ground attack version of the popular fighter. Armed with 2 x 20 mm guns in the wings and 2 x 13 mm guns above the engine, along with racks for 5 bombs.
The FW190 was regarded as one of the best fighter planes of the war, outgunning and, at medium to low altitude, outperforming the perhaps better-known Bf109.
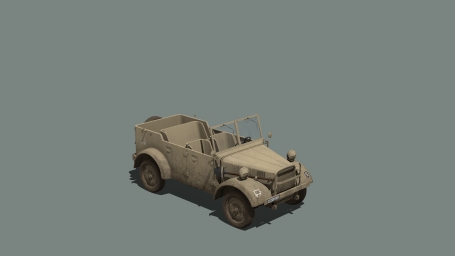
Pkw.Kfz. 1 R200
The Kfz.1 R200 was developed as part of the Einheits-PKW der Wehrmacht program. The intention of this program was to develop a set of standard multi-purpose vehicles for the Wehrmacht based on three uniform chassis. The program was ultimately a failure, with only small numbers of vehicles being produced from multiple manufacturers. The R200 was largely replaced by the Kubelwagen but continued production into 1943, seeing service for troop transport, reconnaissance, and aerial defense in North Africa through to the end of the war in increasingly limited numbers.
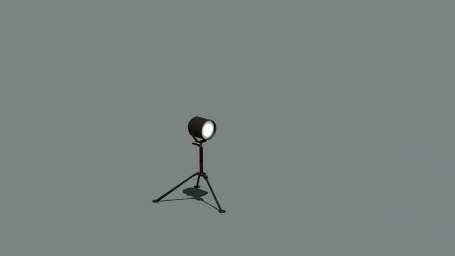
Search Light
The searchlight is a very strong reflector device that projects a strong light beam in a particular direction. Commonly it's possible to move this light.
The searchlight is useful for night fights to locate enemy units and aid in aiming. It can be used against aircraft, vehicles, men, or boats.
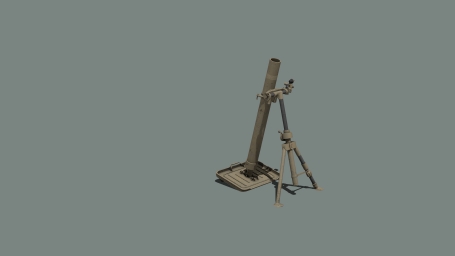
8.14 cm GrW 278/1 (f)
The 278/1(f) was the German designation for captured French Brandt 81 mm mortars. The same mortar that the US M1 was based on.
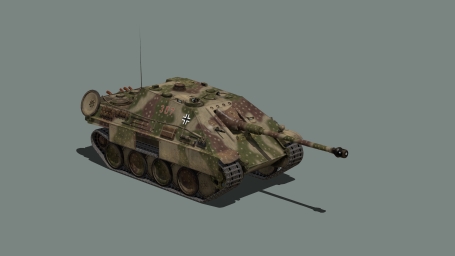
Sd.Kfz. 173 Jagdpanther
The Sd.Kfz. 173 Jagdpanther was a heavy tank destroyer built to combine the armor and mobility of the Panther with the 8.8 cm Pak 43 gun used on the Tiger II. The vehicle primarily saw combat on the eastern front but was also encountered in small numbers during the Battle of Normandy. Despite its effective armor and powerful gun, due to its development late in the war when resources were scarce and its specialized role, there was only a small production of a few hundred vehicles.
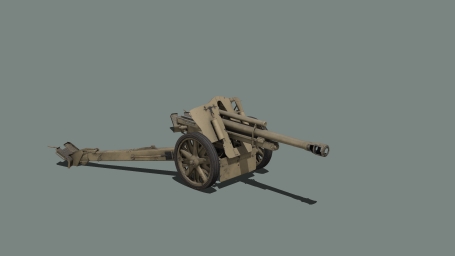
10.5 cm leFH18 (Artillery)
The standard artillery piece of the Wehrmacht, this light howitzer was first introduced in 1935. This gun has a range of up to 10,000 m and was easily towed by the Blitz or even horse, although its weight made the latter difficult on certain terrains.
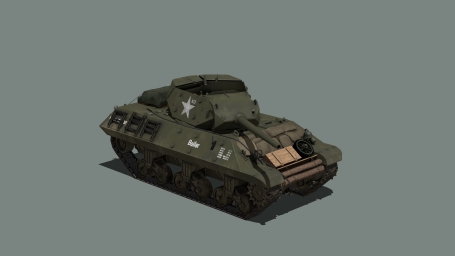
M10 Tank Destroyer
The M10 was born from a need to equip newly formed Tank Destroyer formations in the US Army. A faster, more maneuverable tank was needed to counter blitzkrieg tactics. More lightly armored but with a heavier 3-inch gun, the M10 was designed to respond rapidly to any breakthroughs of enemy armor and counter them using ambush tactics, taking advantage of its speed and agility to defend itself. Based on the chassis of an M4 Sherman, the M10 has a fully rotational, open-topped turret fitted with the main gun, contrary to many other Tank Destroyer designs of the era.
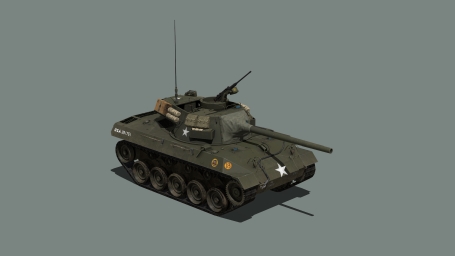
M18 Hellcat
The M18 began combat duties in the Spring of 1944. Despite the success of the M10, it was believed a lighter, more agile Tank Destroyer was needed. After many trials, the M18 was selected to enter production.
Whilst the M10 was based on the Sherman chassis, the M18 was custom designed from the ground up, resulting in a lighter, faster vehicle that was easier to maintain by troops. Carrying the same armament as a Sherman 76, the M18 boasts a faster traversal speed and improved depression and elevation. By the end of the war, the M18 was the most successful Tank Destroyer in the US arsenal.
M1919A4
The M1919 is a .30 cal machine gun that saw widespread use during World War II. Deployed as an infantry weapon, coaxial, mounted aircraft, and anti-aircraft, it was one of the most prolific machine guns of the war. Intended for use as a company support weapon, the 30cal was deployed with a tripod for a sustained fire role.
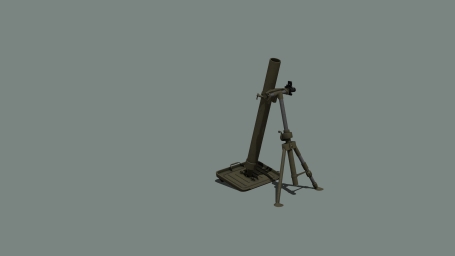
M1 81 mm
The M1 is an 81 mm caliber mortar, able to fire HE, Smoke, and WP rounds to a distance of up to 3 km. Based on the French Brandt mortar, the M1 saw service from 1935 until after the Vietnam War.
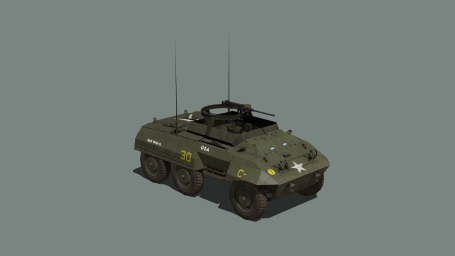
M20 Armored Utility Car
The M20 Armored Utility Car (AUC) was a variant of the M8 Light Armored Car, which traded the 37mm gun and turret for extra seating space and additional radio equipment. It entered service in 1943 alongside the M8, and around 3,700 vehicles were built.
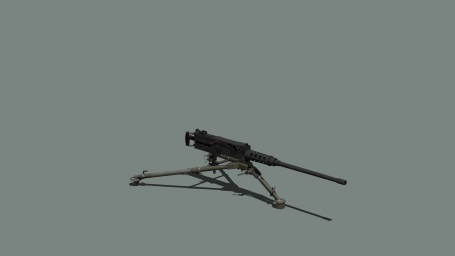
M2 .50 (Tripod)
The M2 .50 caliber machine gun, introduced in the 1930s, is an iconic American heavy machine gun known for its firepower and reliability. It fires the .50 BMG cartridge, capable of penetrating light armor and engaging both ground and air targets effectively. Used extensively by the U.S. military in World War II and subsequent conflicts, it served as a primary anti-aircraft and anti-personnel weapon. Its rugged design made it a staple weapon for ground forces, mounted on various vehicles and aircraft in multiple configurations. The M2 .50 caliber remains in service worldwide.
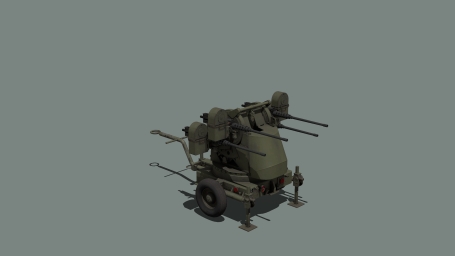
M45 Quadmount
The M45 Quad mount is the Turret assembly attached to the M16 Half-Track. Attached to a trailer to be utilized in more static defensive positions and transported by support vehicles, the Quad mount is an Anti-Aircraft gun featuring 4 50 .cal machine guns with an effective firing range of 1.5 km.
M4(105) Sherman
Some Shermans designated to be deployed with Assault Gun Platoons had their typical 75mm guns replaced with a 105mm M4 Howitzer. These vehicles were primarily designed to fire HE shells to destroy pill boxes, light armored vehicles and infantry positions. However they were also armed with HEAT shells for self defence.
M4 Sherman (Late)
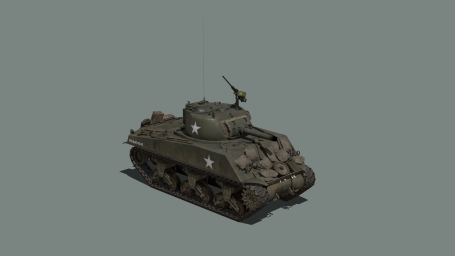
Evolving from the M3 medium tank, the M4 Sherman became the most widely used medium tank by Allied forces, with over 49,000 being built.
Armed with a 75 mm gun, and 3 machine guns, the Sherman became a well-liked infantry support tank. With multiple variations made and with the M4 seeing service across many nations, the Sherman became an iconic symbol of the Allied efforts, seeing action on almost all fronts.
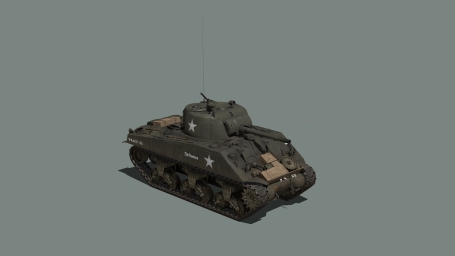
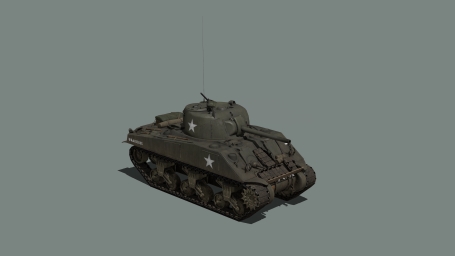
The M4 featured a continental radial engine and a welded hull.
M4 Sherman
Evolving from the M3 medium tank, the M4 Sherman became the most widely used medium tank by Allied forces, with over 49,000 being built.
Armed with a 75 mm gun, and 3 machine guns, the Sherman became a well-liked infantry support tank. With multiple variations made and with the M4 seeing service across many nations, the Sherman became an iconic symbol of the Allied efforts, seeing action on almost all fronts.
The M4 featured a continental radial engine and a welded hull.
M4 Sherman (Composite)
Evolving from the M3 medium tank, the M4 Sherman became the most widely used medium tank by Allied forces, with over 49,000 being built.
Armed with a 75 mm gun, and 3 machine guns, the Sherman became a well-liked infantry support tank. With multiple variations made and with the M4 seeing service across many nations, the Sherman became an iconic symbol of the Allied efforts, seeing action on almost all fronts.
The M4 featured a continental radial engine and a welded hull.
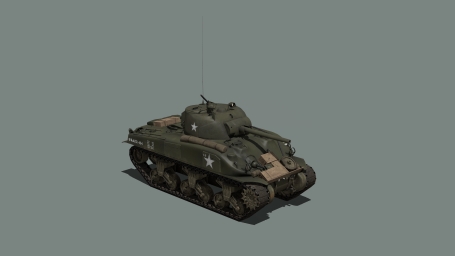
M4A1 Sherman (Late)
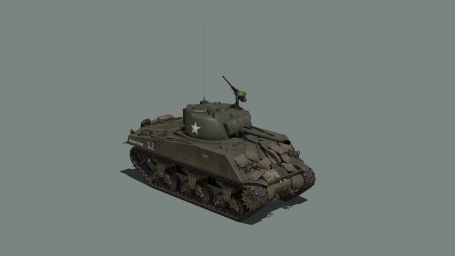
Evolving from the M3 medium tank, the M4 Sherman became the most widely used medium tank by Allied forces, with over 49,000 being built.
Armed with a 75 mm gun, and 3 machine guns, the Sherman became a well-liked infantry support tank. With multiple variations made and with the M4 seeing service across many nations, the Sherman became an iconic symbol of the Allied efforts, seeing action on almost all fronts.
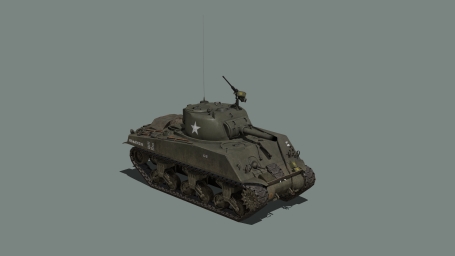
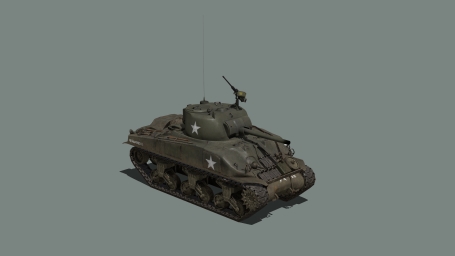
The M4A1 featured a continental radial engine and a one-piece cast hull.
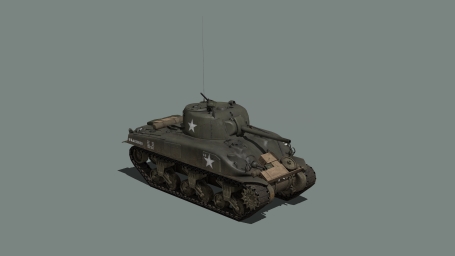
M4A1 Sherman
Evolving from the M3 medium tank, the M4 Sherman became the most widely used medium tank by Allied forces, with over 49,000 being built.
Armed with a 75 mm gun, and 3 machine guns, the Sherman became a well-liked infantry support tank. With multiple variations made and with the M4 seeing service across many nations, the Sherman became an iconic symbol of the Allied efforts, seeing action on almost all fronts.
The M4A1 featured a continental radial engine and a one-piece cast hull.
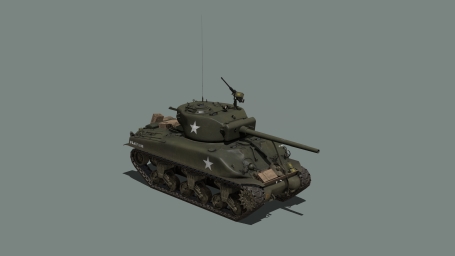
M4A1(76)W Sherman
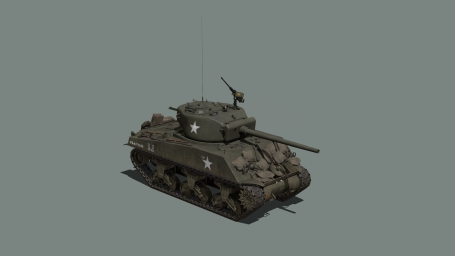
Operation Cobra saw the first use of the 76(W) version of the Sherman. Encounters against German Panthers in the early days of the Normandy campaign saw the standard 75 mm gun on the M4's lacking, and an upgrade was desperately needed to counter the German armor.
The 76 mm gun offered increased shell velocity and gave the US vehicles equal firepower to many of the German vehicles they encountered. After January 1945, it was determined that any further M4s that were sent to Europe would need to carry the 76 mm guns.
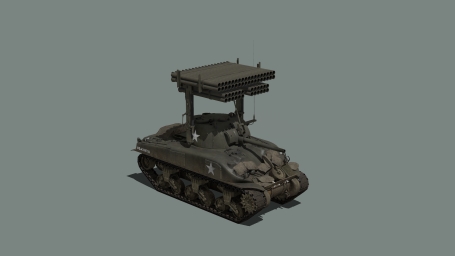
M4A1-T34 Calliope Sherman (Artillery)
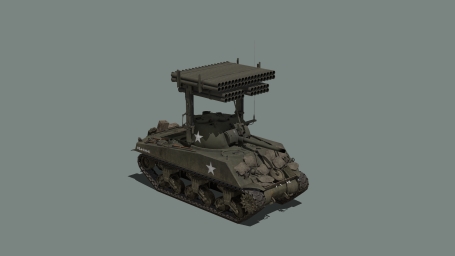
Named after the musical instrument, the Calliope was mounted to the chassis of an M4 Sherman. Carrying up to 60 rockets, the Calliope was envisioned to be used as a 'bunker-busting' weapon in support of armored units. Although it didn't see widespread use initially, many launchers were put to use as Allied forces advanced later in the war.
M4A3(105) Sherman
Some Shermans designated to be deployed with Assault Gun Platoons had their typical 75mm guns replaced with a 105mm M4 Howitzer. These vehicles were primarily designed to fire HE shells to destroy pill boxes, light armored vehicles and infantry positions. However they were also armed with HEAT shells for self defence.
M4A3(75)W Sherman
Evolving from the M3 medium tank, the M4 Sherman became the most widely used medium tank by Allied forces, with over 49,000 being built.
Armed with a 75 mm gun, and 3 machine guns, the Sherman became a well-liked infantry support tank. With multiple variations made and with the M4 seeing service across many nations, the Sherman became an iconic symbol of the Allied efforts, seeing action on almost all fronts.
M4A3(76)W Sherman
Operation Cobra saw the first use of the 76(W) version of the Sherman. Encounters against German Panthers in the early days of the Normandy campaign saw the standard 75 mm gun on the M4's lacking, and an upgrade was desperately needed to counter the German armor.
The 76 mm gun offered increased shell velocity and gave the US vehicles equal firepower to many of the German vehicles they encountered. After January 1945, it was determined that any further M4s that were sent to Europe would need to carry the 76 mm guns.
M4A3-T34 Calliope Sherman (Artillery)
Named after the musical instrument, the Calliope was mounted to the chassis of an M4 Sherman. Carrying up to 60 rockets, the Calliope was envisioned to be used as a 'bunker-busting' weapon in support of armored units. Although it didn't see widespread use initially, many launchers were put to use as Allied forces advanced later in the war.
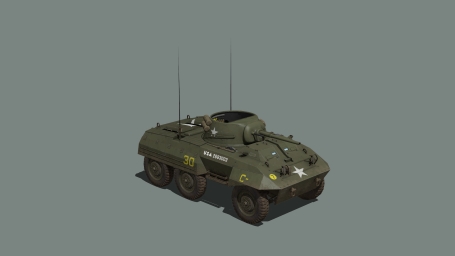
M8 Armored Car
The M8 Light Armored Car (LAC), also known as the Greyhound by British forces, was a 6ᅢラ6 armored car that was primarily used by reconnaissance troops. It entered service in 1943 armed with a 37mm (M6) gun and a coaxially mounted .30 caliber machine gun in a hand-cranked turret. In the build-up to D-Day, most M8s were equipped with extra belly armor, as well as a .50 cal MG often mounted in an M50 ring mount. Although its limited off-road mobility and large turning circle hampered its usefulness in the narrow European streets, the M8 LAC proved effective when its high road speed and range could be used to maximum advantage, such as during the breakout across France. Overall, around 8,500 M8 LACs were produced up until June 1945, and as a result of the Military Assistance Program, it continued to serve for a considerable period following the war.
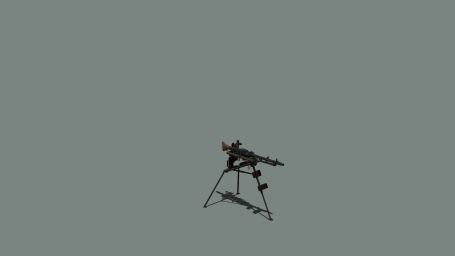
MG 34
Fitted to a Lafette tripod in the static 'Heavy Machine gun' role.
Considered the world's first general-purpose machine gun, the MG 34 was the main support weapon of German Forces until 1942. It would, however, continue to be used and produced until 1945 due to its effectiveness. With an effective range of up to 2,000m and a fire rate of 1,200 rounds/min, the MG 34 found use in conflicts for many years after WW2.
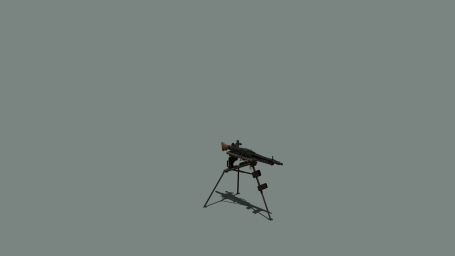
MG 42
Fitted to a Lafette tripod in the static 'Heavy Machine gun' role.
Intended as a replacement for the MG 34, the 42 had many design improvements to enhance the reliability and lower cost of the next general purpose machine gun of the German Armed Forces. Dubbed 'Hitler's Buzzsaw' by Allied troops due to its high rate of fire, the MG 42 was a feared and effective weapon system. Upgraded versions of the weapon system are still in service to the present day.
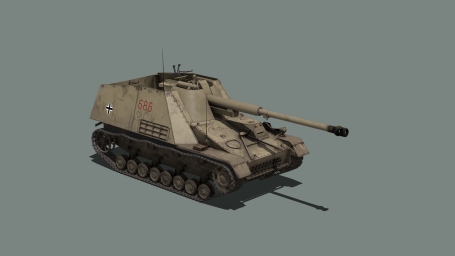
Sd.Kfz. 164 Nashorn
The Nashorn was developed in 1942 as a short-term solution for the requirement of 'tank hunter.' By using pre-existing equipment, namely Panzer 3 and 4 chassis and a variation of the reliable Pak 43 as its main gun, the Nashorn was quickly pressed into service and made its debut at the battle of Kursk in 1943, where it performed exceptionally well.
Sd.Kfz. 305 Blitz
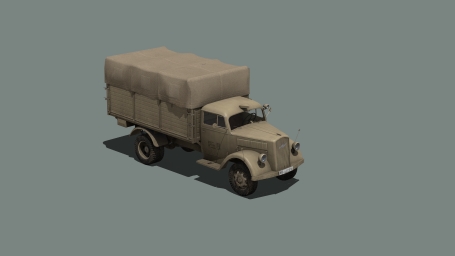
Adapted from a popular civilian commercial truck, the Blitz became the standard cargo truck for the German military. Over 70,000 were delivered to the German Armed Forces during the war period, with multiple variants available, such as ambulances, troop carriers, mobile workshops, fuel trucks, and command centers. The versatility of the Blitz made them integral to armored divisions.
Sd.Kfz. 305 Blitz (Ambulance)
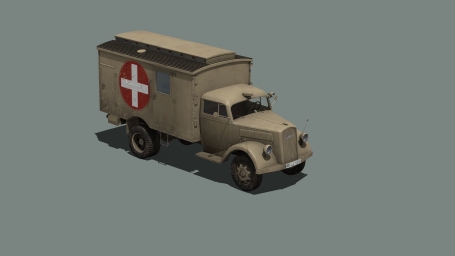
Adapted from a popular civilian commercial truck, the Blitz became the standard cargo truck for the German military. Over 70,000 were delivered to the German Armed Forces during the war period, with multiple variants available, such as ambulances, troop carriers, mobile workshops, fuel trucks, and command centers. The versatility of the Blitz made them integral to armored divisions.
Sd.Kfz. 305 Blitz (FlaK 38)
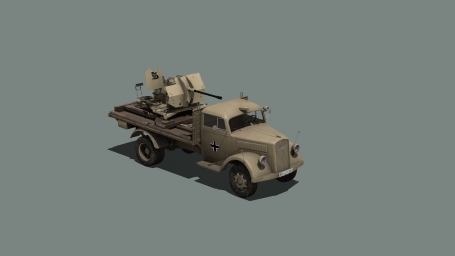
Adapted from a popular civilian commercial truck, the Blitz became the standard cargo truck for the German military. Over 70,000 were delivered to the German Armed Forces during the war period, with multiple variants available, such as ambulances, troop carriers, mobile workshops, fuel trucks, and command centers. The versatility of the Blitz made them integral to armored divisions.
P-47D Thunderbolt
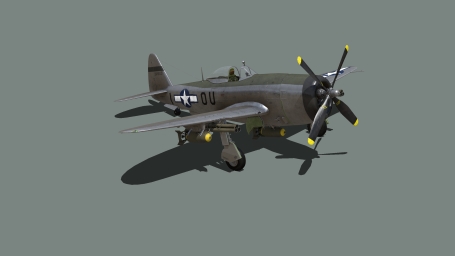
The P-47D was the most prolific fighter bomber in the US arsenal. With 8 x 50 .cal machine guns and the ability to carry rockets or a 2,500lb bomb load, the aircraft was incredibly versatile. Armored and with the ability to remain airworthy even when heavily damaged, the P-47 made the ideal ground attack fighter. First introduced in 1942, by the end of the war, over 15,000 had been made.
PaK 40
With a 7.5 cm gun, this anti-tank weapon first saw service in 1942 and quickly became the main anti-tank gun in use by the German Armed Forces. The gun itself would prove so effective that variants were developed to be attached to vehicles of all types.
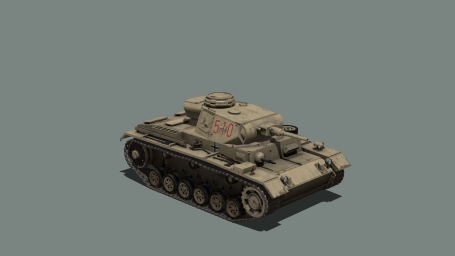
PzKpfw III Ausf.J
Commonly known as the Panzer 3, this medium tank saw service from the first campaigns of the war. It underwent various upgrades during its service, depending on operational requirements and crew feedback.
The 'J' variant was the most produced, with an increase of hull and turret front armor to 50mm. It was armed with a short barrel 5 cm cannon. Some Js were later upgraded with the longer L/60 cannon and redesignated as Ausf. L.
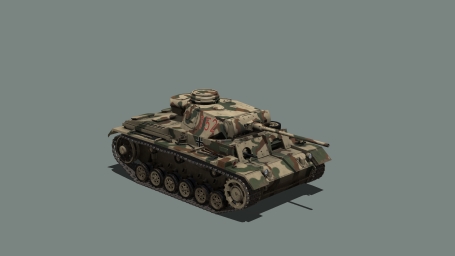
PzKpfw III Ausf.L
Commonly known as the Panzer 3, this medium tank saw service from the first campaigns of the war. It underwent various upgrades during its service, depending on operational requirements and crew feedback.
The 'L' variant was equipped with a long 5 cm gun, an extra 20 mm of spaced frontal armor, and improved performance.
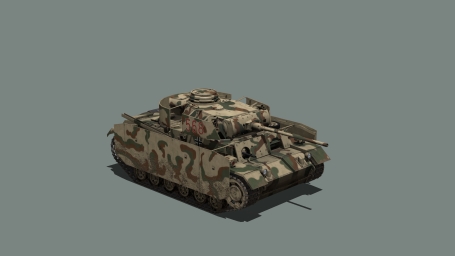
PzKpfw III Ausf.M
Commonly known as the Panzer 3, this medium tank saw service from the first campaigns of the war. It underwent various upgrades during its service, depending on operational requirements and crew feedback.
The 'M' variant was based on the Ausf. L. It added a deep wading exhaust and additional side armor panels known as Schᅢᄐrzen.
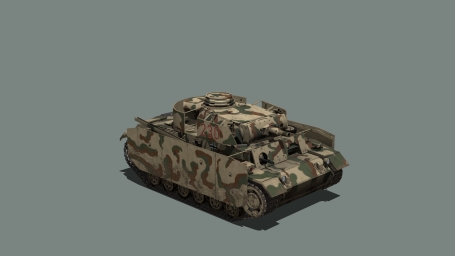
PzKpfw III Ausf.N
Commonly known as the Panzer 3, this medium tank saw service from the first campaigns of the war. It underwent various upgrades during its service, depending on operational requirements and crew feedback.
The 'N' variant was developed from the M variant into an infantry support tank, equipped with a short-barrelled low-velocity 7.5 cm gun.
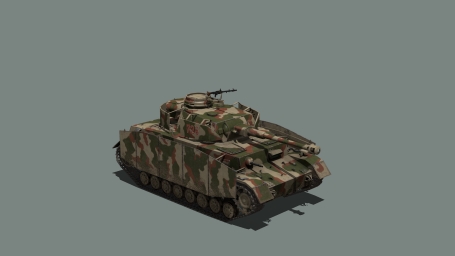
PzKpfw IV Ausf.G
The Panzer 4 was first introduced into service in 1937. By 1944 it had received numerous upgrades and developments, leading to the designation of Ausf. G. The 'G' featured a high-velocity 7.5 cm cannon, new turret-mounted smoke launchers, and an increase to front hull armor (80mm). Later in the war, G variants were also upgraded with Schᅢᄐrzen armor skirts to the side hull and turret.
By the end of WW2, over 8,000 Panzer 4's had been produced.
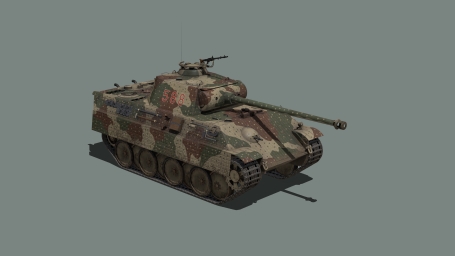
PzKpfw V Ausf.G Panther
The Panzerkampfwagen V Panther, sometimes referred to as the "Mark V" by the Allies, is a German medium tank that entered the war in 1943. It was intended as a compromise between the Panzer IV and the Tiger I, trading some of the Tiger's armor for better mobility while maintaining similar offensive capabilities with its 7.5cm KwK 42 L/70. The tank proved to be a formidable vehicle on all fronts and was produced in much higher numbers than the likes of the Tiger, with a total production of around 6,000 vehicles. During the Normandy campaign, almost 40 percent of the German tanks encountered were Panthers.
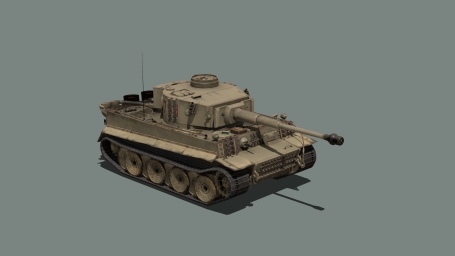
PzKpfw VI Ausf.H1 Tiger
The Tiger I, or simply Tiger, was introduced into service in 1942 and first saw combat with the western allies in Tunisia in December of that year. Featuring a high-velocity 8.8 cm gun and thick frontal armor, the Tiger quickly gained infamy and was the tank of choice of many 'Panzer Aces' during the war.
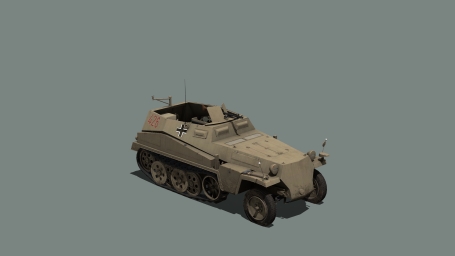
Sd.Kfz. 250/1
A lightly armored half-track. Smaller in design than the standard 251 German half-track, the 250 was a troop carrier for recon or specialist roles. Open topped and armed with a single MG 34, the vehicles saw service across multiple theatres after it was introduced in 1941.
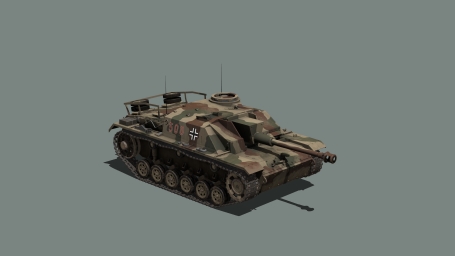
Sd.Kfz. 142/1 StuG III G (Early)
The Sturmgeschᅢᄐtz III (StuG III) is one of Germany's most produced and effective armored vehicles of WW2. Based on a modified Panzer 3 chassis, it entered service in 1940 and continued production until the end of the war. Despite being originally intended for infantry support as a mobile assault gun, it ended up being very effective in a tank destroyer role as the war progressed. By the end of WW2, over 10,000 StuG IIIs were produced.
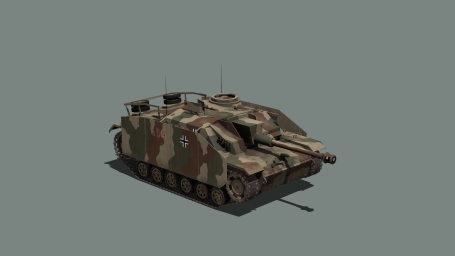
Sd.Kfz. 142/1 StuG III G (Late)
The Sturmgeschᅢᄐtz III (StuG III) is one of Germany's most produced and effective armored vehicles of WW2. Based on a modified Panzer 3 chassis, it entered service in 1940 and continued production until the end of the war. Despite being originally intended for infantry support as a mobile assault gun, it ended up being very effective in a tank destroyer role as the war progressed. By the end of WW2, over 10,000 StuG IIIs were produced.
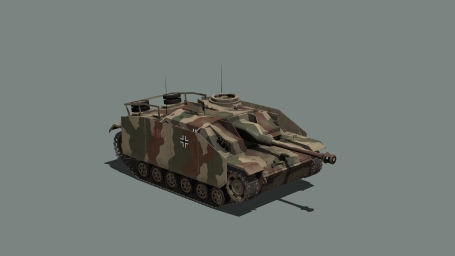
Sd.Kfz. 142/1 StuG III G (SKB)
The Sturmgeschᅢᄐtz III (StuG III) is one of Germany's most produced and effective armored vehicles of WW2. Based on a modified Panzer 3 chassis, it entered service in 1940 and continued production until the end of the war. Despite being originally intended for infantry support as a mobile assault gun, it ended up being very effective in a tank destroyer role as the war progressed. By the end of WW2, over 10,000 StuG IIIs were produced.
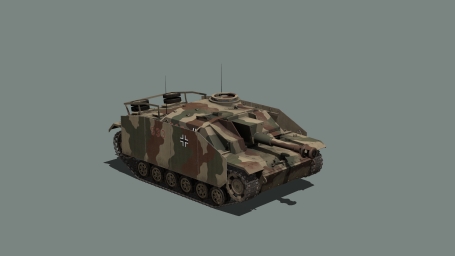
Sd.Kfz. 142/2 StuH 42
In 1942, a variant of the StuG III was produced which mounted the 10.5 cm leFH 18 howitzer in place of the typical 7.5 cm StuK 40 L/43 gun. This up-gunned variant was designated the StuH 42 and over 1,200 vehicles were produced.
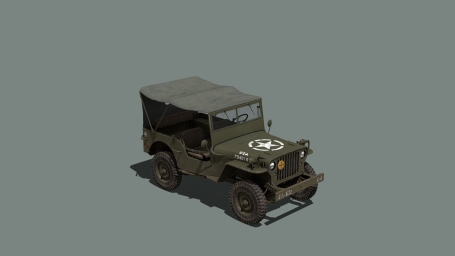
G-503 MB 4x4
The famed G503 MB was an off-road light utility vehicle used by the US Army in very large quantities through most of WW2. It was one of the first ever mass-produced vehicles, with production exceeding 600,000 vehicles. Its design was standardized and very simple, with the intent of being easily repairable or replaceable in the field. Throughout the war, It proved to be extremely reliable and versatile, allowing it to be used in a large variety of roles, including transport, artillery, reconnaissance, and many more, including as an improvised attack vehicle mounted with weapons such as the M1919, M2, and even bazooka rocket launchers. Through lend-lease, the MB was also provided to multiple allied countries, including the Commonwealth and Soviet Union.
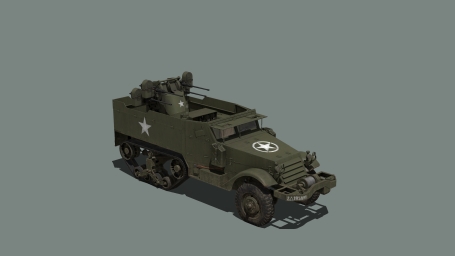
M16 Half-Track
Nicknamed 'the meat chopper,' the M16 'Multiple Gun Motor Carriage' or simply the M16 Half-track was first introduced to the frontlines in early 1944. Primarily an Anti-Air platform, it also saw use in the infantry support role. Armed with 4 12.7 mm M2 machine guns, the M16 was a firm favorite amongst troops, used by nearly all Allied factions in multiple theatres during the war. By 1945, over 3,000 had been produced.
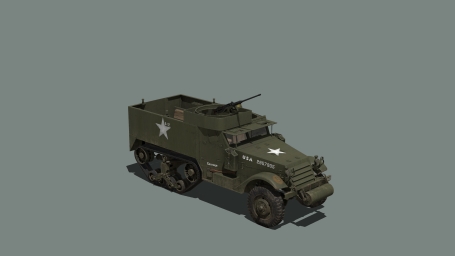
M3A1 Half-Track
A workhorse of the Allied efforts and coming in multiple variants, over 38,000 M3s were produced during the war. Seeing service with US, Commonwealth, and Soviet forces. Lightly armored for protection against small arms, the M3 can support your efforts with the standard version, ambulance, repair, fuel, and ammunition supply variants.
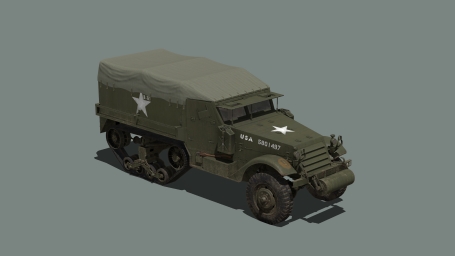
M3 Half-Track (Unarmed)
A workhorse of the Allied efforts and coming in multiple variants, over 38,000 M3s were produced during the war. Seeing service with US, Commonwealth, and Soviet forces. Lightly armored for protection against small arms, the M3 can support your efforts with the standard version, ambulance, repair, fuel, and ammunition supply variants.
Vehicle Optics
Illuminated Optics
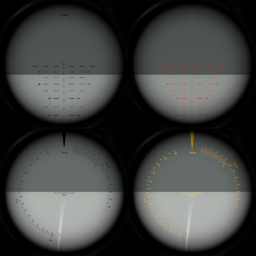
Both American and German tank and static gun optics feature the ability to illuminate their reticles. This is useful when fighting in low-light or night conditions as it provides better contrast for the reticle markings on darker backgrounds.
US Optics
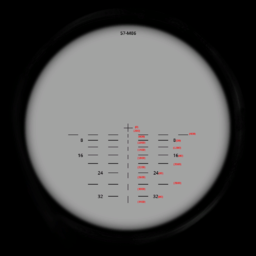
American tank and anti-tank gun telescopes provide range graduations on their reticle. These range graduations are in yards and follow the trajectory of a specific round for the vehicle they're fitted to. At the top of the reticle is the Caliber of the weapon and the Specific Round that the sight is calibrated to. This is typically the main Armor-Piercing ammunition of the weapon system, and other ammunition types may have a similar but different ballistic trajectory.
At the center of the reticle is a crosshair indicating the bore sight and represents the range of0 yards. The bottom of the crosshair represents200 yards. Directly below the small crosshair is a series of vertical lines, each corresponding in length to a range change of200 yards. The vertical lines are separated by spaces, each of which corresponds to a range change of200 yards.
Short horizontal lines extend to the right and left of the vertical lines and are spaced vertically to correspond in range to the top of each vertical line. The short horizontal lines are numbered every800 yards. In aiming at a stationary target or a moving target requiring zero leads, the aiming point of the reticle representing the correct range is laid on the center of the visible mass or the center of the target.
German Rounded Optics
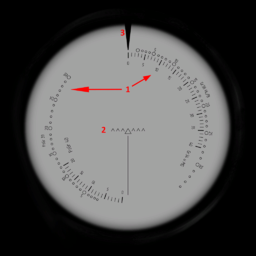
German TZF tank optics come in many variations but can usually be broken down into three elements, and once you understand these elements and how they interact, the sights are easy to use.
- 1. The Range Plate which has markings for the specific ranges for the specific weapons/ammunition types.
- 2. The Sighting Plate, also known as a crosshair.
- 3. The Pointer at the top of the optic indicates the current setting on the range plate.
For the sake of simplicity, when changing ammo type (or switching to the coaxial machine gun), the range plate will automatically rotate to the correct range scale for the selected weapon/ammunition. It's only a matter of reading the correct scale for the loaded ammo type and adjusting the range with your "Left Ctrl+Mouse wheel up" and "Left Ctrl+Mouse wheel down" keys. To slow the rotation of the plate for finer tuning, use the "Left Shift" modifier key. Each mark (or dot) represents100 meters, with the numbers also representinghundreds of meters. So, the '30' mark is the position for3,000 meters, '5' for500 meters, etc.
As the range plate rotates, the sighting plate will move down; then it's just a matter of placing the point of the sighting plate center triangle onto the intended target and firing.
PaK 40 ZF Optics
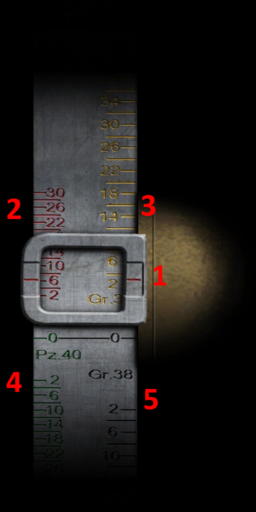
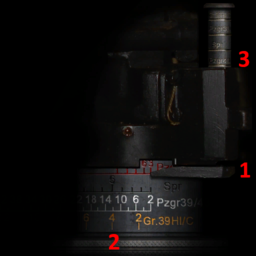
The PaK 40 Anti-Tank gun uses a ZF sight attached to a range drum for sighting purposes. You can rotate the range drum up and down using the "Left Ctrl+Mouse wheel up" and "Left Ctrl+Mouse wheel down" keys. As you do so, the optic view will move up and down depending on the setting of the range drum.
Reading/Using the range drum is as follows:
- 1. The currently selected range is indicated by the red line.
- 2. The range graduations for the PzGr39 Armor Piercing rounds
- 3. The range graduations for the SprGr34 HE rounds
- 4. The range graduations for the PzGr40 Armor Piercing Composite rounds
- 5. The range graduations for the Gr38 HEAT rounds.
The ammo types are written on the drum directly and are color-coded, so it isn't necessary to memorize which scale is for which ammo type.
Like other German optics, the range graduations are in hundreds of meters with each mark being a200-meter increment. So, a range of ‘2’ indicates200 meters, and the next unmarked line represents400 meters. Set the range using the range graduations for the specific ammo type you're intending to use, place the point of the optics crosshair on the target, and fire.
Nashorn SFL Optics
The Nashorn Tank destroyer uses Sfl ZF Optic that's attached to a range drum for sighting purposes. Unlike the vertical range drum used on the PaK 40, the Nashorn range drum is mounted horizontally and features a pointer for the specific range scale, which automatically moves when changing ammunition. To rotate the drum, use the "Left Ctrl+Mouse wheel up" and "Left Ctrl+Mouse wheel down" keys. Doing so will shift the optic up and down to reflect the change of zeroing.
Reading/Using the range drum is as follows:
- 1. The pointer will be in line with the currently active range scale graduations.
- 2. The range scale graduations, like other German optics, is written in hundreds of meters with a number of '6' representing600 meters, etc. Graduations differ between ammo types, with some incrementing in hundreds of meters and others in two-hundred-meter increments.
- 3. The currently selected ammo type and, therefore, what position the pointer is using. In this case, it's set to use the PzGr40 APCR ammunition.
When the required range has been selected on the drum with the pointer, place the tip of the crosshair onto the target and fire.
Vehicle Ammunition Types
Armor-Piercing (AP)
Represents 'solid-shot' ammunition that doesn't have a 'cap' and features no explosive charge.
Usually early war or older ammunition. Has trouble normalizing with sloped armor and therefore has a tendency to bounce. Overall has decent ballistics and can sometimes have better penetration. As a result, it will cause a 'cone-like' spalling effect when penetrating armor. Pros:
- Flatter Trajectory
- Potentially more available
Cons:
- Tends to bounce at odd angles
- Can have trouble with sloped armor.
Armor-Piercing-Capped-Ballistic-Capped (APC)
Represents ammunition that combines both a standard cap to aid with shell normalization, and a ballistic cap made of a softer material to aid in aerodynamics. It deflects significantly less than its non-capped sibling.
Typically a straight upgrade from AP but may have slightly worse ballistics due to being heavier overall. Will cause a 'cone-like' spalling effect when penetrating armor. Pros:
- Has no trouble with sloped armor
- Low weight maintains velocity
Cons:
- No explosive charge
Armor-Piercing-HE-Capped-Ballistic-Capped (APHE)
Represents ammunition that combines both a standard cap to aid with shell normalization, and a ballistic cap made of a softer material to aid in aerodynamics. It deflects significantly less than its non-capped sibling.
Its main feature, however, is a high-explosive charge inside the projectile that detonates after penetrating armor, causing a large amount of spall and fragments in a sphere like pattern. Pros:
- Has no trouble with sloped armor
- Can sometimes knock out what it can penetrate in a single hit
Cons:
- Heaviest of the standard AP shells, can lead to a poor trajectory
High-Explosive-Anti-Tank (HEAT)
Speciality ammunition that's more used by Infantry Rockets but may be available for some tanks. Uses a high-explosive shaped charge to create a molten copper jet that pierces through the armor.
Devastating when it works but has a tendency to bounce. Creates a lot of spalling (to represent the jet bouncing around) in a cone-like pattern Pros:
- Has the same penetration value no matter the range
- Can sometimes knock out what it can penetrate in a single hit
- Has very high penetration values compared to some AP shells
Cons:
- Rarely detonates on sloped armour
- Has to have a flat angle in general or will likely bounce
- Scarce
Armor-Piercing-Composite-Rigid (APCR)
Speciality ammunition that uses a sub-caliber penetrator of hardened material. This allows for far greater penetration than standard AP ammunition but suffers from a severe drop off of penetration ability at longer ranges.
Its design leads to a far greater chance of ricochets when fired against sloped armor. Has reduced spalling due to the smaller surface area. Pros:
- Very fast projectile speed
- Has very high penetration values compared to some AP shells
Cons:
- Has trouble with sloped armor
- Has to have a flat angle in general or will likely bounce
- Scarce
- Low post-penetration damage generally needs direct hits to damage components
Armor-Piercing-Discarding-Sabot (APDS)
Speciality ammunition that uses a sub-caliber penetrator of hardened material. Unlike APCR, its sabot is discarded after it leaves the barrel. This allows for far higher velocity and greater penetration and has less chance to ricochet from sloped armor than APCR, but suffers from poor accuracy.
Has reduced spalling due to the smaller surface area. Pros:
- Very fast projectile speed
- Has very high penetration values compared to some AP shells
Cons:
- Very inaccurate
- Scarce
- Low post-penetration damage generally needs direct hits to damage components
High-Explosive (HE)
High Explosive ammunition, used for engaging soft-targets such as cars or infantry. Larger calibers may be capable of damaging armored vehicles but otherwise are only capable of damaging outer components on tanks (tracks etc.).
Pros:
- Great area of effect
- Can annihilate soft-targets
Cons:
- No penetration value
- No Tracer
Smoke (SMK)
Smoke ammunition, used for concealment or screening. Detonates instantly and typically has a similar trajectory to HE.
White Phosphorous (WP)
Smoke ammunition, used for concealment or screening. Detonates instantly and typically has a similar trajectory to HE. Unlike smoke, it causes damage to exposed infantry making it great for clearing bunkers or buildings.
Vehicle Damage System
Ammo Racks
For vehicles with cannons (20 mm or larger), ammo racks are present and are the fastest and best way to destroy the vehicle. Direct hits with powerful weapons can instantly destroy even the biggest Tanks. Destruction this way is fast and dramatic, causing a large explosion and sometimes sending the turret (when applicable) airborne. Similarly, smaller weapons and spalling created by shots into the interior of the vehicle can damage the ammo racks. This can cause multiple effects from fires inside the vehicle, leading to the vehicle burning out, fires starting a chain reaction, and eventual explosion. Or sudden ammo cook-off causing a build-up of pressure that leads to fire dramatically erupting from the vehicle.
Engine
Destroying the engine stops the vehicle from moving and can be visually noticed by the engine compartment emitting fire and smoke. Damage dealt to the engine is partially transferred to the vehicle's overall health. This represents a fuel explosion or other catastrophic destruction and has a similar effect to the ammo rack.
Fuel Tanks
Damage to the fuel tanks drains available fuel. When it's completely destroyed, fuel will eventually completely drain from the vehicle, disabling it. Similar to the engine, the damage is partially transferred to the overall health of the vehicle and can cause an explosion.
Wheels/Tracks
Destruction of wheels or tracks will impede the vehicle's mobility and completely stop it when all are destroyed.
Turret Ring
Represents the turret ring or the horizontal drive on the gun. Destroying it will disable the vehicle's ability to rotate its turret or turn its gun, partially disabling its ability to engage.
Gun/Vertical Drive
Represents the gun or vertical drive of the vehicle. Destroying it will disable the vehicle's ability to elevate its turret or raise/lower its gun, partially disabling its ability to engage. It doesn't disable its ability to fire.
German FlaK Systems
High-Explosive Time-Fuse
German Anti-Aircraft-Artillery featuring high explosive rounds with a time fuse that allows gunners to airburst shells near enemy aircraft, increasing hit probability.
When such rounds are loaded, the 'Zeroing' interface is replaced with a 'Fuse' distance one and is adjusted in the same fashion using the "Left Ctrl+Mouse wheel up" and "Left Ctrl+Mouse wheel down" keys to set the distance that the shell will airburst at. If finer increments are needed, the "Left Ctrl+Mouse wheel down" key can be used to switch from100 m increments to25 m increments.
FlaK 36 (AA) Range and FCS
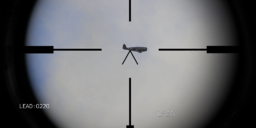
The German 8.8 cm FlaK 36 Anti-Aircraft variant features a range finding and Lead fire control system to assist with effectively engaging enemy aircraft.
The range finder is operated by the Commander by entering their optic, placing the aircraft in the center of the screen, and holding the "T" key. After the progress bar is complete, the estimated distance to the target will display and can be forwarded to the Gunner for setting the fuse. Do note the range finder is only intended for air targets.
Flamethrowers
Flamethrower Operation
In order to operate a flamethrower, two components are required: the flamethrower wand or 'gun' and the fuel tank backpack. With only the 'weapon' equipped, the flamethrower won't operate, and any 'magazines' for it will be removed until the correct backpack is equipped.
Each flamethrower has its own backpack and fuel type and can't be mixed. Magazines are in increments of 50 to aid AI ammo considerations, but reloading is automatic and instantaneous.
- 'M2 Flamethrower'
Backpack: 'US Flamethrower Tank, M2'
- 'Flammenwerfer 41'
Backpack: 'GER Flammenwerfer Tank, FW41'
Crew Served Weapon System
Introduction
The crew-served weapon system in Spearhead differs from the vanilla version in a few significant ways that are crucial to note. For one, the weapon components are no longer backpacks but are instead weapons, with machine guns being a regular primary weapon and tripods/mortar barrels taking the launcher slot. This allows static weapon crews to carry a backpack with them, which is important for the next difference. The second difference is that, unlike vanilla, ammunition isn't stored 'inside' the weapon and instead must be carried by the weapon team or in a vehicle like any other magazine. This eases resupply as no longer will ammo trucks or the like be required to rearm static crew-served weapons. Similarly, the weapons can only have one magazine loaded at a time. For machine guns, this is one belt, or for mortars, one shell. Editor/Zeus placed static weapons are the exception to this and are set up with magazines 'built in' for use by AI and in traditional static emplacements. If disassembled or 'unloaded' with the unload action, they behave as above.
Assembly/Deployment
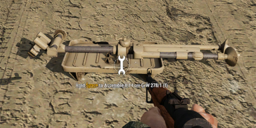
Assembling a static weapon is similar to the Vanilla Arma 3 CSW system, with the only difference being that the tripod needs to be dropped first, which will convert it into a semi-assembled state.
This hold action will take time depending on the complexity of the weapon and will result in an assembled weapon. Machine guns that were already loaded with a magazine will continue to have it loaded in their new static role.
Loading
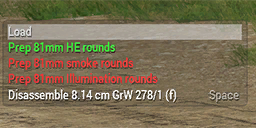
When you assemble a static weapon for the first time, several new actions will appear. We're using a mortar in this example.
With an ammo type 'prepped' the load action will appear, which can be selected from the action menu either manning the weapon or nearby it. The "R" or "XBox X" hotkey can also be used.
The' Load' action will search for appropriate ammunition from three sources:
1. On your person, in your inventory.
2. Nearby magazines placed on the ground.
3. Ammo boxes.
If a compatible shell isn't found in any of these places, it won't load the weapon. If you wish to switch the currently loaded shell out without firing it, an unload action is available to do so.
Artillery Rangetables
Artillery Rangetables
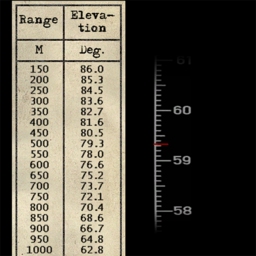
Designed as an alternative for the artillery computer, simple range tables have been provided for indirect fire. To use them, calculate the distance and direction to the intended target, reference the distance on the range table, and set the correct elevation angle using "Left Ctrl+Mouse wheel up" or "Page Up"/"Left Ctrl+Mouse wheel down".
Protection from Rocket Exhaust
Protection from Rocket Exhaust
The RPzB 43 Panzerschreck fires a slow-burning rocket motor that continues to burn after leaving the launcher tube.
Lack of shielding therefore requires that the operator wear personal protection or suffer temporary blindness whenever the weapon is fired.
Normandy Terrain
Overview
The Normandy terrain encompasses much of the area involved in the Allied Operation Cobra following the D-Day landings. This half-scale representation of its real counterpart contains a sprawling countryside dominated primarily by farmland. A number of villages and small towns are connected by an extensive road network allowing for a variety of gameplay opportunities. Whilst the terrain is set at the start of Operation Cobra, the level of militarization and destruction found across the terrain will make it suitable for scenarios set during any part of the war between any of the Axis and Allied forces.
Features
- Size - 149 km2 of land mass.
- Varied locations - Farmlands, Bocage, forests, villages, and more.
- Rivers - A number of branching rivers that stretch across the width of the map.
- Fortifications - Many pre-built fortifications defending key locations in a variety of styles.
Street Signs System
Overview
Across the Normandy terrain, you will discover a variety of road signs serving differing purposes. With the setting of 1944 and the lack of modern navigational luxuries like GPS, we strived to make a robust sign network serving as a navigational tool when exploring Normandy.
There are three categories of road signs found across the terrain, some of them coming in both a French styling and a German styling from their occupation of the region.
Location Signs
These signs come in both French and German styles and will be found alongside roads leading into a village or settlement. The French-style signs that are located alongside paved roads will also display the road number at the top.
Directional Signs
Direction signs also come in both French and German styles. They will be found alongside paved roads and the large dirt road. These signs provide a navigational aid to drivers by displaying a direction and distance to nearby settlements. French-styled signs that are alongside paved roads will also contain the number of that road and will sometimes display the settlement you're approaching or inside if appropriate.
Traffic Signs
Finally, there are traffic signs. There are six different types that were agreed upon by the League of Nations in 1928 and are the first attempt at a standardized traffic sign system. They will mark or instruct motorists on - sharp road bends, railway crossings, uneven ground, junctions, priority, and danger.
Operation Cobra
Theme Introduction
Operation Cobra was a World War II Allied offensive crucial to breaking out of Normandy. For almost seven weeks, the American, Canadian, and British forces tried penetrating firm German defenses embedded throughout the region's complex bocage without any major success. Operation Cobra turned the tide - it was launched on July 25th, 1944, taking just five days for the Allies to see their first major breakout, thus opening the gateway deep into France and initiating the final steps in defeating Nazi Germany.
Enhanced Revive System
Overview
The Enhanced Revive system offers several additional features and customization options compared to the vanilla revive system.
This system includes actions like dragging unconscious co-players or NPCs, stabilizing bleeding, and reviving the wounded. Players who are incapacitated can choose to self-revive if they have the necessary items in their inventory, allowing them to rejoin the action. They also have the option to roll over and crawl to safety or towards friendly forces, or they can call for assistance from both AI units and other players. Furthermore, AI units are also capable of reviving each other.
Detailed information
Interaction
All enhanced revive actions are done through the action menu. Each action, such as reviving, stabilizing, or dragging, will require you to hold down your action key to complete them.
For both players and AI
All playable or switchable units can be incapacitated through the enhanced revive system. This means that members of your group or other groups on your side may require your or your team's assistance or may come to assist you when unconscious.
Calling for help
When incapacitated, units will have the option to Call for help. This action will cause your character to yell for help, alerting the nearest AI unit (and players) that can assist you. Be aware that only AI that have enough First Aid Kits or the required medic trait will come to assist you.
Due to the complexity of the game world and situation, there may be some cases where the AI is unable to get to your position within a certain timeframe. If that occurs, the AI will stop trying to assist you.
Revive modes
There are three modes
Basic
- When units are injured to the point where they would be killed, they're incapacitated
- Incapacitated can't be killed when downed - they can only die from bleeding out
- Less First Aid Kits are required to revive and stabilize units
- Units take longer to bleed out
- Reviving takes less time
Advanced
- When a unit is injured to a certain degree, they're incapacitated and, when injured beyond that amount, will most likely die outright
- Incapacitated units can be killed when downed, as well as bleed out
- More First Aid Kits are required to revive and stabilize units
- Units take less time to bleed out
- Reviving takes more time
Realistic
- When a unit gets injured to a point where they would be killed without the system, they will usually die in this mode too
- Incapacitation will occur only when a unit reaches a point near death
- Incapacitated units can be killed when downed, as well as bleed out
- Even more First Aid Kits are required to revive and stabilize units
- Units take much less time to bleed out
- Reviving takes much longer
- Medic trait multiplier is reduced
- Only units with the medic trait can revive units
Mission parameters
Most default parameters for the enhanced revive system are based on the selected difficulty level by default, but can be customized via the mission parameters or module as mission maker.
Most importantly, the higher the difficulty, the more first aid kits are required and the less time before the injured bleeds out.
The available parameters include:
- Disable the revive system entirely
- Choose between basic, advanced, and realistic mode (the chance to die outright for the amount of damage taken)
- Selecting whether or not the medic trait is required to revive a unit
- A multiplier on how much faster medics operate
- The time it takes to revive a unit
- The time it takes to force respawn
- The time units have until they bleed out from their injuries
- The amount of First Aid Kits required to revive
- If stabilizing is required to stop bleeding
- If 3D icons are displayed to help locate incapacitated units
- If an unconscious unit is to call for assistance automatically
- If AI units will automatically withstand their injuries
AI Tweaks System
Overview
The AI Tweaks system improves in various ways the AI behavior and their gameplay influence.
Usage
When activated via module or functions, the system's functions operate in the background to adjust AI behavior. Depending on the mission setup, it can be active for one or multiple sides.
Detailed information
Main features
- Info Share: This improves the situational awareness and combat responsiveness of fighting forces via simulated voice and radio-based knowledge sharing between groups.
- Unstuck: This system tries to restore the mobility of AI when it's stuck due to various pathfinding issues - applies to both infantry and ground vehicles.
- Collision Insurance: The safety code for AI to avoid harm or damage caused by vehicles colliding with allied mobile infantry and other vehicles.
Additional improvements
- Manning vehicle turrets by passengers to engage enemies
- Improved movement group cohesion to avoid soldiers being left behind
- Autonomous rearming to avoid AI running out of ammo
- Dynamic and situational formation adjustment for combat vs. non-combat phases
- More reliable embarking of vehicles under various conditions
Configuration
Mission parameters may allow the customizing of certain elements of the system for the given play-session in multiplayer.
Mission maker setup and use
The advanced customization of AI is possible via the module to a large extent and even more so via scripting.
Detailed documentation is found in the Spearhead 1944.
Retreat Flee Surrender System
Overview
The Retreat Flee Surrender system simulates the stress, threat perception, and unit morale that may make AI decide to retreat from their current position, drop their weapons and flee the battlefield or surrender altogether. As such, the enemy doesn't have to be killed, yet different actions may also lead to overcoming the opposing force. Finally, POWs can be questioned to receive information on potential enemy forces and their locations.
Usage
When activated via module or functions, the system's functions operate in the background to calculate the AI behavior. Depending on the mission setup, it can be active for one or multiple sides. Players won't be directly affected, yet players do influence the AI through their actions.
Detailed information
Units in the scenario that are affected by this system will gain a special stress value that will increase and decrease depending on the current situation (being under fire, wounds, losses, lack of ammo, nearby threats, or allies). Depending on the stress value and the proximity of hostiles, units may be put into one or more non-combatant states. They may temporarily retreat, abandon weapons and flee permanently, become shocked, or surrender. Surrendered enemies, when approached, become POWs and may be interrogated with some chance to get intel about enemy presence in the area. POWs are directed towards certain areas where they will remain. Units in the permanent non-combatant state may get deleted when far enough away from any player.
Configuration
Mission parameters may allow customizing certain elements of the system for the given play-session in multiplayer.
Mission maker setup and use
The advanced customization of RFS is possible via the module to a large extent and even more so via scripting.
Detailed documentation is found in the Spearhead 1944.
Indirect Fire Support System
Overview
The Indirect Fire Support system provides battlefield support in various forms: mortars, artillery, CAS, and even direct support from nearby tanks.
The support occurs both by player call-in requests, as well as automatically, and is based on the available intel of enemy threats and capabilities in any given moment.
Usage
When activated via module or functions, the system operates the autonomous form of fire support in the background, depending on indirect fire support assets present in the scenario and mission setup without any action required from the player. That said, by spotting enemy units and vehicles, players, as well as friendly AI forces, will effectively provide information about possible targets to the allied supporting assets, which may affect their decision-making and behavior.
The called-in form of indirect fire support is under the player's direct control. What operations are available and any limits to the activities depend on the mission-specific setup. By using the action menu and hold actions, players can call in mortar, artillery, or CAS support or ask nearby allied tanks for direct fire support. Players can also send a request for emergency fire support that's provided by any available asset at a given moment.
Detailed information
Autonomous fire support for all sides is based on the presence of the artillery assets in the scenario and CAS presence defined in the mission setup. Amongst known enemy units and vehicles, the most tempting targets are chosen when an allied unit is at the appropriate distance to serve as the forward operator (FO). Potential targets must also meet a few additional requirements - including low enough risk for friendly fire.
When the target is accepted, the allocated artillery asset will start the aim procedure, which takes around 20 seconds, in order to take into account the target's movement vector with the assumption that it will continue to move.
Autonomous artillery barrage is a subject of both general aim error and individual round spread. Depending on the mission setup, usually, the main firing action is preceded by a single spotting round - and in the case of players under threat, a few notifications about the incoming fire.
Meanwhile the called-in artillery support is fired at the location requested by the original caller. However, each round is still subjected to a statistical spread, leading to certain inaccuracy.
Via mission setup, certain areas or objects may be blacklisted. As a result, calling fire support to strike those will be impossible. The same applies to the immediate vicinity of the caller.
CAS fire support, both autonomous and called-in, works in a similar way. Typically, though, it's much more precise against moving vehicles since the pilot can correct his aim till the last moment.
Emergency support calls are meant as a desperate last resort. The first available support provider of any type will automatically pick a hostile target near the caller that seems the most threatening, without any friendly fire avoidance - so beware. It's also possible there will be no available support at all.
In general, depending on mission setup and game difficulty, called-in fire support will have various usage conditions and limitations, including radio availability, amount of calls, time interval between the calls, or inability to call the same type of support many times simultaneously. The current status of support availability, if any is present at all, is shown directly in the action menu.
Finally, if the player is close enough to an allied tank, it may be possible to point the tank gunner to a target and engage via the action menu.
Configuration
Mission parameters may allow customization of certain elements of the system for the given play-session in multiplayer mode.
Mission maker setup and use
The advanced customization of IFS is possible via the module to a large extent and even more so via scripting
Detailed documentation is found on the Spearhead 1944.
Indirect Fire Support
During the game, you may encounter or cause various indirect fire support events.
Soldiers present on the battlefield, AI and players alike, will automatically report spotted hostile targets to HQ. HQ, according to its own judgment, may issue orders to attack a worthy target with its own artillery or aerial asset if present and not busy elsewhere.
Sometimes, players also have the possibility to call in such support directly.
Called-in Fire Support
Select and hold a support action to call in the chosen type of support to a position or target in the middle of the screen.
Avoid requesting support too close to your own or allied positions - ordnance has a considerable blast radius and spread.
Custom Difficulty Adjustment System
Overview
To make Arma 3 more playable and enjoyable with and against AI, the Custom Difficulty Adjustment system allows various aspects of AI behavior, damage taken/dealt, skill, and much more to be adjusted automatically.
Usage
The system needs to be activated via module or scripting for the given mission.
Detailed information
The adjustments are based on the currently active difficulty level from Arma 3 itself. If the Custom difficulty level is used, the settings for Recruit difficulty are applied as the baseline.
When exposed as mission parameter for a mission, it's possible to allow an admin in multiplayer mode to change the Custom to CDA level mapping for the session.
The basic design is:
- 1. Recruit: For new Arma players. More of a movie experience on rails presenting only a very limited challenge. The focus is on the player (or friendly AI) easily eliminating enemies while completing the mission tasks.
- 2. Regular: For average Arma players or with only limited SP/AI play or unit commanding experience. Still has various helpers, yet this is no longer child's play.
- 3. Veteran: For experienced Arma veterans. Almost no helpers, mostly the raw Arma 3 system - quite a challenge!
- 4. Hardcore: A new setting with zero helpers, minimal interface, and super AI for the maximum challenge. Recommended to use only after having completed a mission in Veteran.
Configuration
Mission parameters may allow customization of certain elements of the system for the given play-session in multiplayer.
Mission maker setup and use
The advanced customization of CDA via scripting.
Detailed documentation is found in the Spearhead 1944.
Nametags
Permanent Nametags Enabled
Double tap "zirkumflex" to disable them.
Permanent Nametags Disabled
Double tap "zirkumflex" to enable them.
Nametags
Nametags can be shown by pressing "zirkumflex". Double tap "zirkumflex" to toggle permanent mode.
Enhanced Server Browser
Overview
The Enhanced Multiplayer Menu [EMM] is a new in-game server browser for Arma 3. The vision is to make the complex multiplayer environment easier to navigate and enable players to explore the diverse community-driven server and game modes landscape.
Main Goals
- Speed - gets you those servers at lightning speed
- Relevance - show you only those servers you're looking for
- Ease of use - responsive, fun, and easy
- Expose community game modes - learn about and explore the wide variety. Via game mode images, descriptions, and default sorting by server activity (instead of raw player numbers or ping)
- Simplify mod use in MP - leave the complex and confusing situation behind, get clear information and assistance to enjoy the new mods heaven.
Key Features
- Detects your current active CDLC(s) and/or mods to show you only the relevant servers by default
- Game mode focused server selection [Quick Play] - when looking for a specific game mode or experience is now easy
- Recommended server set [Simple Server Browser] - if you just want to play a quick game without hassle and you're open to trying a new experience or server, you will be served a set of servers to choose from and hop into the action
- Filter customization [Advanced Server Browser] - when you're looking for something very specific or want to choose from your own set of filter profiles, you can go as crazy now as you want
- Rejoin servers easily [Last Servers] - in case you want to continue where you left off last time or get back to your preferred server (next to the classic Recent/Favorites tabs)
- Mod matching - the system will warn you ahead of time if you may not be able to join a given server and provides an overview of mod mismatches
- Various convenience features like Exclude Game Modes, Server History, Export Server Details, including links to website, Discord, qq, Teamspeak, or Connection Data (IP:PORT+PW) and Server Password Caching
Detailed information
Detailed documentation is found on the Arma 3: Enhanced Multiplayer Menu.

