Eden Editor: Entity Placing: Difference between revisions
mNo edit summary |
mNo edit summary |
||
| Line 1: | Line 1: | ||
<div style="width:640px; margin: 0 auto 0 auto;"> | |||
New '''assets''' can be added to the scenario by placing them. Once added, they become editable '''entities'''. | New '''assets''' can be added to the scenario by placing them. Once added, they become editable '''entities'''. | ||
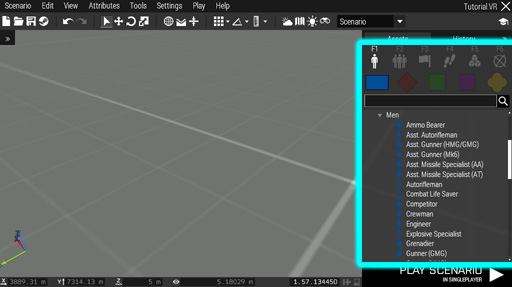
All available assets can be previewed in the [[Eden_Editor:_Asset_Browser|asset browser]]. They are divided by type and its specific sub-type. They are further sorted into categories. Assets themselves are represented by an icon. | All available assets can be previewed in the [[Eden_Editor:_Asset_Browser|asset browser]]. They are divided by type and its specific sub-type. They are further sorted into categories. Assets themselves are represented by an icon. | ||
[[File:3den assetBrowser.jpg|center]] | |||
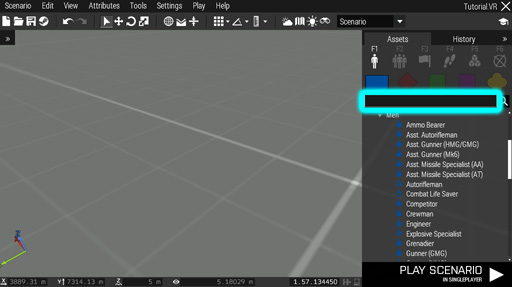
You can quickly search for the desired asset name. Switching between types and sub-types will not erase the search field. | You can quickly search for the desired asset name. Switching between types and sub-types will not erase the search field. | ||
[[File:3den assetSearch.jpg|center]] | |||
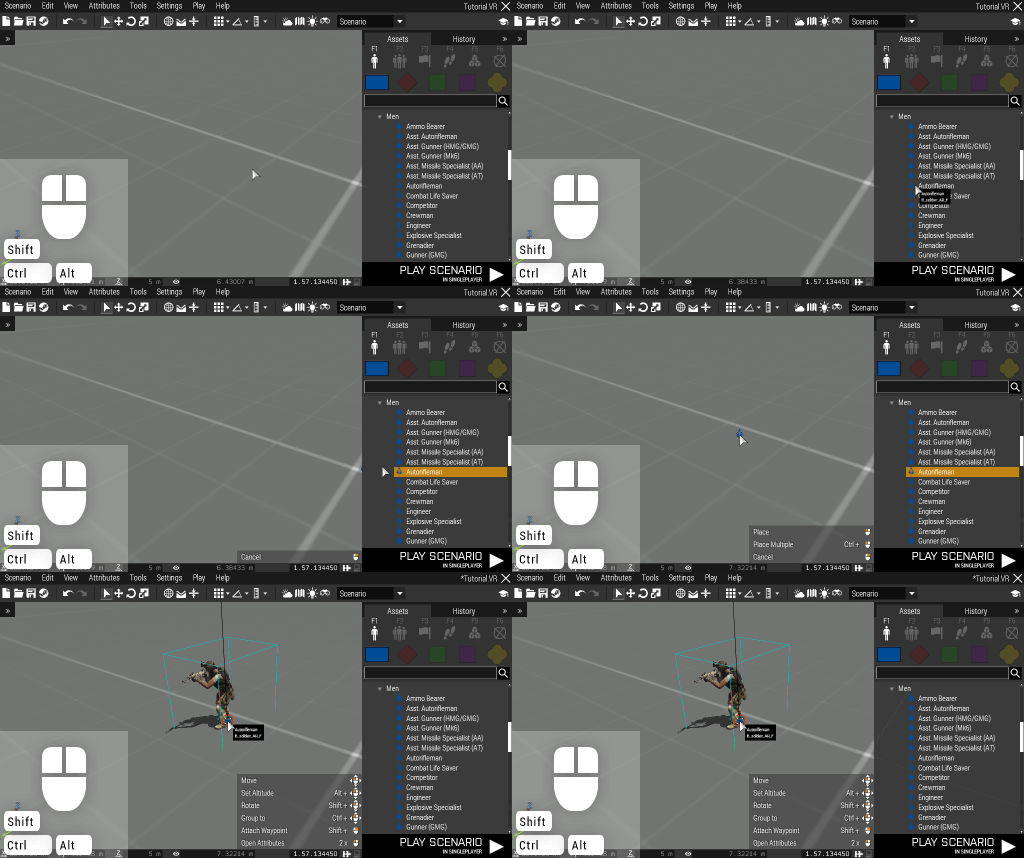
To place an entity, click the '''Left Mouse Button''' on its name in the asset browser, and then click the '''Left Mouse Button''' on the desired position in the view. The entity will be selected afterwards and you can interact with it (e.g., give it [[Eden_Editor:_Waypoint|waypoints]] or delete it). | To place an entity, click the '''Left Mouse Button''' on its name in the asset browser, and then click the '''Left Mouse Button''' on the desired position in the view. The entity will be selected afterwards and you can interact with it (e.g., give it [[Eden_Editor:_Waypoint|waypoints]] or delete it). | ||
[[File:3den placeClick.gif|center]] | |||
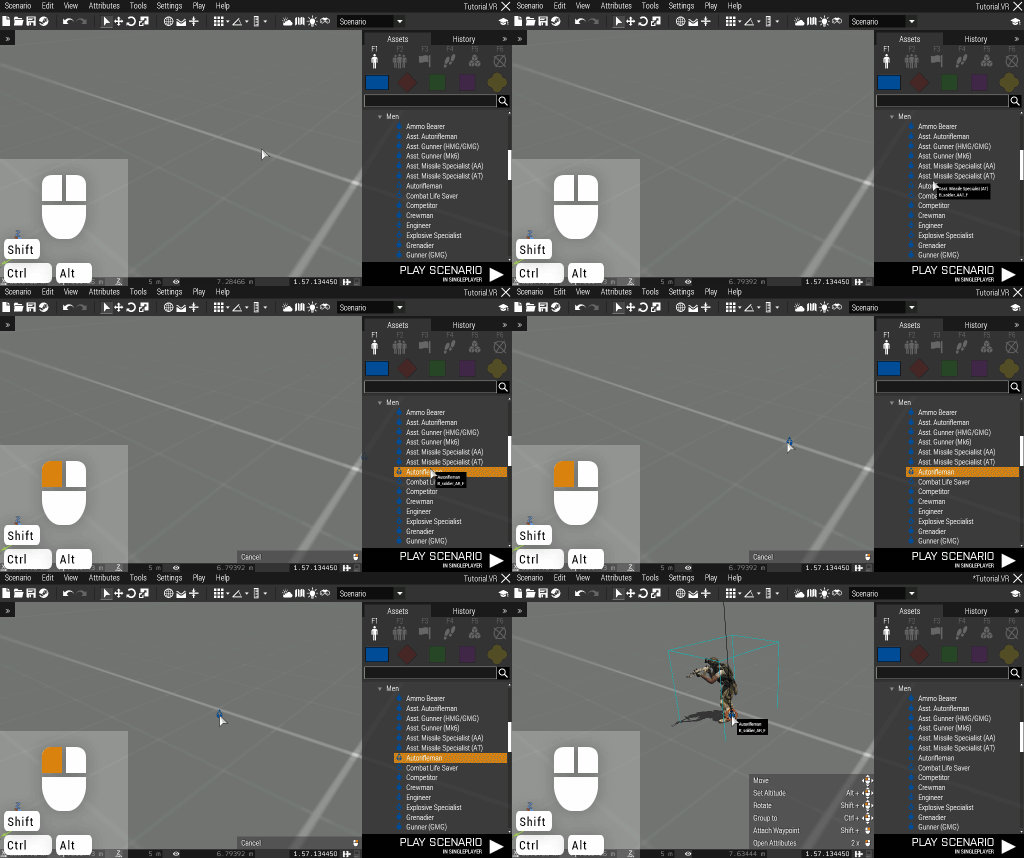
Alternatively, you can place an entity by '''dragging''' it from the asset browser to the desired position in the view. | Alternatively, you can place an entity by '''dragging''' it from the asset browser to the desired position in the view. | ||
[[File:3den placeDrag.gif|center]] | |||
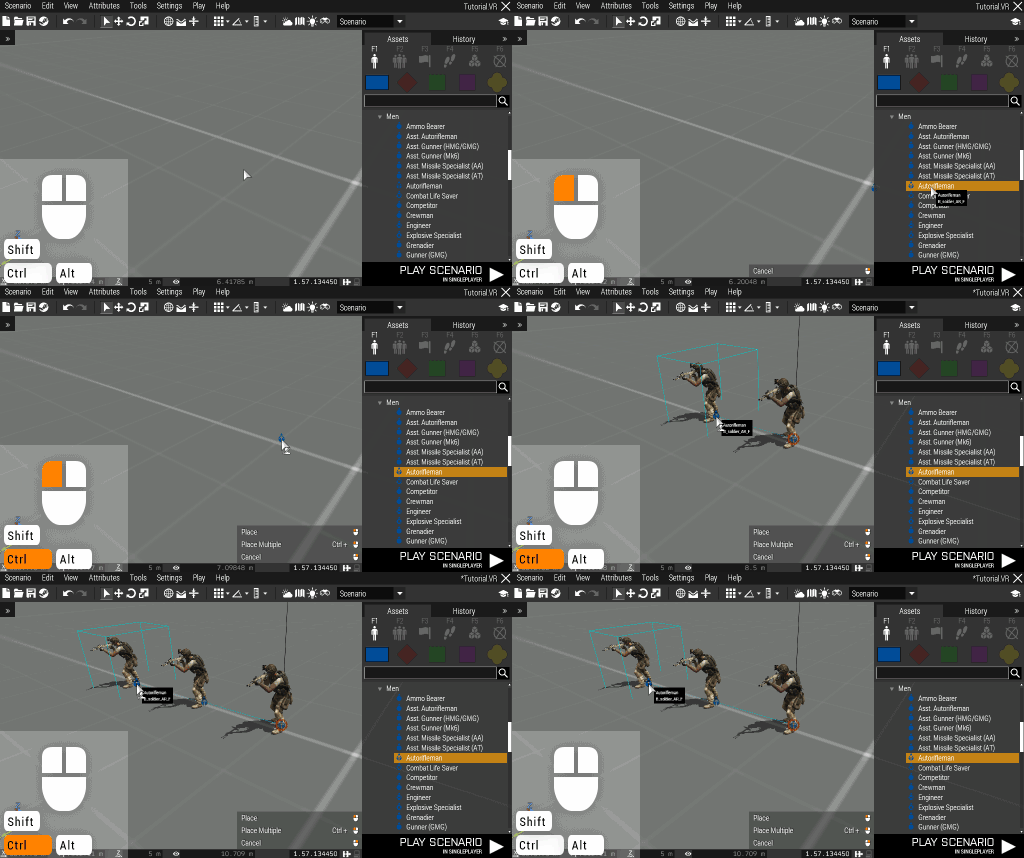
To place multiple entities in a row, '''hold Ctrl''' while placing an entity. It will preserve the placing operation, so you can continue adding more entities. | To place multiple entities in a row, '''hold Ctrl''' while placing an entity. It will preserve the placing operation, so you can continue adding more entities. | ||
[[File:3den placeMulti.gif|center]] | |||
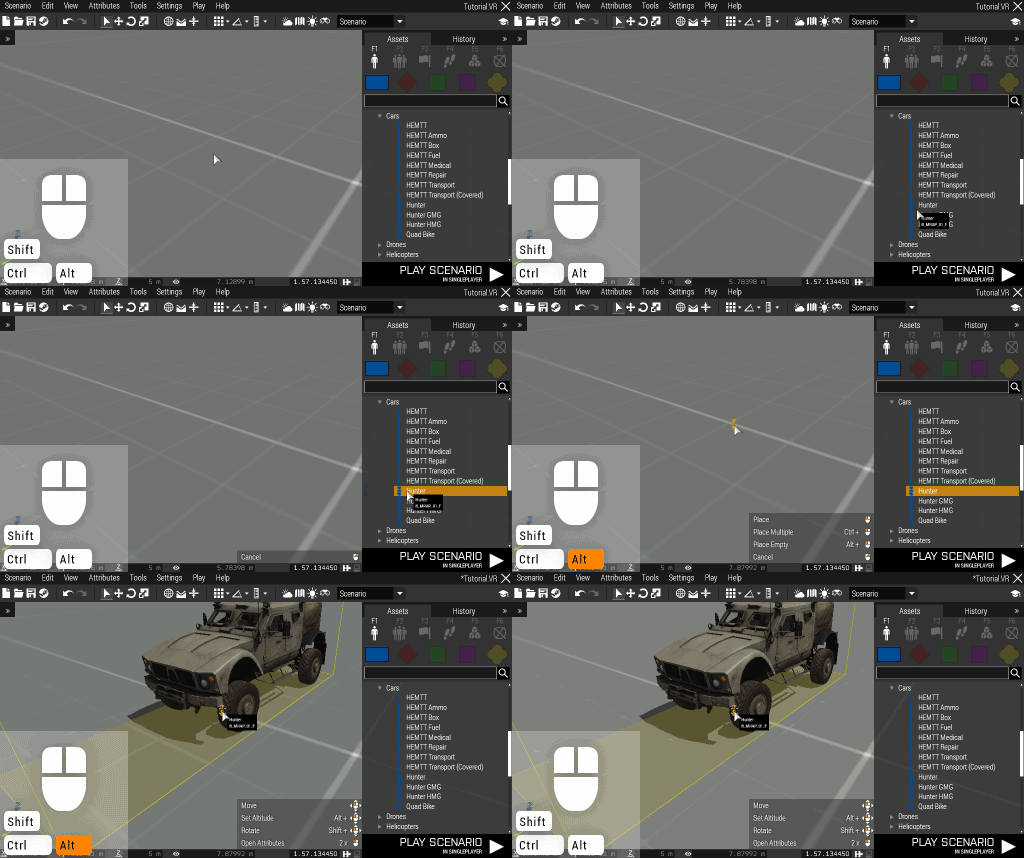
By default, vehicles are placed with crew inside. To add an empty vehicle, '''hold Alt''' while placing it. | By default, vehicles are placed with crew inside. To add an empty vehicle, '''hold Alt''' while placing it. | ||
[[File:3den placeEmpty.gif|center]] | |||
</div> | |||
[[Category:Eden Editor|Entity Placing]] | [[Category:Eden Editor|Entity Placing]] | ||
[[Category:Eden Editor: Editing|Entity Placing]] | [[Category:Eden Editor: Editing|Entity Placing]] | ||
Revision as of 16:20, 10 February 2016
New assets can be added to the scenario by placing them. Once added, they become editable entities.
All available assets can be previewed in the asset browser. They are divided by type and its specific sub-type. They are further sorted into categories. Assets themselves are represented by an icon.
You can quickly search for the desired asset name. Switching between types and sub-types will not erase the search field.
To place an entity, click the Left Mouse Button on its name in the asset browser, and then click the Left Mouse Button on the desired position in the view. The entity will be selected afterwards and you can interact with it (e.g., give it waypoints or delete it).
Alternatively, you can place an entity by dragging it from the asset browser to the desired position in the view.
To place multiple entities in a row, hold Ctrl while placing an entity. It will preserve the placing operation, so you can continue adding more entities.
By default, vehicles are placed with crew inside. To add an empty vehicle, hold Alt while placing it.
