Mission Export
Two export methods are available, both with certain pros and cons.
Mission Format
Older export variant working since Arma: Cold War Assault. Mission PBO contains only mission folder itself and additional options are limited, e.g. you cannot have multiple missions in one file and in case you need mission specific addon, it has to be created separately.
Multiplayer missions are sent by server to every connected user, occasionally leading to increased bandwidth. It's recommended not to use any large files (pictures, sounds, ...) to prevent it.
File itself is always named in following format
<mission name>.<world name>.pbo
Examples:
TopGun.abel.pbo
SpyGame.Chernarus.pbo
Domino.ProvingGrounds_PMC.pbo
World name matches the class in CfgWorlds.pbo
Installation
Put missions/campaigns in following folders or in folders of the same names in mod subfolders.
Singleplayer Missions
%ROOT%\Missions
Multiplayer Missions
%ROOT%\MPMissions
Campaigns
%ROOT%\Campaigns
Export
Ingame
- When in mission editor, click on Save button.
- Select 'Export to single-missions' or 'Export to multiplayer missions', depending on type of your mission
Mission PBO was created in Missions or MPMissions folder in the game's root.
- You can publish the mission directly from Editor in [Arma 3] to Steam Workshop . Click on the Steam icon and provide necessary data: name, description, tags and image.
External
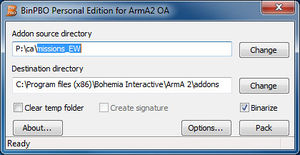
- Pack mission folder using BinPBO or other preferred packing tool.
Armed Assault introduced mission export based on addon structure, giving designers more control of PBO structure. Missions or campaigns can be grouped in single PBO (like official missions) or with other supporting addons like new objects or functions.
Multiplayer missions has to be installed before the game is run. No file size limitations exists.
Installation
Put missions/campaigns in following folder or in folder of the same names in mod subfolders.
%ROOT%\Addons
Export
- Create folder with name of the addon (example: MyMission)
- Copy mission folder into the addon folder (example: MyMission\MissionFolder.World)
- Create Config.cpp in addon folder with CfgPatches and CfgMissions classes (example: MyMission\config.cpp)
class CfgPatches
{
	class MyAddonClass
	{
		units[] = {};
		weapons[] = {};
		requiredVersion = 1.0;
		requiredAddons[] = {};
	};
};
class CfgMissions
{
	class Missions
	{
		class MyMissionClass
		{
			directory = "MyMission\MissionFolder.World";
		};
	};
};
- Pack addon folder using BinPBO or other preferred packing tool. It's recommended not to binarize it.
Format Comparison
| Feature | Mission Format | Addon Format |
|---|---|---|
| Ingame Export | ||
| External Export | ||
| Multiple missions in one file | ||
| Custom addon in mission file | ||
| Localized mission name | ||
| Designer controlled subfolders | ||
| User controlled subfolders | ||
| Ingame download of MP mission |
