Raptor – User
mNo edit summary |
Lou Montana (talk | contribs) m (Add ARG 2013 link back) |
||
| (11 intermediate revisions by 3 users not shown) | |||
| Line 1: | Line 1: | ||
{{ | {{UserDefaultPage}} | ||
{{Link|Arma 3: Alternate Reality Game 2013}} | |||
===# I. Download and play=== | |||
<spoiler text="Show Yoma Arma Addon Synchroniser article"> | |||
=== # I. Download and play === | |||
The OAC files are now available via '''YomaTools''' (Yoma Arma Addon Synchroniser). | The OAC files are now available via '''YomaTools''' (Yoma Arma Addon Synchroniser). | ||
| Line 30: | Line 33: | ||
====Detailed process description==== | ==== Detailed process description ==== | ||
'''Here is a step by step guide.''' | '''Here is a step by step guide.''' | ||
| Line 38: | Line 41: | ||
{{Clear}} | |||
[[Image:Startup.jpg|thumb|600 px|Startup|left]] | [[Image:Startup.jpg|thumb|600 px|Startup|left]] | ||
{{Clear}} | |||
1. Start YomaTools. | 1. Start YomaTools. | ||
{{Clear}} | |||
[[Image:Servername.jpg|thumb|600 px|Servername|left]] | [[Image:Servername.jpg|thumb|600 px|Servername|left]] | ||
{{Clear}} | |||
2. For '''Server name''' insert: '''OAC Project'''. | 2. For '''Server name''' insert: '''OAC Project'''. | ||
{{Clear}} | |||
[[Image:Serverurl.jpg|thumb|600 px|Serverurl|left]] | [[Image:Serverurl.jpg|thumb|600 px|Serverurl|left]] | ||
{{Clear}} | |||
3. For '''Addon Server URL''' insert: '''http://oac.quest-link.net/updater'''. | 3. For '''Addon Server URL''' insert: '''http://oac.quest-link.net/updater'''. | ||
{{Clear}} | |||
[[Image:Save_server.jpg|thumb|600 px|Save_server|left]] | [[Image:Save_server.jpg|thumb|600 px|Save_server|left]] | ||
{{Clear}} | |||
4. Now save the server settings on the '''save''' button. | 4. Now save the server settings on the '''save''' button. | ||
{{Clear}} | |||
[[Image:Serverlist.jpg|thumb|600 px|Serverlist|left]] | [[Image:Serverlist.jpg|thumb|600 px|Serverlist|left]] | ||
{{Clear}} | |||
5. The '''OAC Project''' server is now available in the list box at the top. | 5. The '''OAC Project''' server is now available in the list box at the top. | ||
{{Clear}} | |||
[[Image:Settings.jpg|thumb|600 px|Settings|left]] | [[Image:Settings.jpg|thumb|600 px|Settings|left]] | ||
{{Clear}} | |||
6. Next you should check '''Settings''' to verify if it found your ArmA directory.<br> | 6. Next you should check '''Settings''' to verify if it found your ArmA directory.<br> | ||
Normally this works automatically. | Normally this works automatically. | ||
{{Clear}} | |||
[[Image:Mod_addon_list.jpg|thumb|600 px|Mod_addon_list|left]] | [[Image:Mod_addon_list.jpg|thumb|600 px|Mod_addon_list|left]] | ||
{{Clear}} | |||
7. Now you should select the '''OAC Project''' server from the server list.<br> | 7. Now you should select the '''OAC Project''' server from the server list.<br> | ||
You will see all '''packages''' from the '''OAC Project''' server in the large list box below.<br> | You will see all '''packages''' from the '''OAC Project''' server in the large list box below.<br> | ||
{{Clear}} | |||
[[Image:Download.jpg|thumb|600 px|Download|left]] | [[Image:Download.jpg|thumb|600 px|Download|left]] | ||
{{Clear}} | |||
8. The last step is to click on the '''Download all mods''' button.<br> | 8. The last step is to click on the '''Download all mods''' button.<br> | ||
YomaTools will automatically download all files from the server to your ArmA folder and create the mod folders. | YomaTools will automatically download all files from the server to your ArmA folder and create the mod folders. | ||
! Do NOT forgot to load | {{Feature|important|! Do NOT forgot to load the mod folders. YomaTools can do that for you in the '''Launch Game''' tab.}} | ||
! Note that you need to download a few addons yourself, if you want to use the '''@oac-optional-unit-replacement'''. | {{Feature|important|! Note that you need to download a few addons yourself, if you want to use the '''@oac-optional-unit-replacement'''.}} | ||
</spoiler> | |||
Latest revision as of 23:28, 17 March 2024
|
Raptor | |
My Sandbox
User:Raptor/Sandbox |
My Contributions
Special:Contributions/Raptor |
Arma 3: Alternate Reality Game 2013
# I. Download and play
The OAC files are now available via YomaTools (Yoma Arma Addon Synchroniser).
First please download the newstest version of Yoma tools at http://yomatools.be.
Hint: You find the download in the left navigationbar.
Once you have downloaded and installed YomaTools, add a new server with following data:
Server name: OAC Project
Server url: http://oac.quest-link.net/updater
Press Download all mods to get all files, missions and campaigns (large
button on the lower right).
You can also have a look at the different packages by clicking on in the
respective line and de-/select the files of your interest.
Required packages to run OAC:
- @ace_islands\addons
- @oac\addons
- dta\userconfig
- dta\userconfig\ace_island_config
Detailed process description
Here is a step by step guide.
Please head over to the OAC forum if questions remain.
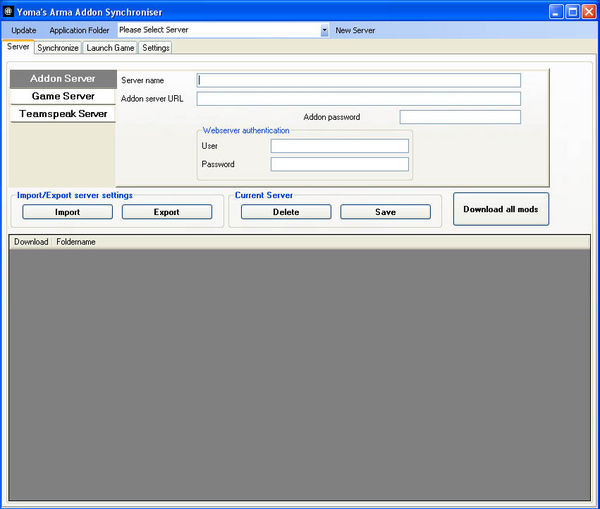
1. Start YomaTools.
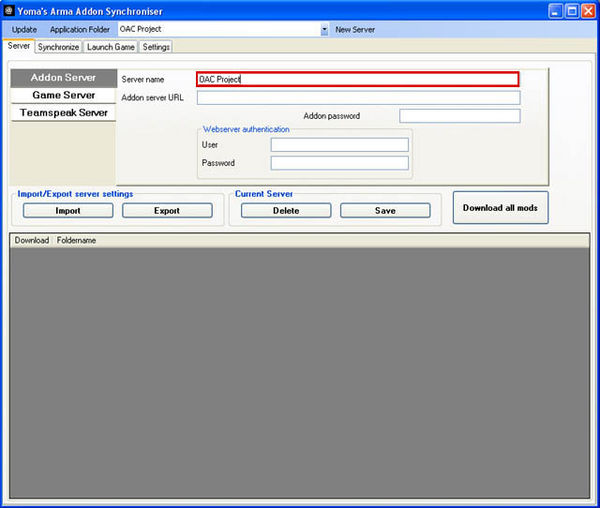
2. For Server name insert: OAC Project.
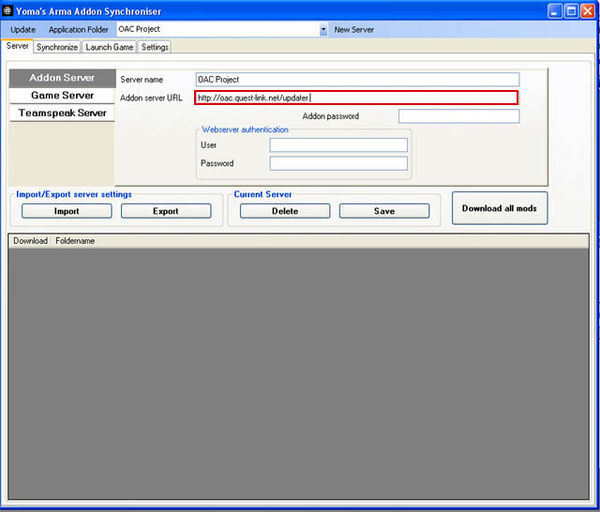
3. For Addon Server URL insert: http://oac.quest-link.net/updater.
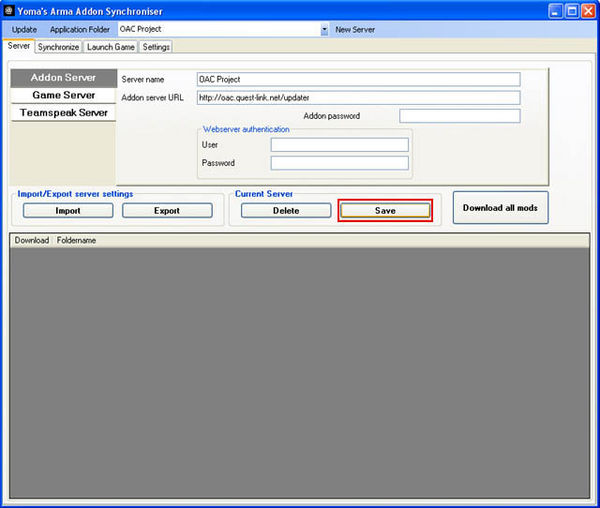
4. Now save the server settings on the save button.
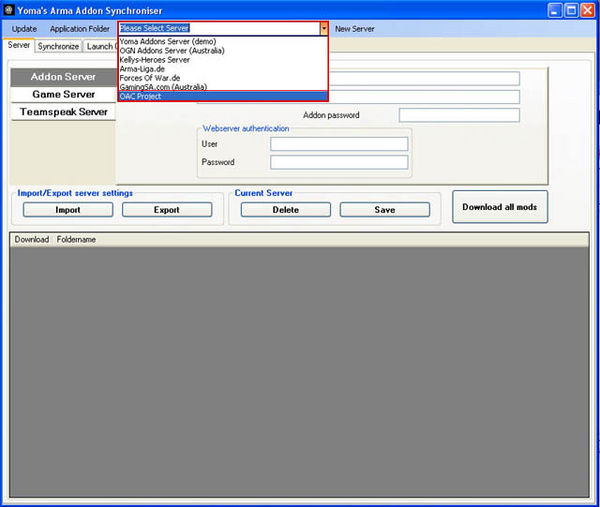
5. The OAC Project server is now available in the list box at the top.
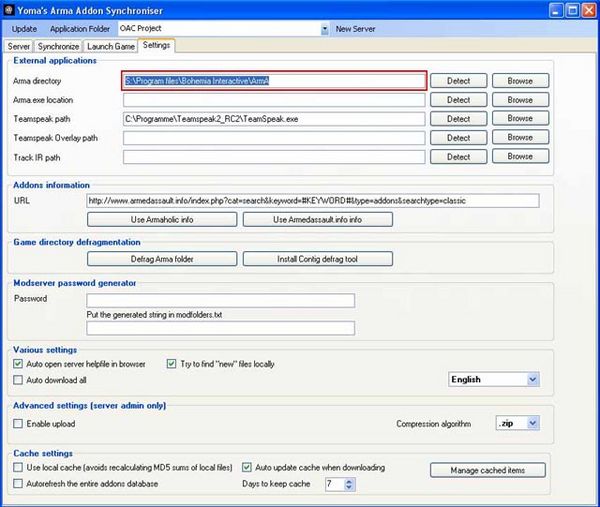
6. Next you should check Settings to verify if it found your ArmA directory.
Normally this works automatically.
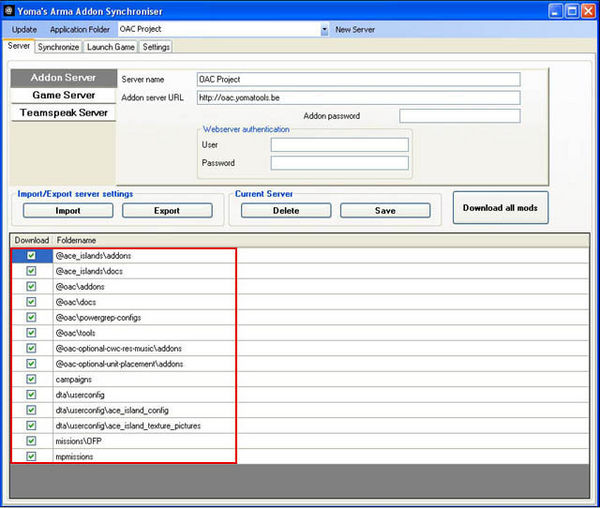
7. Now you should select the OAC Project server from the server list.
You will see all packages from the OAC Project server in the large list box below.
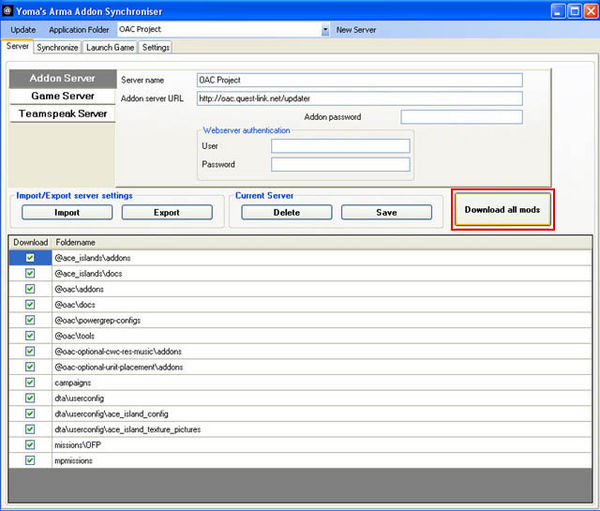
8. The last step is to click on the Download all mods button.
YomaTools will automatically download all files from the server to your ArmA folder and create the mod folders.
