Car Creation/Prefab Configuration – Arma Reforger
Adding basic car configuration
Overview
Following topics will be covered in this paragraph
- Creation of new car
- Configuration of actions
- Configuration of crew
- Basics of wheeled simulation
- How to change engine parameters
- Changing of driving characteristics
Creating new prefab
When creating new vehicle, it's recommended to use one of the core vehicle prefabs located in Prefabs\Vehicles\Core. This way, most of the crucial components will be already present in new car prefab with already some of the parameters filled in.
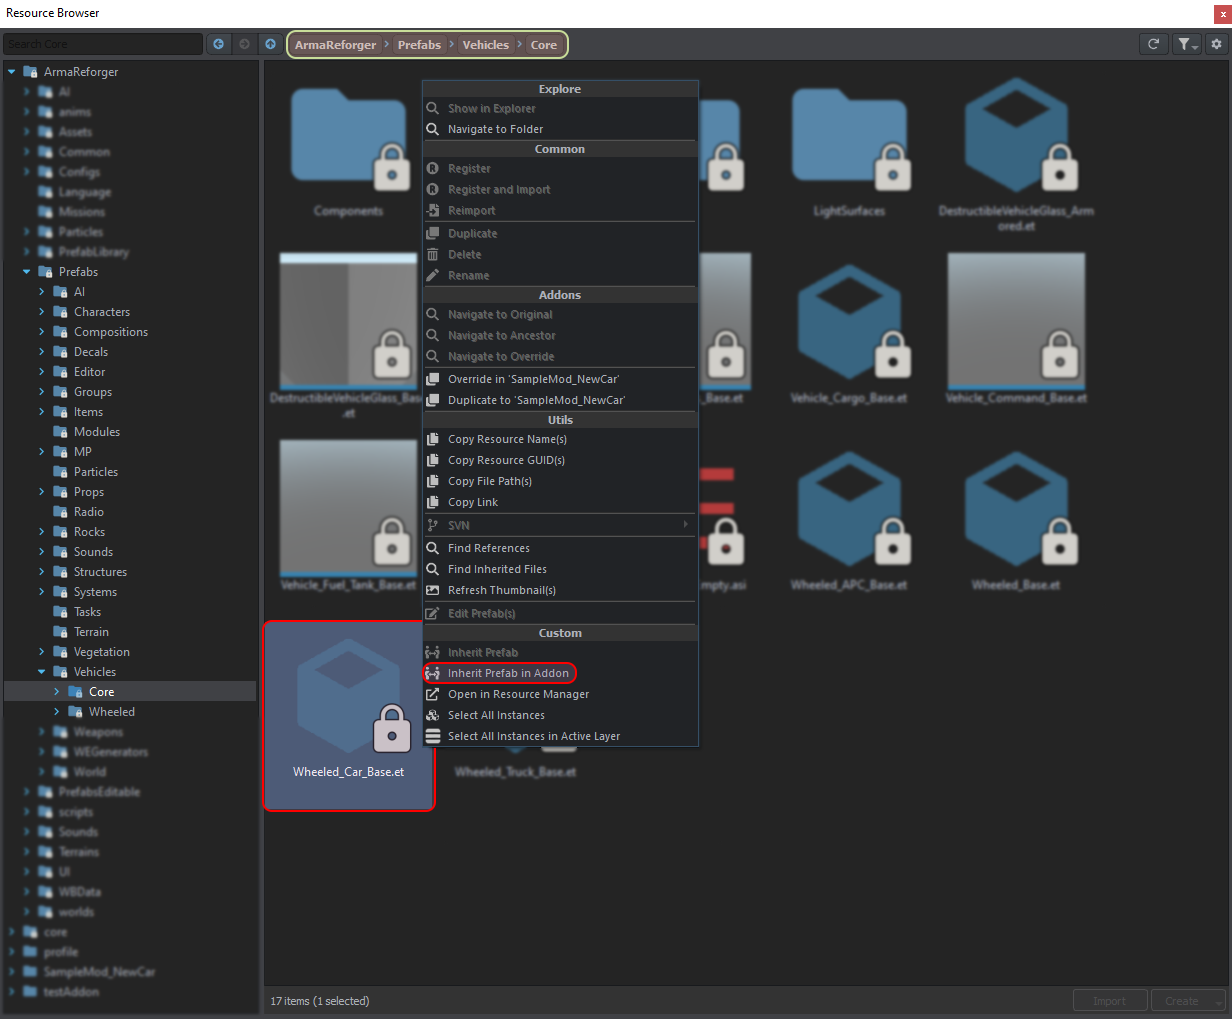
Since this asset is a car, Wheeled_Car_Base.et is going to be used as base. Easiest way to do so is using Resource Browser - after navigating to Prefabs\Vehicles\Core, click on Wheeled_Car_Base.et with Right Mouse Button and select from context menu Inherit in option. After selecting name of new prefab, the only thing left to do is moving prefab that prefab to more appropriate folder in addon.
Other method involves duplicating some already existing prefab - this might be handy if you are creating something similar to already existing cars. For instance if you are making some car with 2 axis, you could use Duplicate in "addon name" function on UAZ469.et prefab and then start to adjust parameters of newly duplicated file.
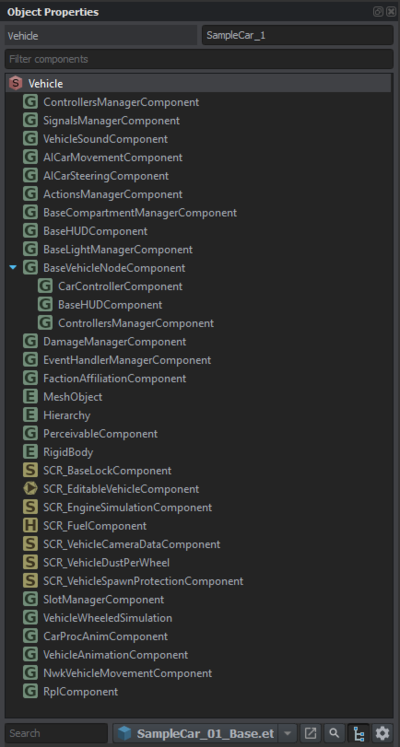
New SampleCar_01_Base.et prefab should already have almost all necessary components for adding new car to the game. Among missing components there are things like:
- SlotManagerComponent - this component is used to attach new elements to the vehicle like destructible parts (windows) or completely new elements (machine-gun mounts)
- VehicleSoundComponent - handles sounds that vehicle emits
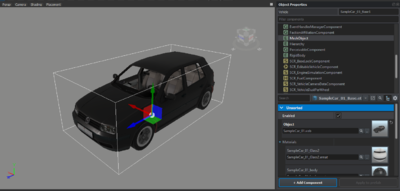
With that prefab already being present, it's possible to starting changing properties so new car is resembling newly imported mesh. To do so, MeshObject component has to be changed and SampleCar_01.xob need to be applied to Object field. As a result, SampleCar_01.xob mesh should be now visible in World Editor view port.
| Components list | MeshObject component with SampleCar_01.xob |
|
|
Creating actions
Actions Manager Component
Before even vehicle can be entered, it requires setting up actions so engine knows where to show certain options like get in dialog. Those actions are configured in ActionsManagerComponent.
In this component you can find Action Contexts, which serves as a library of actions (somewhat similar to memory LOD in RV engine but with additional layer of information attached to it) & Additional Actions. Usually contexts defined in this component are used by other components (like BaseCompartmentManagerComponent)
Each context defined in Action Contexts has option to change Context Name, Position, Radius & set if action is Omnidirectional. Position of the context can be either tied to bone in hierarchy or manually entered via gizmo controls. It is also possible to combine those two methods.
Allow Cross Hierarchy option is used when vehicle consist of multiple prefabs (attached via i.e. SlotManagerComponent) where it's desired to be able use actions from attached components.
Creating action contexts
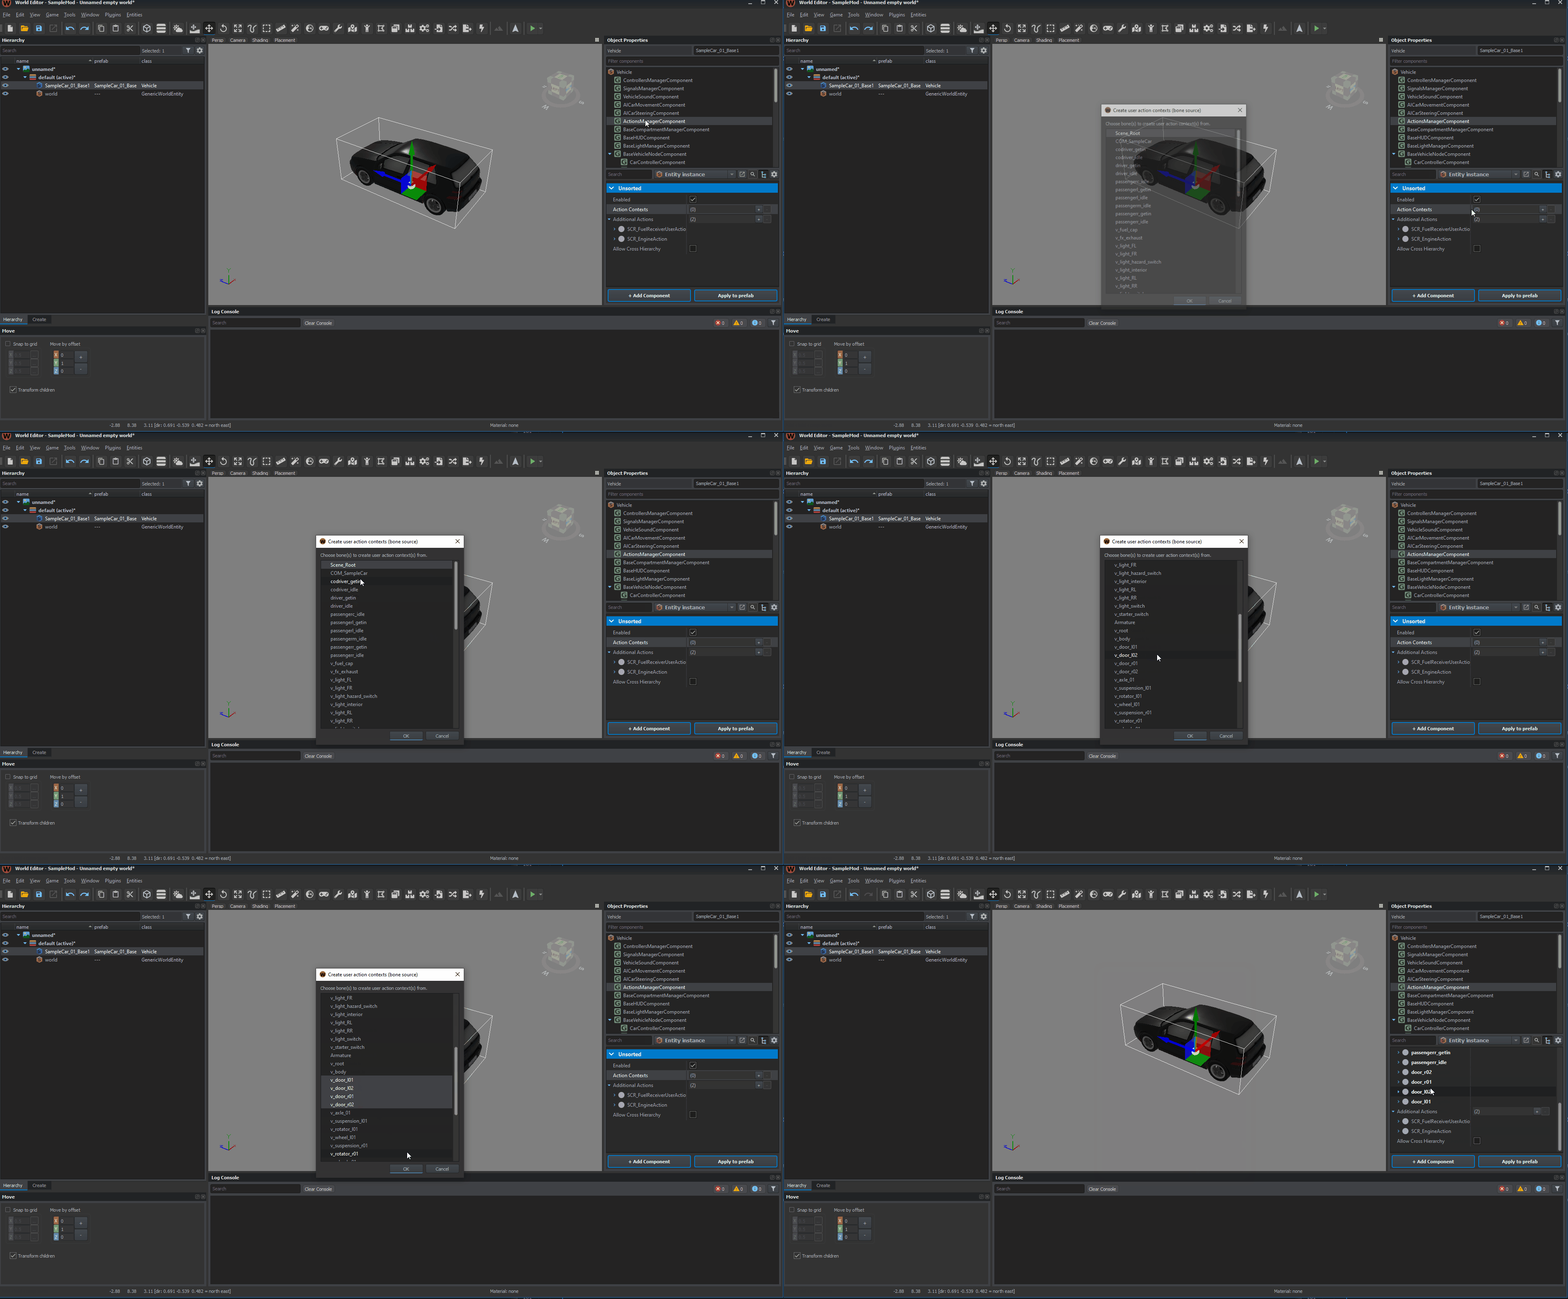
If vehicle has already some bones or sockets which could be used as position for action context, then it's possible to use Create user action context(s) from bones option which is available in context menu of ActionsManagerComponent. This menu can be invoked by clicking with Right Mouse Button on ActionsManagerComponent in components list.
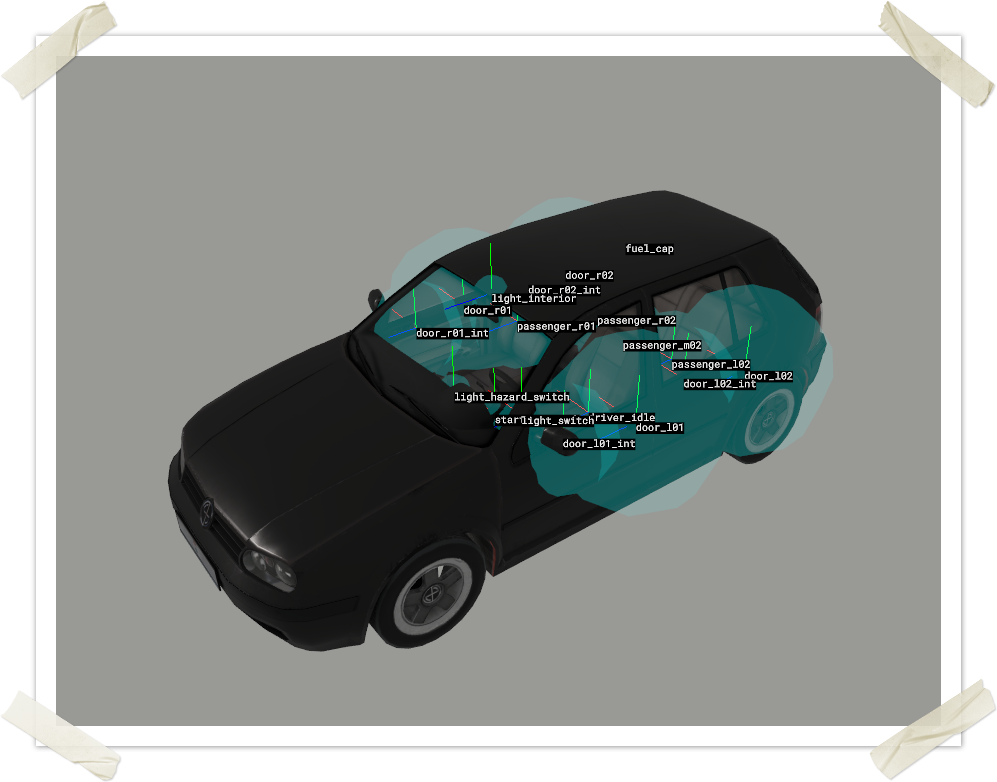
It's also worth to mention that this context menu has few other options, which are quite useful for setting up & debugging of context actions. Below you can see in action transform gizmos (activated via Toggle context(s) transform gizmo visualization ) and radius visualization (activated via Toggle context(s) radius visualization option).
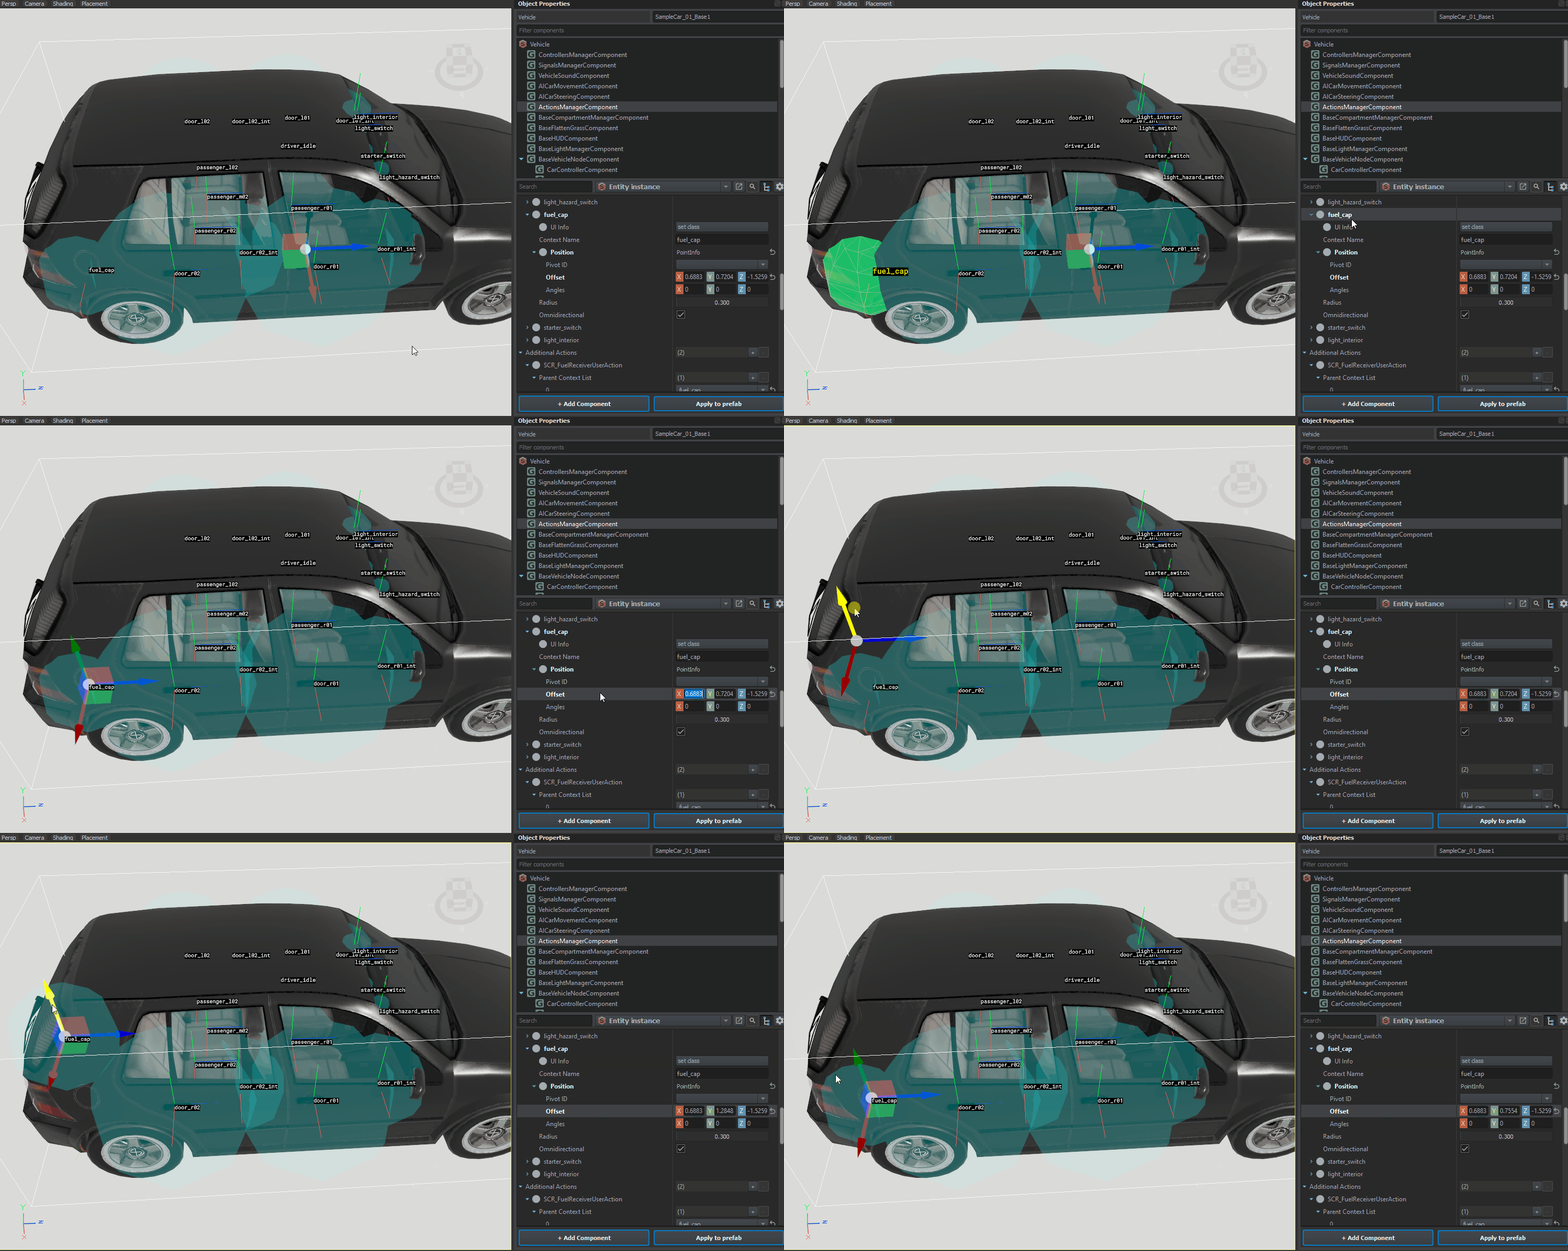
Position of Action Contexts can be also adjusted inside of the view port. To do so, click with Left Mouse Button on one of the Offset fields (X, Y or Z). After, transform gizmo should snap to existing offset and it should be possible to manipulate location of the action. It is also possible to use Pivot ID parameter which will snap action context to selected bone or pivot - this option is especially useful if it's desired that action follow the bone like on turrets.
For this particularly vehicle, following Action Contexts were created:
| Name of action context | Usage |
|---|---|
| door_l01 | Those action contexts will be used to determine position of get in action. Recommended to place at the middle of the door |
| door_r01 | |
| door_l02 | |
| door_r02 | |
| door_l01_int | Those action contexts will be used to determine position of get out action. Recommended to place at the middle of the door or door handle |
| door_r01_int | |
| door_l02_int | |
| door_r02_int | |
| driver_idle | Those action contexts will be used to determine position of switch seat action. Recommended to place at the middle of the seat |
| passenger_r01 | |
| passenger_l02 | |
| passenger_r02 | |
| passenger_m02 | |
| light_hazard_switch | Action context for switching hazard lights |
| fuel_cap | Action context for refuelling vehicle |
| starter_switch | Action context for engine start/stop - placed at the starter position |
| light_interior | Action context for toggling interior lighting |
Adding additional actions
Additional actions are type of actions which are not part of other components. Usually those actions are scripted and it's possible to add new ones. For purpose of this tutorial, 2 new actions will be added:
- SCR_EngineAction - adds action to toggle state of the engine. In this example starter_switch should be added to Parent Context List of that action
- SCR_FuelReceiverUserAction - adds action to refuel vehicle. In this example fuel_cap should be added to Parent Context List of that action
Compartments setup
Compartments are used to define who, where & how units can access seats in the vehicle. Most of the configuration is performed in BaseCompartmentManagerComponent, where compartment slots are defined itself, and in ActionsManagerComponent, which provides information about actions properties & their position.
Overview of compartments
By default, Wheeled_Car_Base.et prefab already contains PilotCompartment slot. This slot defines driver of the vehicle. Bunch of parameters should be already inherited from parent prefab (like UI infos containing strings for actions), yet some of the values still have to be filled in. Those parameters which need to be update include:
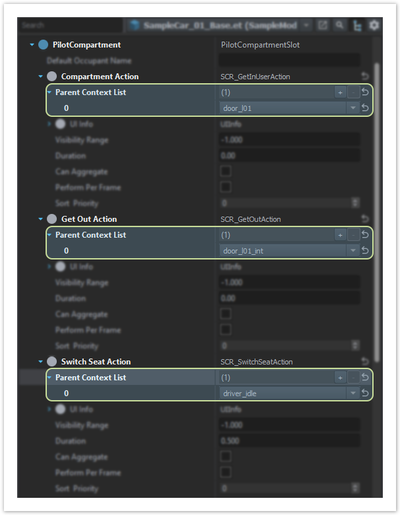
- Compartment Action, Get Out Action & Switch Seat Action – those define which action contexts are used for get in, get out or switch seat action & how it’s presented in game UI. Compartment Action (get in action) is available when player is outside of the vehicle and wants to, as name suggests, get inside. Get Out Action is present when player is seating on that slot. Finally, Switch Seat Action is available only when player is seating on some other seat in the same compartment of that vehicle and is looking at the action contexts defined by this action.
- Passenger Position Info – stores information about position of the character inside of the vehicle. (Similar to seat proxies in RV engine)
- Door Info List - contains information about actual get in & get out position & behavior. Here it is for instance possible to define if engine should play animation tied to the vehicle or if character should be instantly teleported in & out.
Making adjustments to those classes listed above should be enough to get first driver seat working in game. Rest of the properties are described in detail on Vehicle Compartments page.
Configuring compartments
Having knowledge about what PilotCompartment is, it’s time to start setting it up. In Compartment Action, Get Out Action & Switch Seat Action main thing to do is adding parent contexts to Parent Context List. Now it’s proper moment to use action contexts created in previous step. In this example, following contexts will be used:
- Compartment Action -> door_l01
- Get Out Action -> door_l01_int
- Switch Seat Action -> driver_idle
In case slot action can be performed from multiple sides (i.e. middle car seat – this one should be accessible from both left & right side), it is possible to define multiple contexts.
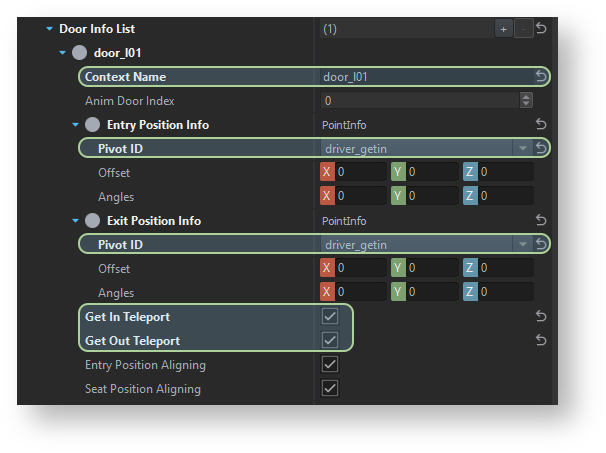
Next step on the way to fully functional car is configuration of Door Info List. In this class, contexts provided in Compartment & Get out Actions are linked to respective doors, so engine know where character should get out or which door should be animated during get in action.
In this example there are no actual get in or get out animations and simple teleport is used. To activate such behavior, Get In Teleport & Get Out Teleport should be checked.
Next step will be changing get in location in Entry Position Info. In this class it is possible to either define offset & angles manually or use one of the existing sockets present in the model. In this example Pivot ID is used & changed to driver_getin socket.
By default, Wheel_Car_Base prefab doesn’t have Exit Position Info class present, so it has to be created by clicking with Left Mouse Button on set class button. Once class is there, similar steps to Entry Position Info class can be applied – in this case it will be changing Pivot ID also to driver_getin socket.
Once those steps are completed, it should be possible to get in & out from the vehicle. In both cases character will get in & get out at driver_getin socket location.
Adding new compartments slots
New compartments slots can be created in two ways:
- By drag & dropping one of the existing Compartment Slots configs (basic one are located in Prefabs/Vehicles/Core/Configs) – this way some of the common parameters will be already inherited from selected config. When doing multiple seats of same type specific to some asset (i.e. Ural-4320 rear cargo seats), it is also recommended to create new, inherited config (conf inherits from CargoCompartment_Base.conf ) which is then applied to such prefab.
- By clicking on arrow icon on the right side of the Compartment Slots – this will create new class of your choice with only default values.
Both of the methods are described in detail on Vehicle Compartments page. In most cases, it is recommended to use config solution, since it makes easier maintenance of such prefabs.
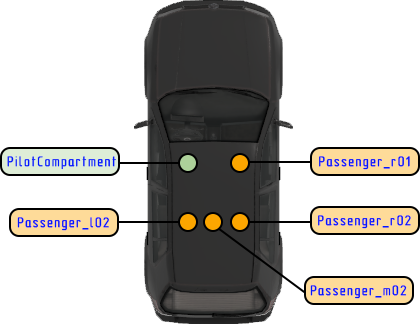
In this example, 4 additional cargo seats will be added to the vehicle using CargoCompartment_Base.conf as a base.
Vanilla content is using following naming convention for passenger seats:
- Passenger_ - prefix indicating type of the seat
- _r_ - indicates whether seat side - left (_l_), right (_r_) or middle (_m_)
- 01 - row indicator - counting from front of the vehicle.
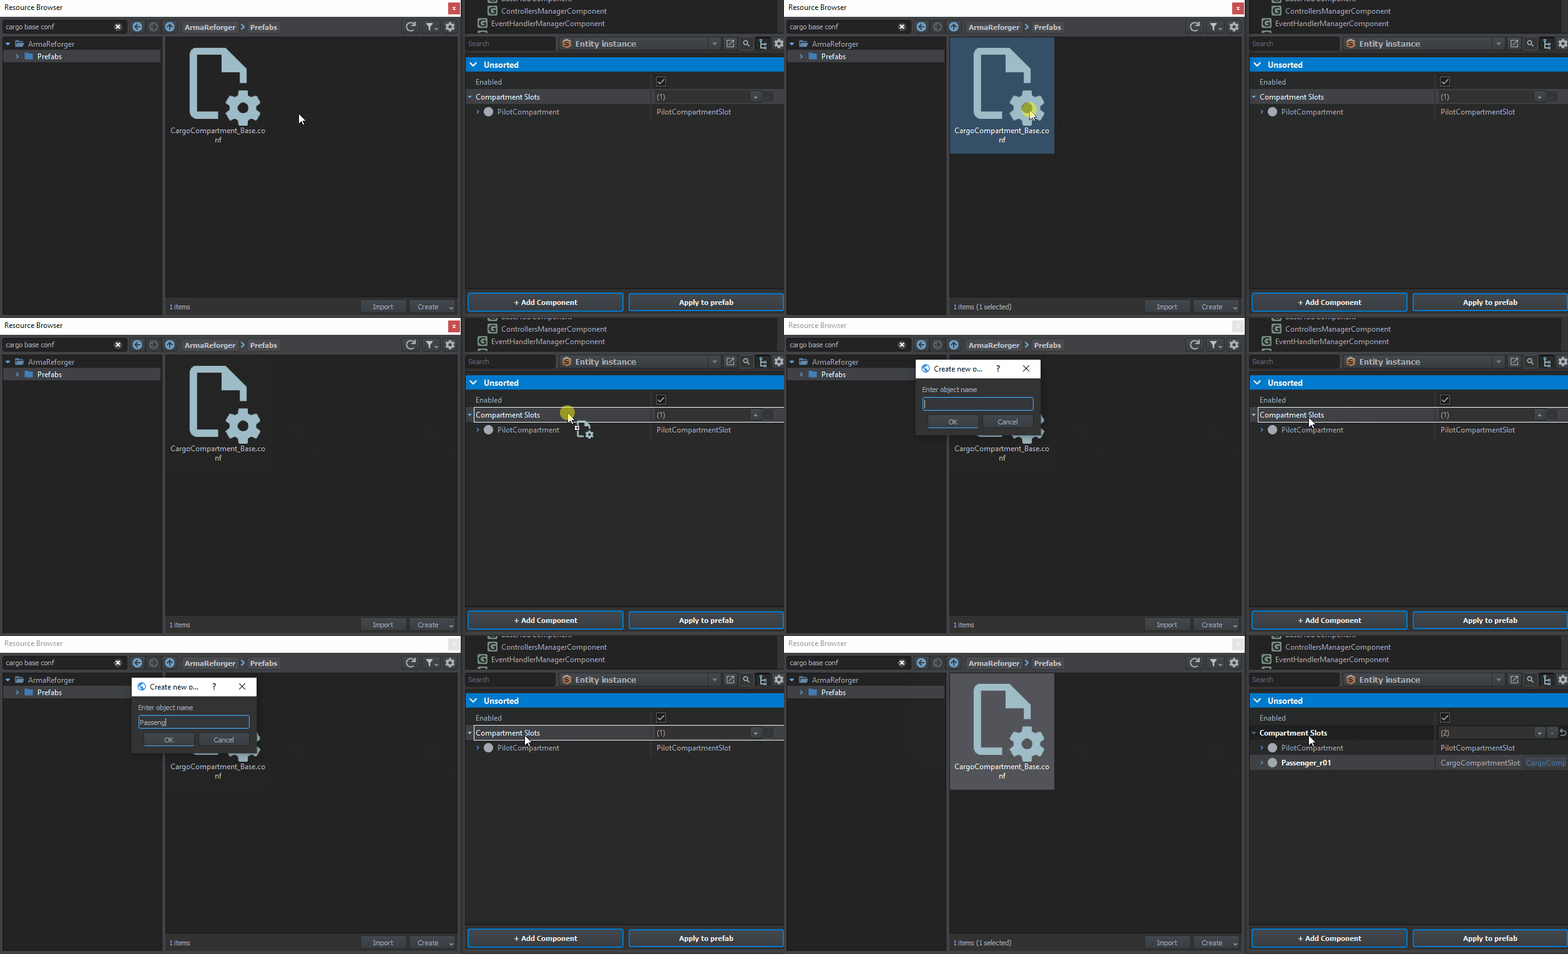
To add new Cargo Compartment Slot, locate CargoCompartment_Base.conf in Resource Browser and then drag and drop it on Compartments Slots property.
After that, similar to Pilot Compartment, it is necessary to fill in:
- Parent Action Contexts for Compartment Action, Get Out Action & Switch Seat Action
- Select Pivot ID or adjust offset in Passenger Position Info
- Adjust data in Door Info List
Passenger_m02 is sort of special case since it is desired to be able to access that seat from both left & right side. To do so, it is necessary to two contexts to Compartment Action Parent Contexts List & then, create two entries in Door Info List where both contexts matches with those newly created entries.
