Reyhard/Sandbox/Arma Reforger:Car Creation/Asset Preparation – User
Preparing mesh
Model orientation
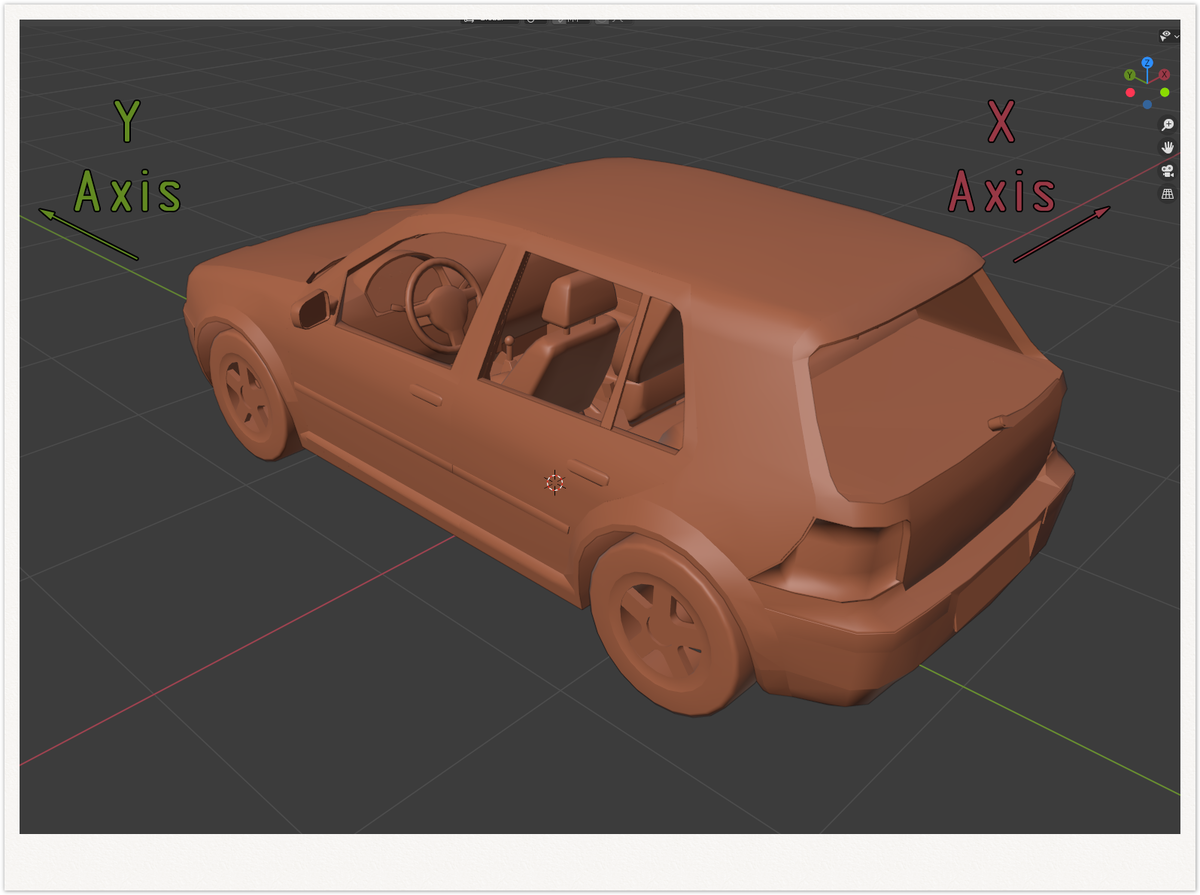
One of the most important thing to begin with is making sure that your model is properly orientated. Similar to weapons, there is one important rule to keep in mind
That means, when you are importing A3 weapon you need to rotate it by 90 degrees to the left!
Splitting mesh into parts
In principle, following elements of the vehicle should be split to separate models
- Vehicle accessories (i.e. vehicle roof) used for creation of variants of the same vehicle like i.e. cargo or fuel variant of the same truck.
- Destructible elements (windows, breakable elements of the vehicle, etc)
- Emissive lights
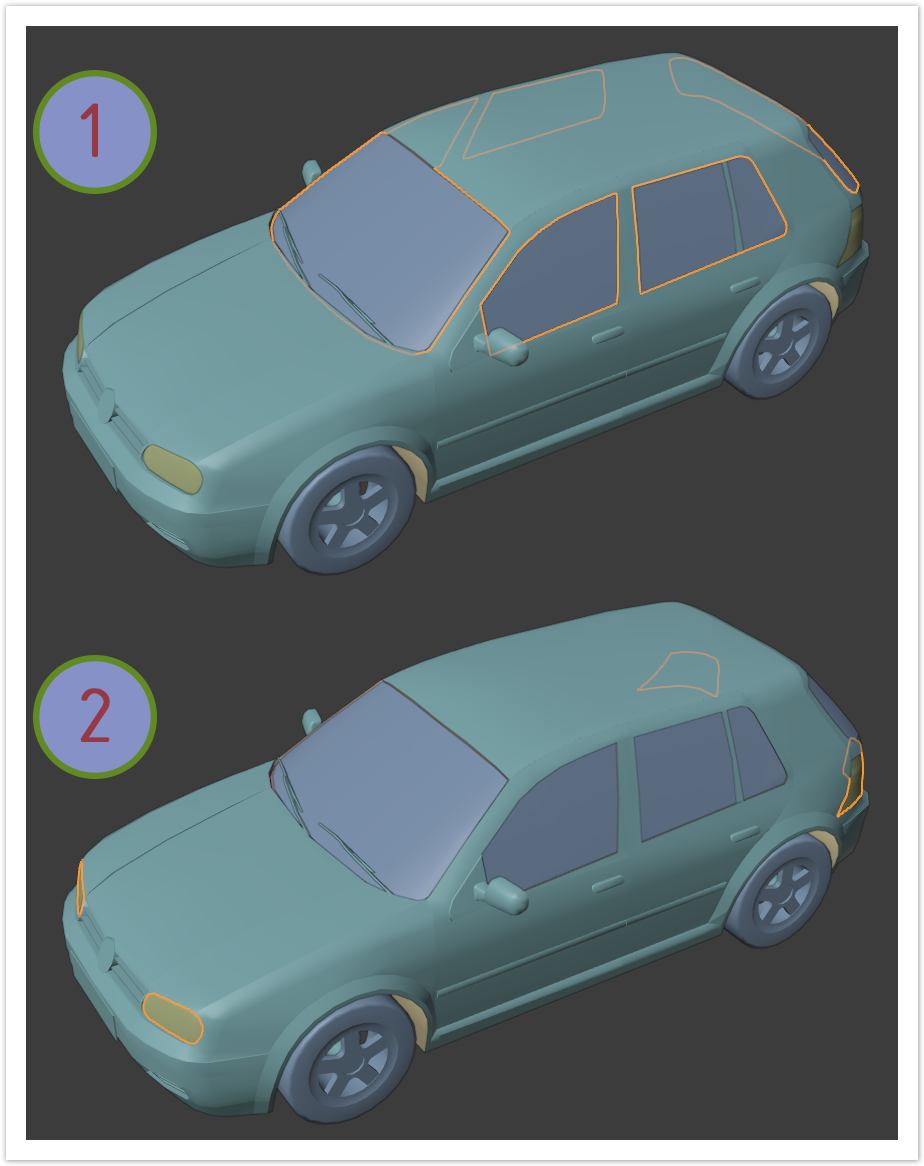
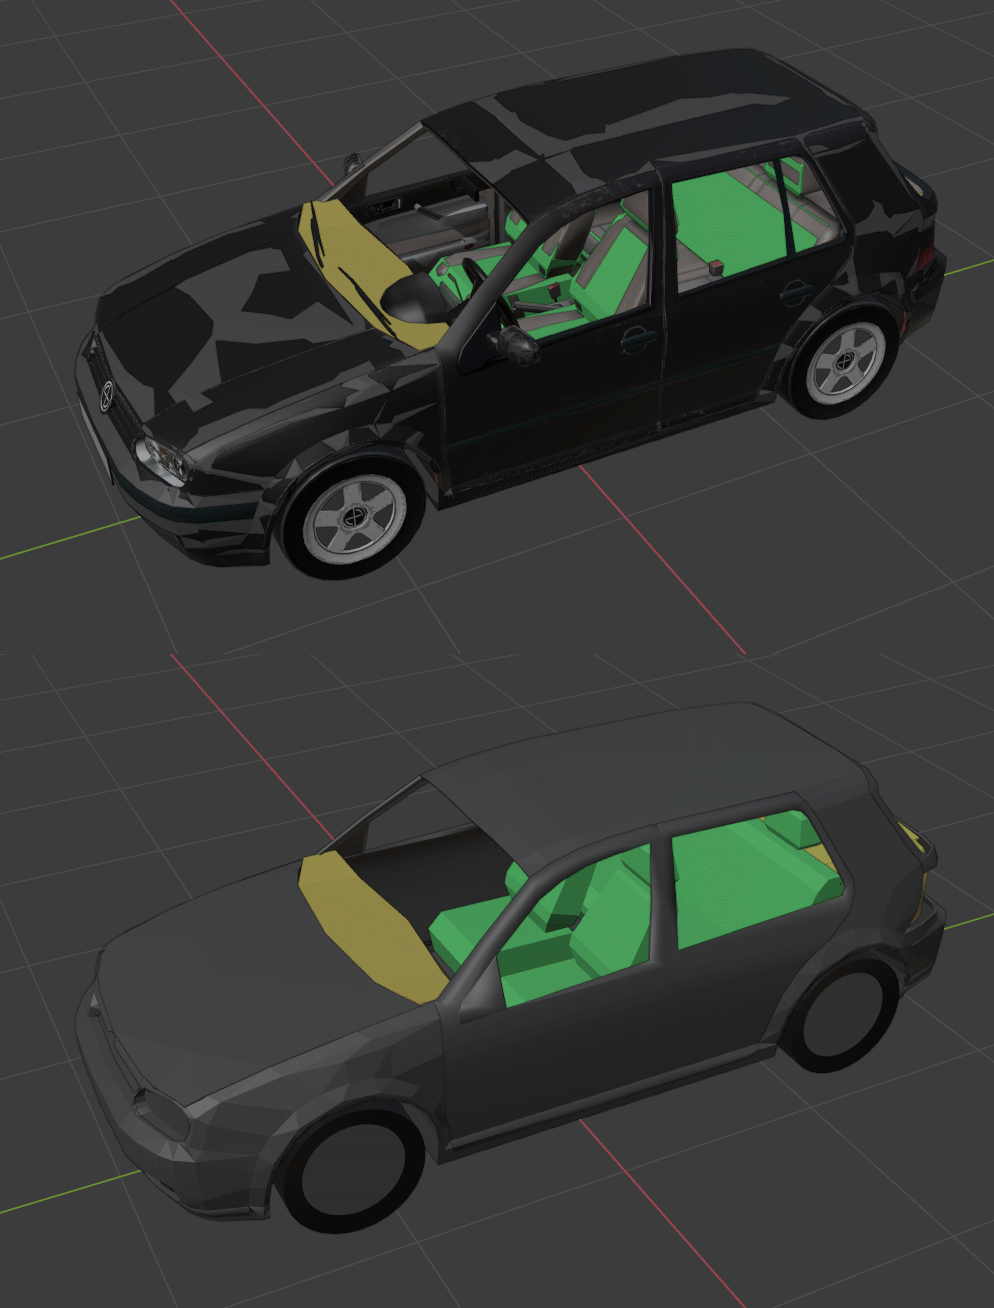
In this example, windows (1) & emissive lights (2) were separated to their own FBX files.
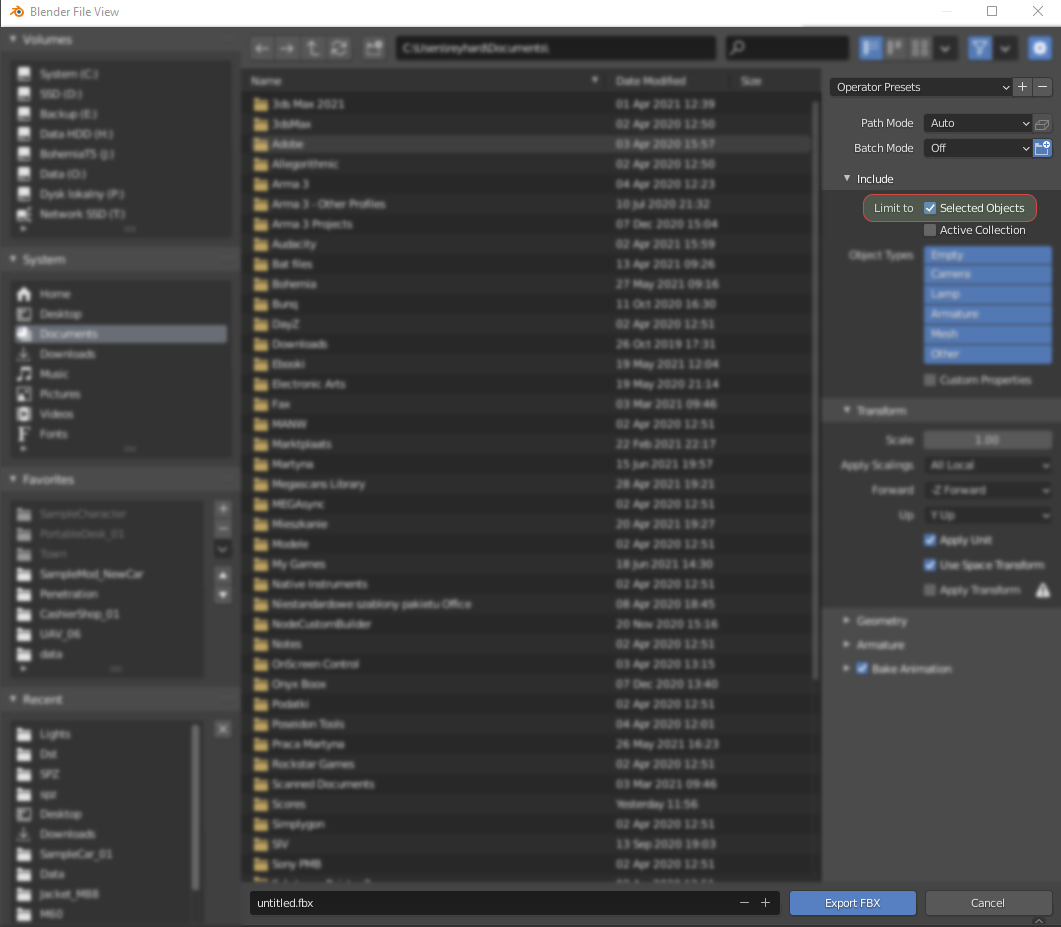
If those elements are already separated to unique objects, then it's possible to select them one by one and save them as FBX file with export limited to currently selected object.
Generally, such simple objects doesn't require skeleton but in case of more complicated elements (like gun mount), it's possible to add them to mesh.
Naming of objects
When it comes to naming, there are few important rules to keep in mind.
- _LODx suffix is used to indicate Level of Details. You can have up to 8 LODs.
- UBX_, UCX_, USP_, UCS_, UCL_, UTM_ prefixes are used to mark Colliders (Box, Cylinder, Sphere, Capsule, Cylinder, and Trimesh respectively)
- OCC_ prefix is used for Geometry Occluders
- COM_ prefix is used to determine geometry center of mass
There are also some general guidelines regarding naming of the vehicle parts on Vehicle Pipeline - Parts' page'. It's strongly recommended to follow those rules since most of the base prefabs are using those names by default to reduce duplication & make easier data management. On that page, there are also general guidelines regarding naming objects which are not explicitly mentioned there.
Vehicle can also have various small sockets for destruction, crew positions management and contextual actions. Some of the rules regarding slots naming can be found in slots section of Vehicle Pipeline page.
Creating colliders
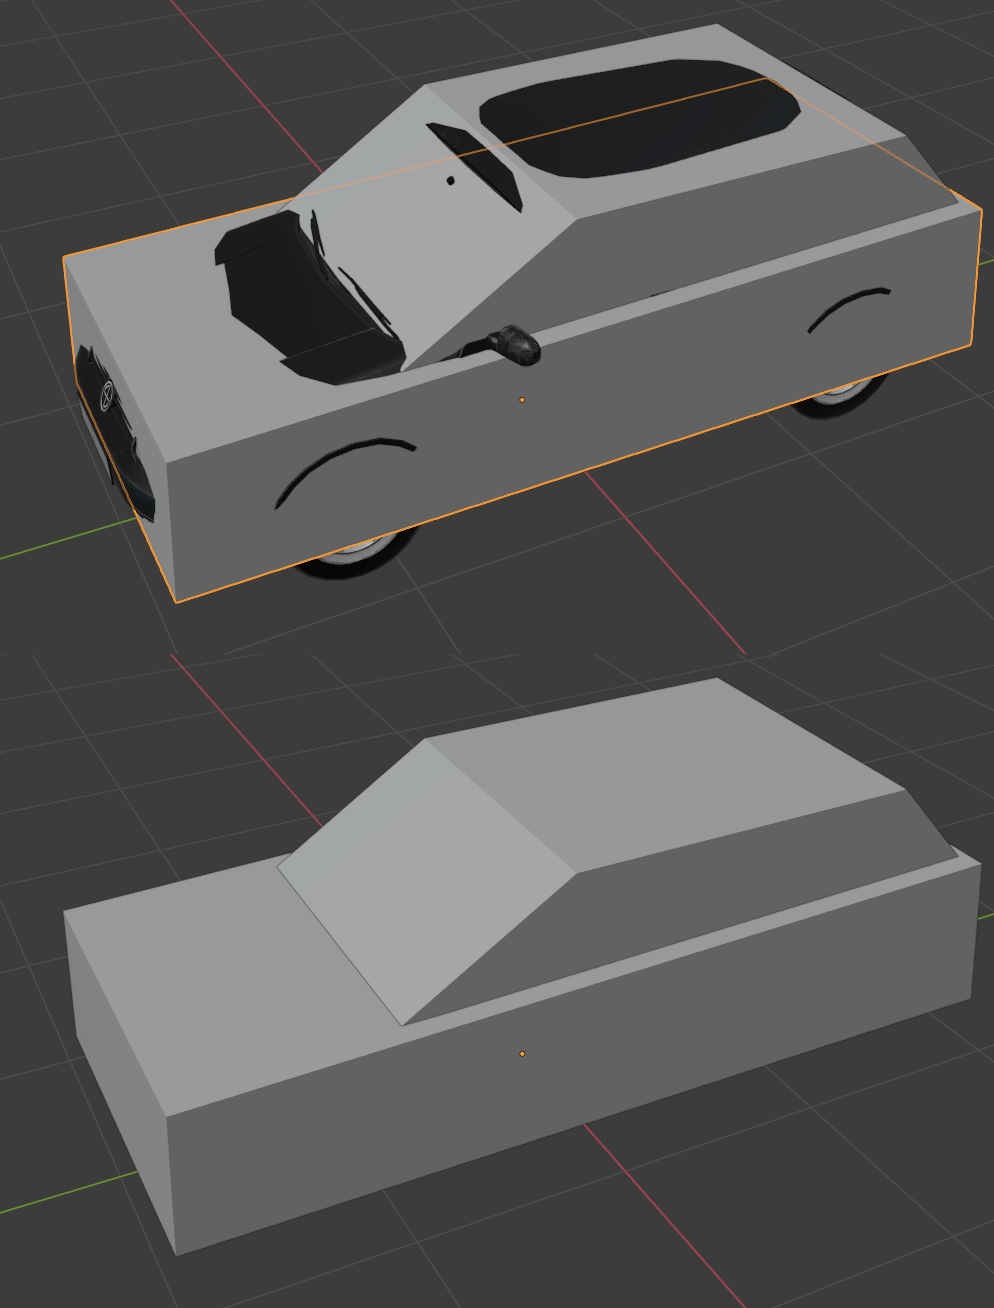
Colliders are special type of objects which are used to calculate various kinds of collisions - be it physic simulation or tracing of bullet penetration. There are few rules regarding those colliders and most of them listed here - FBX Import - Collider usage. In case of models imported from Arma 3, there are usually some convex components already present which could be used a base for collision geometry. It's recommended though to make at least fire geometries from scratch.
In case imported convex components are useless (too complex collision geometry or not detailed enough fire geometry) and completely new geometries have to be created, below there are some tips & rules.
Collision geometry
This type of geometry should be kept as simple as possible and amount of colliders should be also kept low. Simple type of colliders like convex, cylinders or cubes should be used. Large single shapes should be used to avoid issues with collision imprecision.
Fire geometry
Penetration geometries can be bit more detailed and, in contrast to Real Virtuality engine, they don't have be convex. Usage of trimesh geometry can greatly speed up creation of detailed fire geometry.
 Some additional information can be also found on Vehicles - Colliders and Fire Geometry.
Layer presets
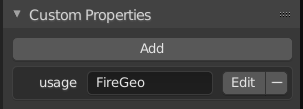
Layer presets are used by engine to determine how given collider should behave when it collides with other object. Layer Presets can be either directly defined in modelling software by adding custom property to object or can be changed in Workbench after successful import of the mesh. If you are using Blender, there is small official tool - Enfusion Blender Tools - to assist you with assigning correct game materials & layer presets on colliders.
For creating custom attributes in 3dsMax, use only the Parameter editor in Animation menu, otherwise the properties in exported FBX can't be edited in Maya. So doing it with Object Properties/User defined is FORBIDDEN
More details about Collision Layers, Layer Presets and Interaction Matrix can be found on linked page.
Setting skeleton & rigging mesh
When creating skinned objects, Enfusion Workbench expects that the whole object is skinned to some bone. Otherwise importer will try to "fix" it by skinning remaining faces to some root bone. In such case, you might see following error in the console:
RESOURCES (W): Missing some mesh skinning weights (Object_LOD0). Weighting them to root
In Blender realms, this means that any object with Armature modifier, must be fully skinned to some existing bone through vertex groups.
If you have some animated collider please keep in mind that only trimesh colliders can be skinned. In all other cases you have to use 100% weight.
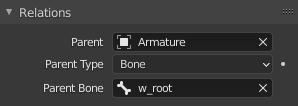
In Blender it gets even bit more tricky and Object Relations (in Object tab) have to be used.
FBX export settings
Most of the general rules can be found on FBX Import page . In principle, when exporting from i.e. 3DS Max, you have to make sure that you are exporting in binary format in version 2014/2015. Furthermore, Triangulation & Preserve Edge Orientation should be turned off.
Blender wise, there are 3 most important things to keep in mind when exporting FBX
Importing Mesh
Overview
In this chapter following topics will be explained
- Importing new model
- Importing textures
Importing & registering new model
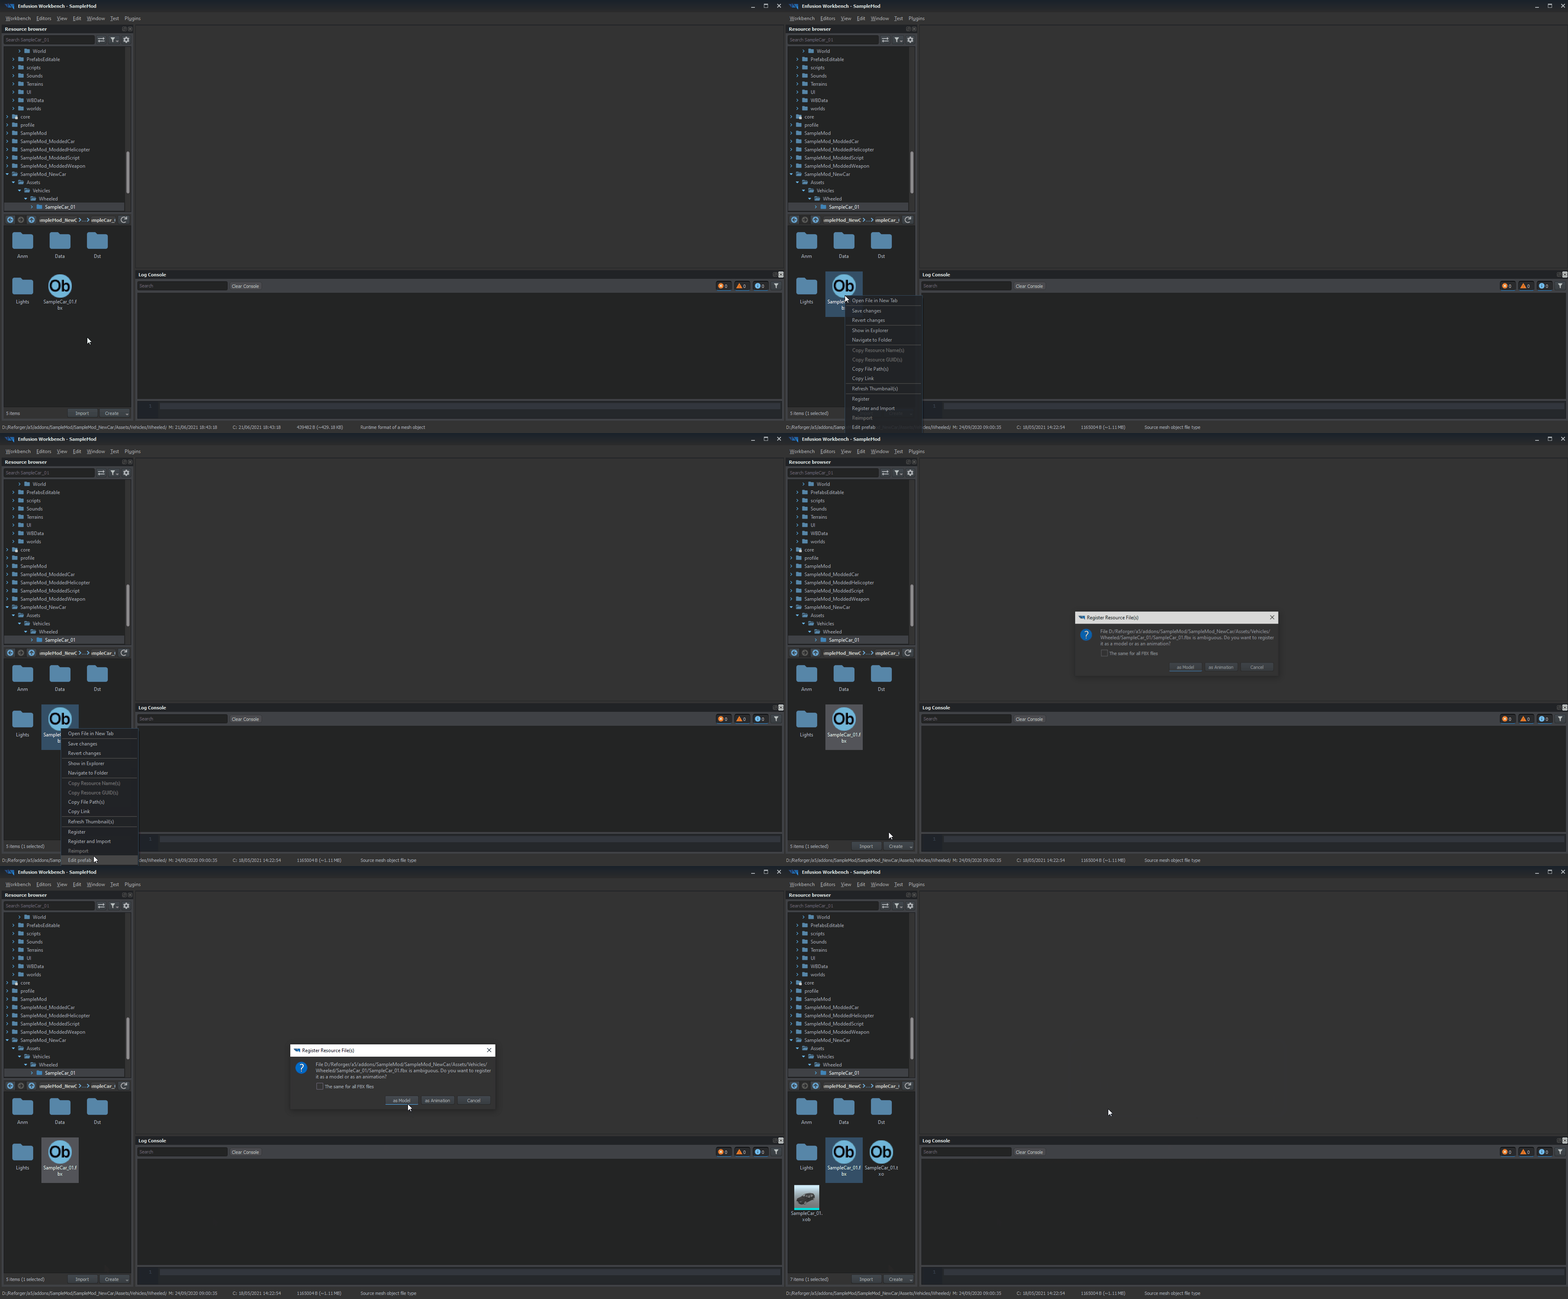
Once mesh was successfully prepared and all selections, sockets & snap points are in place, it's time to try our asset in game. Majority of the process is already pretty well described on FBX import - Import process in the Workbench page.
In principle, all you have to do is click with right mouse button on your FBX files and select from context menu Register and Import option and then click as Model to import selected mesh as a game model.
Checking colliders & materials
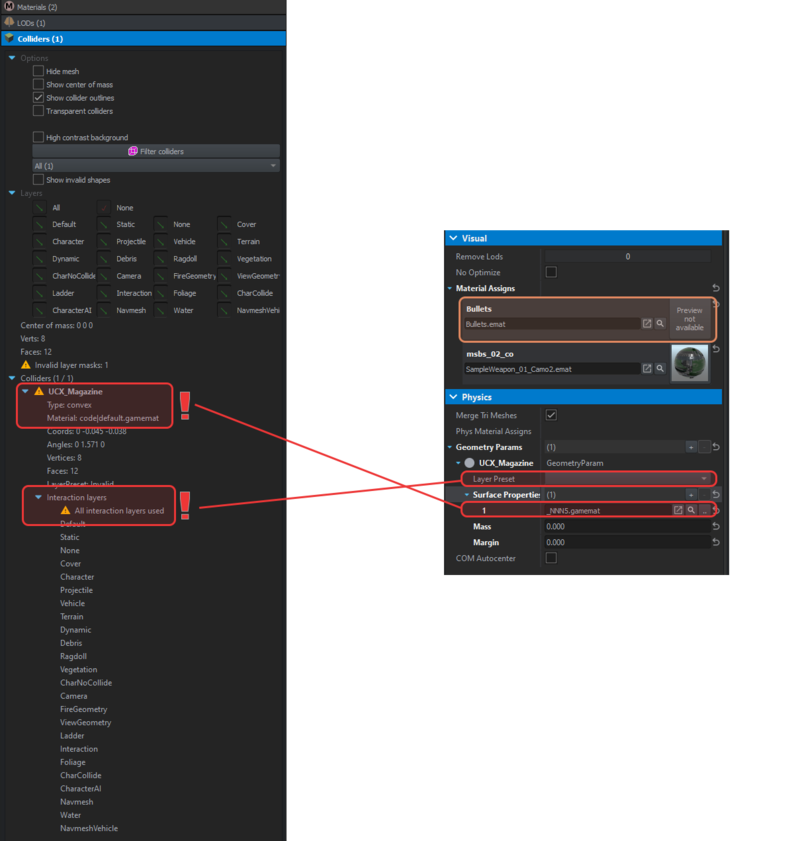
After initial import was done it's time to make sure that materials & colliders are using proper materials & colliders. By default, Enfusion will try to assign material based on the name of the assigned texture in mesh. If it fails to find such texture, new dummy material (see area marked in orange on screen below) will be created in data folder next to the FBX model.
There are 2 typical errors when it comes to collider configuration:
Skeleton & hierarchy
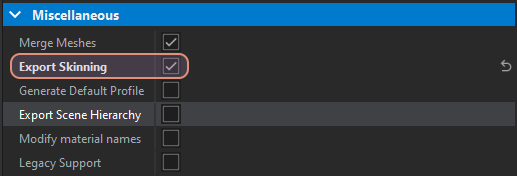
Since this model is animated, it's very important to check Export Skinning checkbox in Import Settings of model. Without that parameter selected, vehicle will be imported without skinning or any sockets!
Importing textures
In principle, you can use same procedures as the ones described in |Weapon Modding - New Materials creation page. By default, Workbench will new materials based on the materials name from the FBX file.
