Weapon Collimator Creation – Arma Reforger
Lou Montana (talk | contribs) (Add typical catches and Script API) |
No edit summary |
||
| Line 352: | Line 352: | ||
{{GameCategory|armaR|Modding|Tutorials|Assets}} | {{GameCategory|armaR|Modding|Tutorials|Assets}} | ||
{{GameCategory|armaR|Modding|Tutorials|Assets|Weapon Creation}} | |||
Revision as of 11:34, 4 December 2024
Tutorial Goal
Structure Preparation
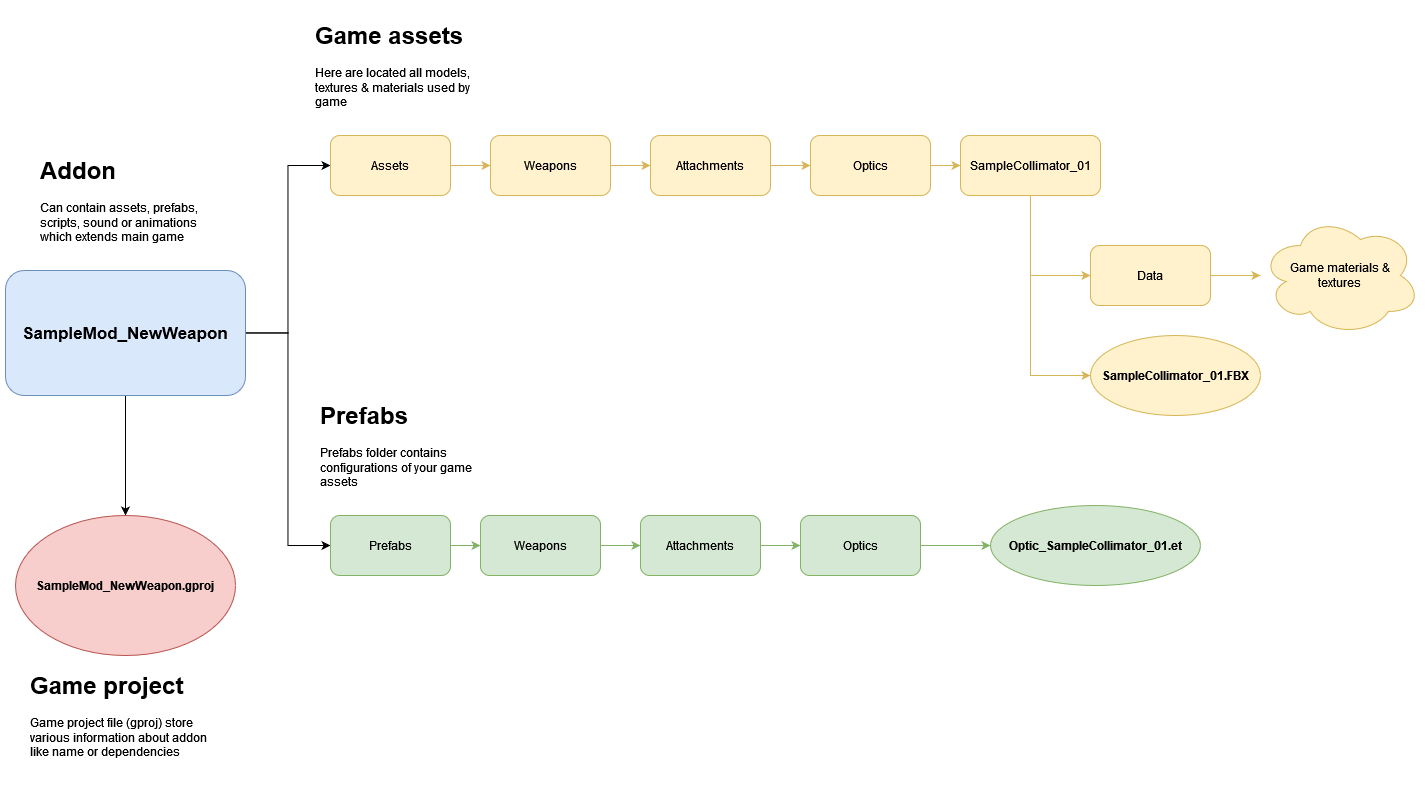
While sticking to official structure is not mandatory and there are no engine restrictions asset wise about it, it is recommended to follow guidelines listed here - Data (file) structure - to ensure that all automation plugins are parsing your assets correctly and make it later easy to navigate.
Therefore, your first task will be preparing following file structure
Model Preparation
The model must be prepared in Blender accordingly. Besides the normal setup of colliders, optics memory points and weapon snap point there are two additional considerations
Plane UV
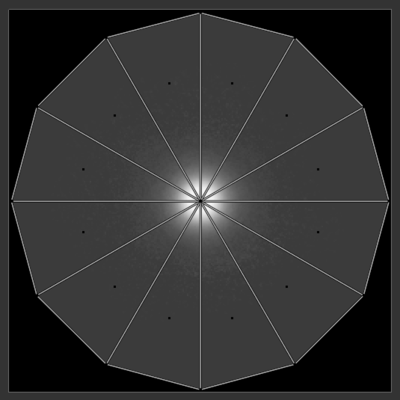
We need a grayscale reticle texture of square aspect ratio with the "aimpoint" in the center. The geometry of the projection plane needs to extend all the way to the edge of the texture (for now). See the image below for an idea on how this should look
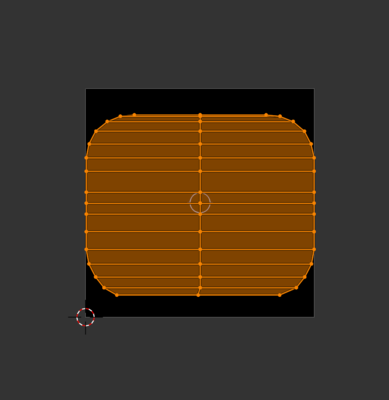
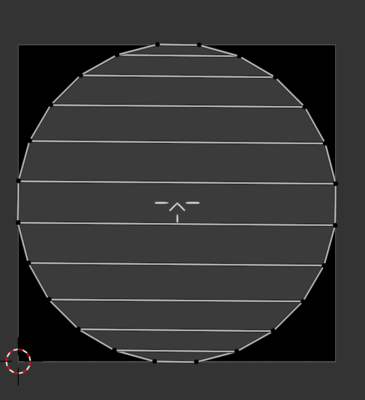
Note that if the model's geometry allows it, you can use a simple rectangular projection plane instead, but it cannot "stick out" of the casing. Some optics like the Russian OKP-7 which have a completely open projection plane must be shaped accordingly.
Geometry Definition
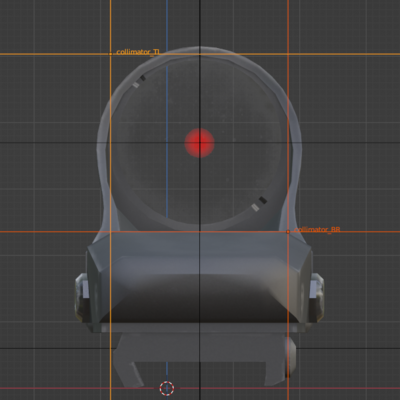
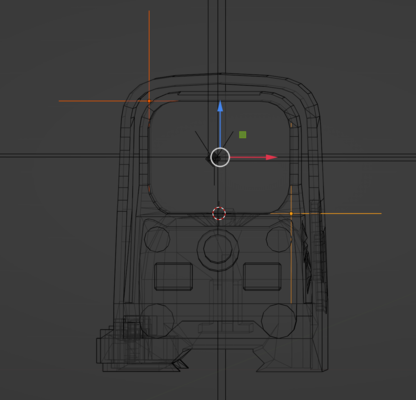
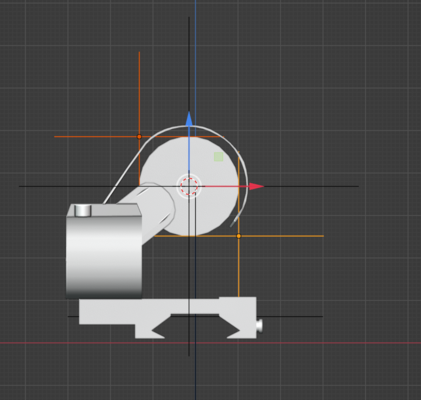
In the prefab for the collimator, you will need to define the upper and lower edge of the projection plane. While this can be done without any memory points, using two empties is the easiest and most precise way.
In examples below, collimator_BR (for bottom right) and collimator_TL (for top left) is used:
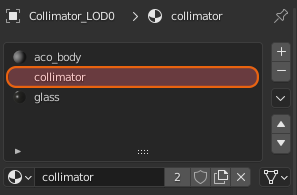
Since collimator plane need to use separate material, don't forget to assign different material to this selection.
The rest of the model is the same as usual - you can find more info about mesh configuration (including RIS setup) and import procedure in Weapon Optic Creation tutorial.
Reticle Material
Once model is imported and material is created, it is time to start work on material. If you named your material in model "collimator" then by default, a new Enfusion material called .emat will be created in Data folder next to the FBX file. This new material is also using PBRBasic class which is more than sufficient for collimator reticle.
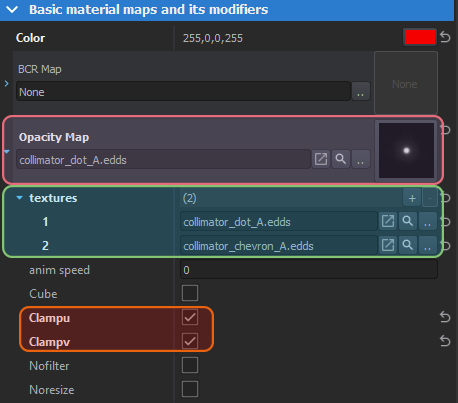
Open collimator material and then in Basic material maps and its modifiers section assign black and white texture (where black represents transparent pixels) to Opacity Map field. It is possible to assign multiple textures - this can be done by expanding textures parameter and then adding new entries in the array via plus button.
In theory, for an addon you can have one "master collimator" material that contains all possible reticles, since we will be able to "filter" them later in the prefab config. It is also possible to switch between reticles via the API which is provided by SCR_CollimatorSightsComponent although keep in mind, that such feature is not implemented in vanilla game.
After setting reticle (or multiple reticles), make sure to set ClampU and ClampV so that the texture does not wrap.
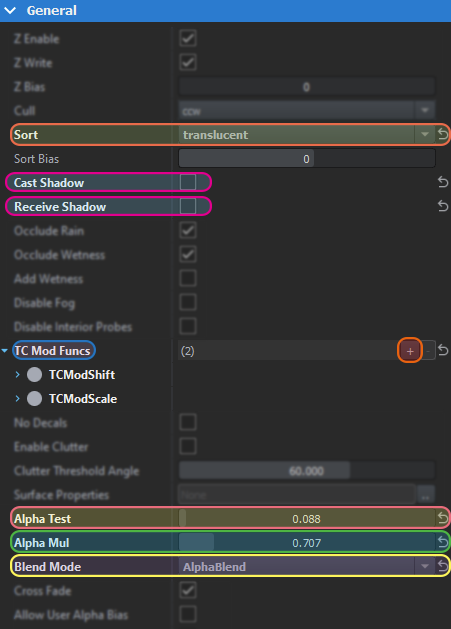
Next, in General section of the material settings, modify following properties
- Change Sort to Translucent
- Disable Cast Shadow & Receive Shadow properties
- Add TCModFunc array in the general section, click the "+" sign and add a TCModShift & TCModScale to it.
- Change Blend Mode to AlphaBlend
- Adjust Alpha Test & Alpha Mul to achieve desired reticle transparency
Manual Material Corrections
Unfortunately, at the time of writing, there is no way to set script bindings within the workbench, everything needs to be done in a text editor. You need to load the emat file into a text editor and manually add the following segments
After opening .emat file in text editor, located TCModFuncs segment and Refs segments to both TCModShift & TCModScale classes (you can also paste & replace whole TCModFunc segment)
TCModFuncs {
 TCModShift "{5CDCD917EA1E1A1B}" {
  ShiftU 0
  ShiftV 0
  Refs {
   "ShiftU" "SCR_CollimatorControllerComponent.m_fUCoord"
   "ShiftV" "SCR_CollimatorControllerComponent.m_fVCoord"
  }
 }
 TCModScale "{5D60B8B11F689A05}" {
  ScaleU 1
  ScaleV 1
  CenterU 0.5
  CenterV 0.5
  Refs {
   "ScaleU" "SCR_CollimatorControllerComponent.m_fUScale"
   "ScaleV" "SCR_CollimatorControllerComponent.m_fVScale"
  }
 }
}
Next ,copy paste those refs at the bottom of the material:
 Refs {
 "Color"
 "SCR_CollimatorControllerComponent.m_vColor"
 "Emissive"
 "SCR_CollimatorControllerComponent.m_vEmissive"
 "EmissiveLV"
 "SCR_CollimatorControllerComponent.m_fEmissiveLV"
 "OpacityMap"
 "SCR_CollimatorControllerComponent.m_ReticleMap"
 }
Full material example:
MatPBRBasic {
 Color 1 0 0 1
 Emissive 1 0 0 0
 EmissiveLV 9.538
 ApplyAlbedoToEmissive 0
 Sort translucent
 CastShadow 0
 ReceiveShadow 0
 TCModFuncs {
 TCModShift "{5CDCD917EA1E1A1B}" {
 ShiftU 0
 ShiftV 0
 Refs {
 "ShiftU" "SCR_CollimatorControllerComponent.m_fUCoord"
 "ShiftV" "SCR_CollimatorControllerComponent.m_fVCoord"
 }
 }
 TCModScale "{5D60B8B11F689A05}" {
	ScaleU 1
	ScaleV 1
	CenterU 0.5
	CenterV 0.5
	Refs {
	 "ScaleU" "SCR_CollimatorControllerComponent.m_fUScale"
	 "ScaleV" "SCR_CollimatorControllerComponent.m_fVScale"
	}
 }
 }
 AlphaTest 0.088
 AlphaMul 0.707
 BlendMode AlphaBlend
 OpacityMap "{C9DCB787E3AA1C41}Assets/Weapons/Attachments/Optics/SampleCollimator_01/Data/collimator_dot_A.edds" "{2BBE7CC9FAEEC02B}Assets/Weapons/Attachments/Optics/SampleCollimator_01/Data/collimator_chevron_A.edds" clampu clampv anim( 0 )
 Refs {
 "Color"
 "SCR_CollimatorControllerComponent.m_vColor"
 "Emissive"
 "SCR_CollimatorControllerComponent.m_vEmissive"
 "EmissiveLV"
 "SCR_CollimatorControllerComponent.m_fEmissiveLV"
 "OpacityMap"
 "SCR_CollimatorControllerComponent.m_ReticleMap"
 }
}
When you are done with those modifications, save your changes in text editor and restart the Workbench.
Prefab
Creation
Collimator prefab setup is quite similar to regular optic as described in Weapon Optic Creation tutorial but there are some differences. Main difference is fact that WeaponOptic_Base.et contains SCR_2DPIPSightsComponent which is not desired in this case. Since you cannot delete inherited components and disabled prefabs still have some memory footprint, it is recommended to either:
- Create new prefab inheriting from Attachment_Base.et and manually add components which are present in WeaponOptic_Base.et except SCR_2DPIPSightsComponent
- Duplicate in addon WeaponOptic_Base.et prefab and remove from it SCR_2DPIPSightsComponent component
In most cases, it will be easier to use 2nd method (duplication) for creation of the new prefab. Once new prefab is created and adjusted, don't forget to put it in some proper folder (check structure paragraph at the top of the page).
Adding Components
Next, it will be necessary to add two, collimator specific, components to the prefab - SCR_CollimatorSightsComponent & SCR_CollimatorControllerComponent.
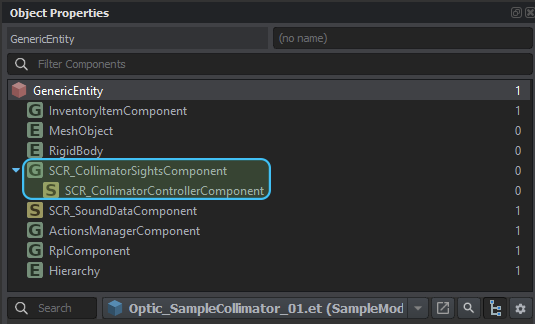
First, begin by adding SCR_CollimatorSightsComponent to collimator prefab, which is quite standard procedure. After that, it will be necessary to add SCR_CollimatorControllerComponent as a child component of SCR_CollimatorSightsComponent via Add child component action. If everything was done correctly, you should end up with something like this
Configuration
SCR_CollimatorSightsComponent does not have any attributes that need to be taken care of, all set up is done in SCR_CollimatorSightsComponent.
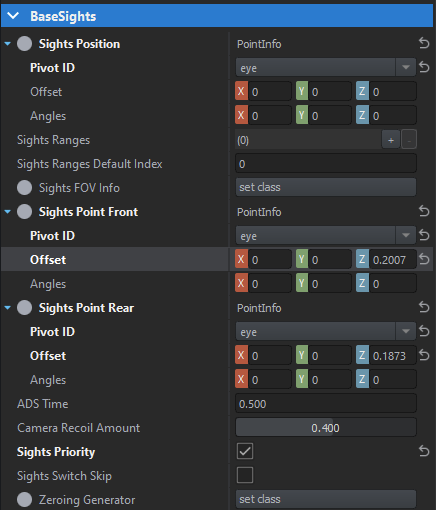
Set up the sight points, eye point and all other parameters of the SCR_CollimatorSightsComponent normally - you can referer to Weapon Optic Tutorial for more info.
The "Collimator" category contains all the relevant settings and most of the work will be performed in this section:
- Collimator Top Left, Collimator Bottom Right and Collimator Center:
- These settings are used to define the projection plane of the collimator sight. The Top Left and Bottom right points are mandatory. The center point is optional, and it is highly recommended to leave it empty. You can specify bone names and offset or just a numerical offset in the PointInfo.
- Collimator Aspect Ratio
- Set to true by default, it specifies that the collimator reticle textures have a 1:1 aspect ratio. There is usually no good reason to disable this
Reticle Setup
Reticle Default Angular Size and Reticle Default Texture Portion
- This defines the angular size of the reticle. A collimator reticle will always appear a certain size, regardless of how close the observer is to the projection plane. Angular size is specified in degrees. The default HWS Holo sight has a reticle angular size of 68 MOA (minutes of arc), which translates to about 1.13 degrees (60 MOA is one degree). This means that the reticle is approximately the size of a human at 100 meters distance.
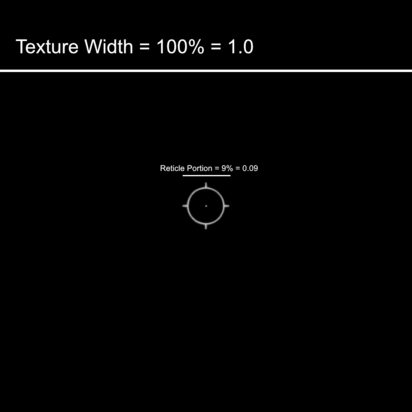
- Reticle Default Texture Portion describes how much of the given texture is actually covered by the reticle. Principle is same as described in Weapon Optic Tutorial. In the above case, the reticle is 9% of the entire texture (see image)
- Note that both of these values can be overridden in the Reticle Infos array, see below. If any or both of these values are zero, then the reticle is taken "as-is" and no angular size adjustment is made at all.
Default Reticle Color and Reticle Colors array
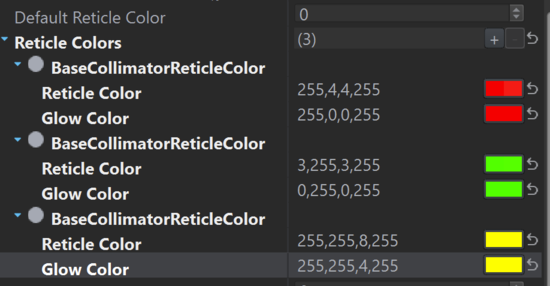
The settings here are ignored if there are no reticle colors defined, and the settings of the emat are used. Otherwise the color in the emat is ignored and the default reticle color specifies the color used for the reticle. Each BaseCollimatorReticleColor entry has two color values, a reticle color and a glow color. The glow color is the emissive part of the material, while the reticle color is the base color used. They should normally be relatively close, but experimentation is possible.
Default Reticle Index and Reticle Info array
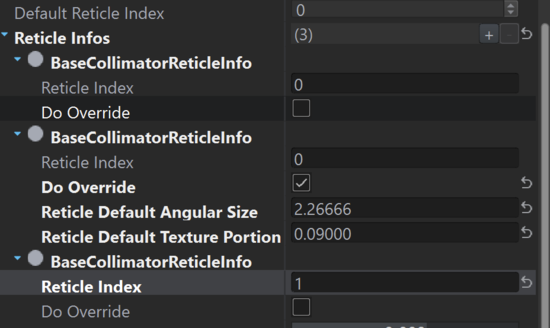
If the reticle info array is empty, then the default reticle index specifies the texture index in the emat texture array of the collimator material. Otherwise, the Default Reticle Index specifies the index into the Reticle Info array. The Reticle Infos array consists of BaseCollimatorReticleInfo structures. The first field, Reticle Index, specifies the texture index from the emat. The second field is a checkbox which defaults to off. If disabled like this, the angular size and reticle portion are taken from the specified default values. If checked, two new fields will appear - an override for the Reticle Default Angular Size and one for the Reticle Default Texture Portion. Again, either one of these set to 0 will disabled reticle angular size FOR THIS RETICLE only. The example in the picture below specifies three different reticles: The first one is using the default values with the first reticle texture in the emat. The second one overrides the angular size to be twice as big. The third one uses a different texture but does not override any of the angular size/portion settings.
Misc Parameters
- ADS Activation/Deactivation percentage
- The collimator sight is disabled when not aiming down sights to avoid unnecessary calculations. During the blend-in and blend-out of the Aim Down Sights, the sight is enabled. These two values give a percentage when the sights are enabled during the blend in. The default is 50% (0.5), which causes the reticle to "slide in" and "slide out" of view. If the sights are very open, a smaller value might be required for either.
- Daylight/Night brightness
- These values specify the brightness of the glowy bits of the reticle during daytime or night time. The night time brightness is selected via the Reticle Illumination toggle feature also available on some scopes, only that this makes the reticle less bright, but the semantics are the same.
Testing
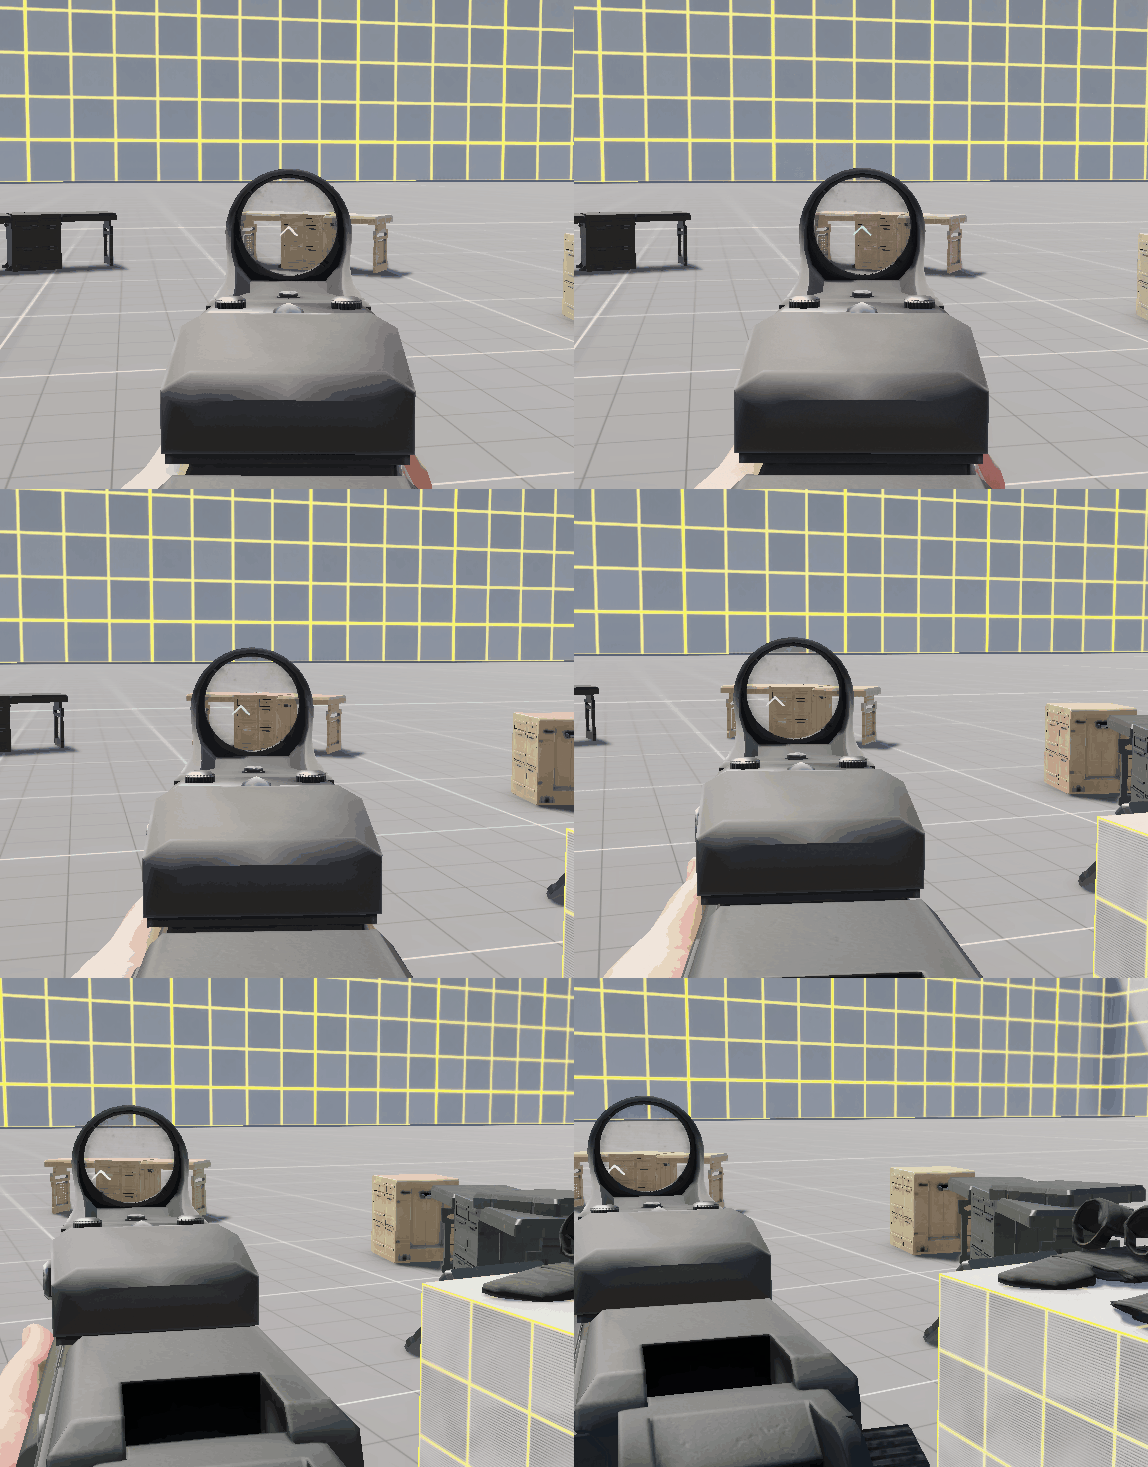
Once all those steps were completed, you should be to verify in game if collimator is working correctly. First thing to test might be parallax effect when freelook is turned - reticle should stay on target no matter at which angle you are looking at it. During movement, you should also observe natural sway of the reticle which is showing actual aiming point of the rifle.
Potential Traps
There are a number of things you can check to see why the sights do not work as expected:
- Check that the UV mapping of the collimator projection is correct. Since most reticles are at least symmetrical in one axis, a flipped UV map is hard to detect. If the movement looks highly exaggerated in one direction, or simply wrong, check the UV coordinates first. A collimator should look like there is a glowing reticle floating in mid-air, and head movement should move the sights itself but not the collimator.
- The collimator functionality only works in game and does not work in World editor. Weapon sights only work when in ADS, while vehicle sights only work from a specific seat.
Script API
| Method | Description |
|---|---|
| Set the reticle size in degrees. reticlePortion determines the portion of the reticle that is covered by this (see above) | |
| Return the current angular size of the reticle | |
| Return the current reticle portion (see above) | |
| Get the number of different reticles confiigured for this sight. Typically 1, but might have more that can be switched around | |
| Check if the given reticle index is a valid reticle or not. Returns false if invalid | |
| If valid, returns the reticle info for the given reticle index, which includes angular size, reticle portion, index and a boolean that indicates whether or not this reticle overrides the globally set reticle size and portion. | |
| Returns the index of the currently active reticle. | |
void ReticleNextShape() void ReticlePreviousShape() |
Cycles forward or backward through the array of reticles, wrapping at the ends. |
| Set the current reticle by specifiyng its index. Returns false if the index was invalid. | |
| Get the number of defined reticle colors. Typically 1, but a sight can define multiple colors for its reticles. | |
| Returns true if the given index is a valid color. | |
| Returns the indexed reticle color, or null if the color is invalid. Colors are defined by two fields, reticle and glow color, which can be gotten via vector GetReticleColor() and vector GetGlowColor() from the structure | |
| Get the currently active color index | |
void ReticleNextColor() void ReticlePreviousColor() |
Cycle up or down the current reticle color, wrapping at the edge cases. If only one color is defined, this does nothing. |
| Set the color by index. If index is invalid, the function returns false. | |
| Returns a floating point value between 0 and 1 which represents the normalized light intensity currently "experienced" by the sights. Internally, this is used to calculate the dot brightness for auto brightness correction. The value is only valid if auto brightness is enabled. | |
| Sets the vertical angular correction of the reticle, in mils. This value can be used for zeroing, for example in the XM60 helicopter sight | |
| Returns the current angular correction of the reticle, in mils. | |
| Sets the horizontal angular correction of the reticle, in mils. This value can be used for windage adjustments | |
| Returns the current horizontal angular correction for the reticle, in mils. | |
| Returns false if the sight is disabled by script. If the sight is NOT disabled by script, it will return true, but that doesn't necessarily mean that the sight is actually active, only that it isn't forced off. | |
| Force the sight off if forceOff is true. This will suppress any display of the reticle. Setting this to false might or might not make the reticle visible. This can only force the sight off, otherwise it behaves normally, as expected. | |
| Enables manual brightness control. If enabled, all other functionality for brightness control (automatic brightness, day/night toggle) is inhibited. | |
| Returns true if manual brightness control is active, false otherwise | |
|
Set the manual brightness to the given floating point value. The fBrightness value MUST be greater or equal to zero, and SHOULD be between 0 and 1. Values higher than 1 are possible. Typically, if bClamp is true, the brightness value interpolates between daylight and night time invensity. If bClamp is false, then night time intensity is ignored, and the fBrightness factor interpolates between zero and daylight brightness. Values greater than 1 boost the brightness beyond daylight brightness. Internally, the value will be capped to the maximum brightness supported by Enfusion (which is 22). So if your daylight brightness is, say, 10, setting the fBrightness factor to 2 will make the reticle appear with a brightness of 20. | |
| Return the currently selected brightness factor. | |
| Returns true if the manual brightness is currently clamped between day and night. |

