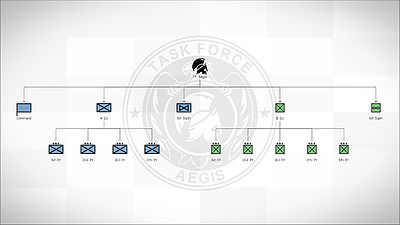
ORBAT Viewer – Arma 3
Config
class CfgORBAT
{
	class 7thInfantry
	{
		id = 7; // Unit ID
		idType = 0; // Unit ID type
		 // 0 - show as ordinal number, e.g. "7th" (default)
		 // 1 - show as roman numeral, e.g. "VII"
		 // 2 - show as NATO phonetical alphabet word, e.g. "Golf"
                // 3 - show as color, e.g. "Red"

		side = "West"; // Unit side from CfgChainOfCommand >> Sides
		size = "Division"; // Unit size from CfgChainOfCommand >> Sizes
		type = "HQ"; // Unit type from CfgChainOfCommand >> Types
		insignia = "\ca\missions_f\data\orbat\7thInfantry_ca.paa"; // Unit insignia, displayed in ORBAT background and in tooltip
		colorInsignia[] = {0,0,1,1}; // Insignia image color (white default), can be either RGBA array, or class from CfgMarkerColors
		commander = "Armstrong"; // Name of unit commander. Can be either direct name, or class from CfgWorlds >> GenericNames (random name from the list is then selected)
		commanderRank = "GENERAL"; // Rank of unit commander (by default selected based on unit size)
		tags[] = {BIS,USArmy,Kerry,Hutchison,Larkin}; // Group tags. When opening ORBAT viewer, user can define what tags will be accepted.
		text = "%1 Combat Technology Research %3"; // Custom text and short text, can still use some arguments when defined:
		// 	%1 - ID (e.g. "7th")
		// 	%2 - Type (e.g. "Infantry")
		// 	%3 - Size (e.g. "Division")
		textShort = "%1 CTR %3";
		texture = "\ca\missions_f\data\orbat\customTexture_ca.paa"; // Custom texture, will replace icon set by 'type' param.
		color[] = {0,0,1,1}; // Custom color, will replace color set by 'side' param. Can be either RGBA array, or class from CfgMarkerColors
                description= "All of your text would go here."; // A brief description of the group or unit.
		assets[] = {{B_Heli_Transport_03_F,5},{B_Heli_Light_01_F,3},{B_Heli_Light_01_armed_F,4},B_Heli_Transport_01_camo_F}; // Will display pictures of all available assets to the unit commander
		subordinates[] = {2ndBCT}; // Subordinates, searched on the same level as this class.

               // When 'subordinates' are missing, child classes will be used. They can have their own subs - number of tiers is not limited.
		class 1stBCT
		{
			id = 1;
			type = "Armored";
			size = "BCT";
			side = "West";
			commander = "NATOMen";
			tags[] = {"BLUFOR", "USArmy","Kerry"};
 		};
	};
	class 2ndBCT
	{
	};
};
Possible values of side attribute:
- West
- East
- Resistance
- Civilian
- Unknown
Possible values of size attribute:
- Army
- ArmyGroup
- Battalion
- BCT
- Brigade
- Company
- Corps
- Division
- FireTeam
- HBCT
- IBCT
- Platoon
- Regiment
- Section
- Squad
- Squadron
- Troop
Possible values of type attribute:
- Airborne
- Armored
- Artillery
- Assault
- AttackRecon
- AviationSupport
- Cavalry
- CombatAviation
- Fighter
- GeneralSupport
- Helicopter
- HQ
- Infantry
- Maintenance
- Maritime
- MechanizedInfantry
- Medical
- Mortar
- MotorizedInfantry
- Recon
- Service
- Support
- UAV
- Unknown
Possible values of rank attribute:
- Private
- Corporal
- Sergeant
- Lieutenant
- Captain
- Major
- Colonel
- General
Module Parameters
CfgORBAT Path
The group you want this module to display.
Example:
missionconfigfile >> "CfgORBAT" >> "unitClassName" >> "subordinateUnitClassName"
CfgORBAT Ceiling
The highest superior unit to display in the ORBAT viewer while this group is selected.
Example:
missionconfigfile >> "CfgORBAT" >> "unitClassName"
Tags
Texture
As texture is treated as a new texture (rather than an image, as icon is), Arma needs a direct path to it. Example,
C:\Users\Kerry\Documents\Arma 3\Kerry\missions\MyMission.Stratis
However, as CfgORBAT is defined in description.ext, we cannot use SQF scripting like missionConfigFile.
But we can define a global variable in description.ext using PreProcessor Commands to our mission's folder. In this case, MISSIONLOCATION.
__EXEC (MISSIONLOCATION = __FILE__ select [0, count __FILE__ - 15])
In our CfgORBAT, be it in a separate .hpp file or your description.ext, we can now define the path to our texture with the following:
texture = __EVAL(MISSIONLOCATION + "someFolder\SomeImage.paa");
Thanks to KK's blog for solving the above issue.
Functions
- BIS_fnc_ORBATAddGroupOverlay
- BIS fnc ORBATAnimate
- BIS fnc ORBATConfigPreview
- BIS fnc ORBATGetGroupParams
- BIS fnc ORBATOpen
- BIS fnc ORBATRemoveGroupOverlay
- BIS fnc ORBATSetGroupFade
- BIS fnc ORBATSetGroupParams
- BIS fnc ORBATTooltip
Other
- To make the ORBAT icon follow a unit during a mission, simply Synchronise (F5) the module to the group leader.
- See more on Preprocessor Commands: http://killzonekid.com/arma-scripting-tutorials-mission-root/
