Car Modding – Arma Reforger
Goals of this tutorial
In this tutorial you will learn about:
- How to modify basic damage characteristics of the vehicle
- How to change fuel consumption
- How to change basic driving characteristics
- Changing exhaust particle effects
- Adding additional elements to the vehicle with BaseSlotComponent
- How actions are working and how to add custom one
Modifying existing car
Overview
Before going deeper into vehicle configuration, first we will prepare basic prefab to work with. In this chapter we will take a look at:
- Basic file structure
- Preparing basic prefab inheriting from UAZ-469
- Briefly check already assigned components to UAZ-469
File structure
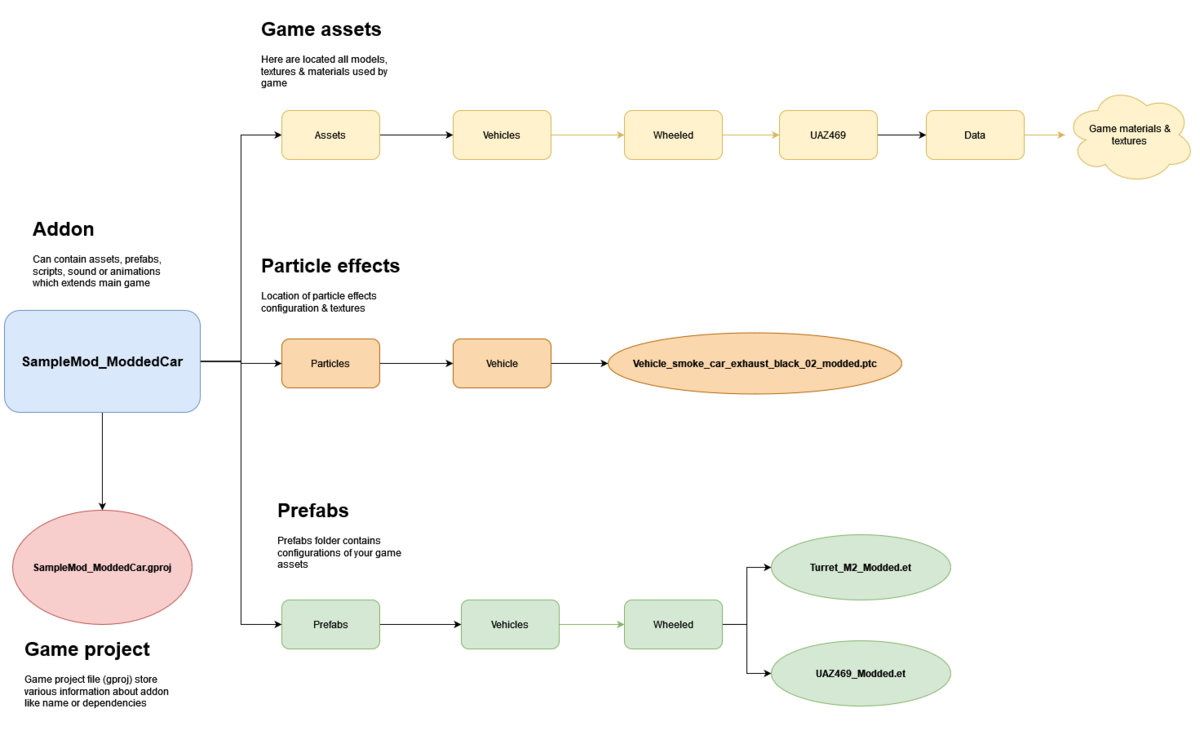
While keeping to official structure is not mandatory and there are no engine restrictions asset wise about it, it's recommended to follow guidelines listed here - Data (file) structure - to ensure that all automation plugins are parsing your assets correctly and make it later easy to navigate.
Therefore, your first task will be preparing following file structure
Preparing prefab
Let's start with creating new prefab. Look for UAZ469.et in Resource Browser and then by using of the methods mentioned in Sample Modded Weapon documentation. To make it obvious what we are doing, call that new prefab UAZ469_modded.et.
Changing Multi Material base color
Next thing that we will quickly do is replacement of currently assigned materials. In principle, everything works exactly same as on weapons so try to locate UAZ469_Body.emat and create duplicated material (as described here for instance) called "UAZ469_Body_Modded.emat" and afterwards move it Sample Mod structure. MatPBRMulti is powerful kind of material which is going to be described more in detail in Sample New Car page. For now, try changing Material 1 (Base) to get some interesting variation and just to play with sliders. You can try to play with adjusting other mask this way too but as mentioned before, this material will be described in detail at later stage.
File:armareforger-modded-car-changing-material.mp4
Components overview
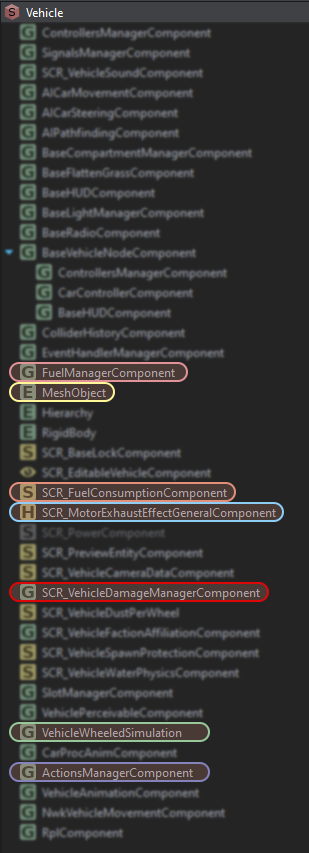
As you can notice, list of components attached to vehicle is bit larger comparing to weapon we were editing before. From that list, we will use following components:
- ActionsManagerComponent - To manage contextual actions (including get in/out)
- SCR_VehicleDamageMangerComponent- To modify damage our vehicle is taking
- MeshObject - To change used material
- SCR_FuelConsumptionComponent & FuelManagerComponent - To change fuel consumption and capacity of fuel tanks
- SCR_MotorExhaustEffectGeneralComponent - To change exhaust particle effects
- VehicleWheeledSimulation - To change general driving behavior
Full list of components with some brief info on what they are doing can be obtained from Vehicle Components page. As you probably noticed, components listed in Object Properties list have different colors & shapes. Those are some visual cues whether they are for instance scripted or handled by game.
Modifying damage behaviour
Overview
In this chapter following topics will be explained
- How to increase armor on vehicle
- ...yet make it super fragile to collisions!
Damage manager overview
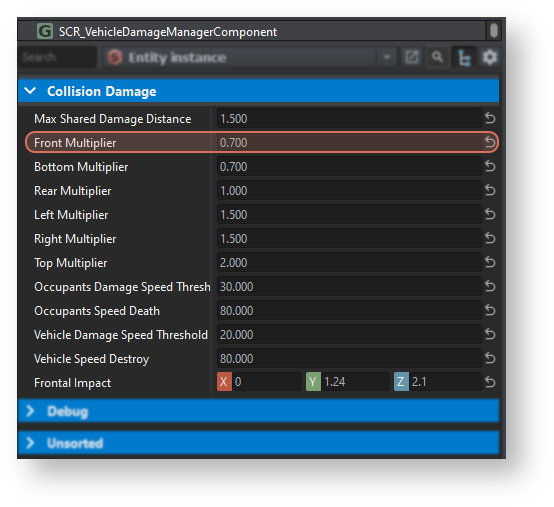
Whole vehicle damage simulation is contained in SCR_VehicleDamageMangerComponent. There you can modify various parameters controlling how object will react to projectiles, explosions and collisions. The main hit. This Vehicle Hit Zone element serve as global damage collector - once Total HP is destroyed, whole vehicle is considered destroyed and damage particles will spawn (like Destruction Particle , Burning Particle Resource ) together with wreck model (defined in Wreck Model). More information about how damage is handled can be found here - Damage - Vehicles.
Increasing armor
In order to increase armor of our vehicle, we will have to change HP Max parameter. To ensure that it survives even the strongest projectiles in game, I would recommend to add 2 zeros to HP Max value. Similarly HP Damaged, which controls when damaged particles are started to be played (dark exhaust smoke in this case) can be increased too so smoke doesn't start to appear to early.
Increasing collision impulse
Next thing on our to do list is increasing amount of damage received from collision with environment. To do so, simply increase Collision multiplier to i.e. 100000, which will result in huge damage being applied upon collision & decrease Collision Velocity Threshold to 1.
As a result, you should end up with thing which can survive direct RPG hit yet it will be destroyed by slightly bumping into obstacle
Changing fuel consumption
Overview
In this chapter we will learn how fuel is simulated in game and we will change following things:
- Type of fuel vehicle is using
- Amount of fuel in fuel tanks
- Fuel consumption
Fuel handling overview
After filtering down components containing "Fuel" in their name, we should see 2 components in Object Properties list.
| FuelManagerComponent | SCR_FuelConsumptionComponent |
|
|
How both FuelManagerComponent & SCR_FuelConsumptionComponents works is described quite in detail on Fuel: Fuel System & Fuel: Fuel Consumption pages, so I recommend to read those pages first before proceeding further in this tutorial.
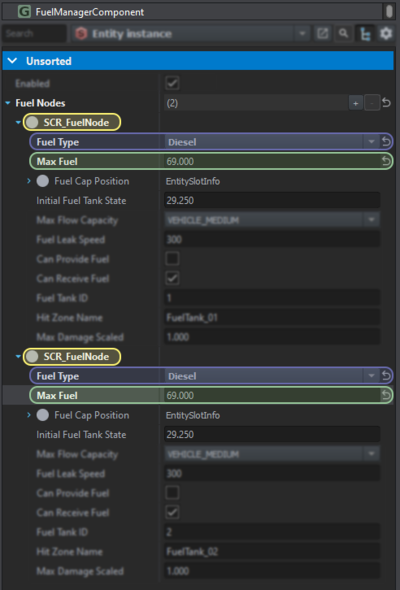
When looking at the UAZ-469 Fuel Nodes array, you might notice that it has two SCR_FuelNode elements. This is due to fact, that UAZ-469, like quite plenty of military vehicles, has 2 separate fuel tanks and this thing is simulated in game.
Changing fuel type
To change fuel type, select one of the SCR_FuelNodes in FuelManagerComponent components, and then simply click on "Fuel Type" list box and change fuel type from Petrol to Diesel. Repeat same procedure with 2nd fuel tank.
Changing fuel tanks capacity
Changing fuel capacity is as simple as previous change to fuel type. To change maximum capacity, increase "Max Fuel" parameter from 39 to 69 liters on both fuel tanks. Beside that, it might be also wise to change initial fuel tank state by increasing Initial Fuel Tank State on one engine from 39 to 69 too. Just for sake of experimentation, we will leave 2nd fuel tank with same amount of initial fuel as before.
Increasing fuel consumption
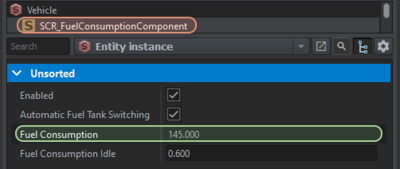
Next, let's move to changing fuel consumption. Select SCR_FuelConsumptionComponents and locate Fuel Consumption property. This property controls amount of liters fuel consumed at max power RPM per hour. Change it to 145 and voila - your vehicle will consume fuel quite fast even though it has larger fuel tanks.
Changing driving behaviour
Overview
Following topics will be covered in this paragraph
- Basics of wheeled simulation
- How to change engine parameters
- Changing of driving characteristics
Wheeled simulation overview
Wheeled vehicles simulation is contained in VehicleWheeledSimulation component. In that component, after expanding Simulation list, you can find five major categories:
- Engine - responsible for engine simulation
- Clutch - contains all parameters controlling clutch simulation
- Gearbox - here you can change gearbox settings like amount of gears, gear ratios or gearbox latency
- Differentials - differentials controls
- Axles - contains definition of each axle together with wheels and tyres
Whole topic is rather complex so lets start with some simple changes first.
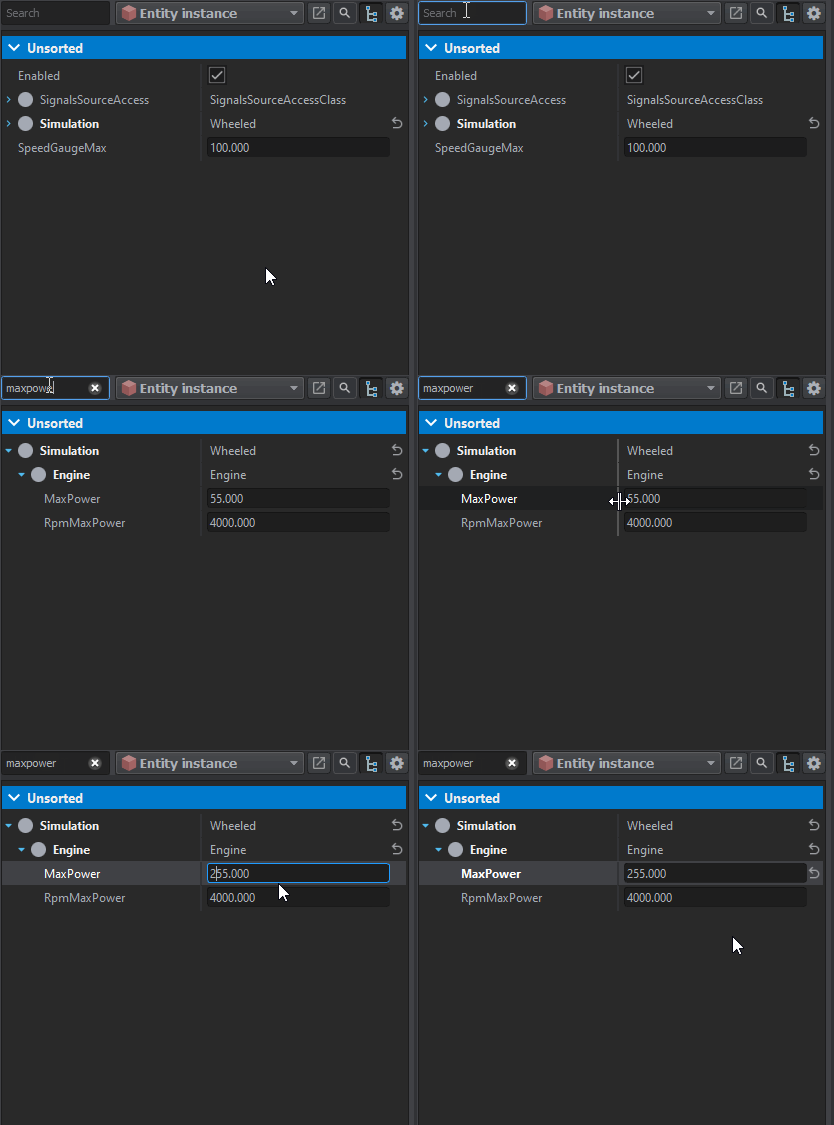
Changing engine parameters
Changing driving characteristics
Another thing that we might try is changing turning radius of front axle. To do so, navigate & expand Axels list and then select top one Axle. Over there you should see Max Steering Angle parameter, which controls maximum rotation of front axle. Parameter is in degrees. To gain some more maneuverability on tight corners, we will increase that value to 48.
Above changes are just quickly demonstration on how simulation works so feel free to play with those values mores. A bit more information can be also found in Sample New Car - Documentation page where things like wheel position and setting up gearbox are described.
Adding turret to vehicle
Overview
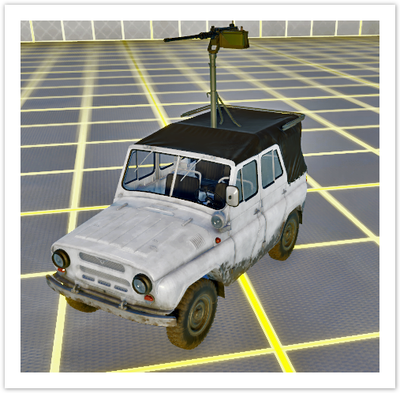
Time to add some extra firepower to our vehicle! In this chapter we will learn how to add working* turret our vehicle
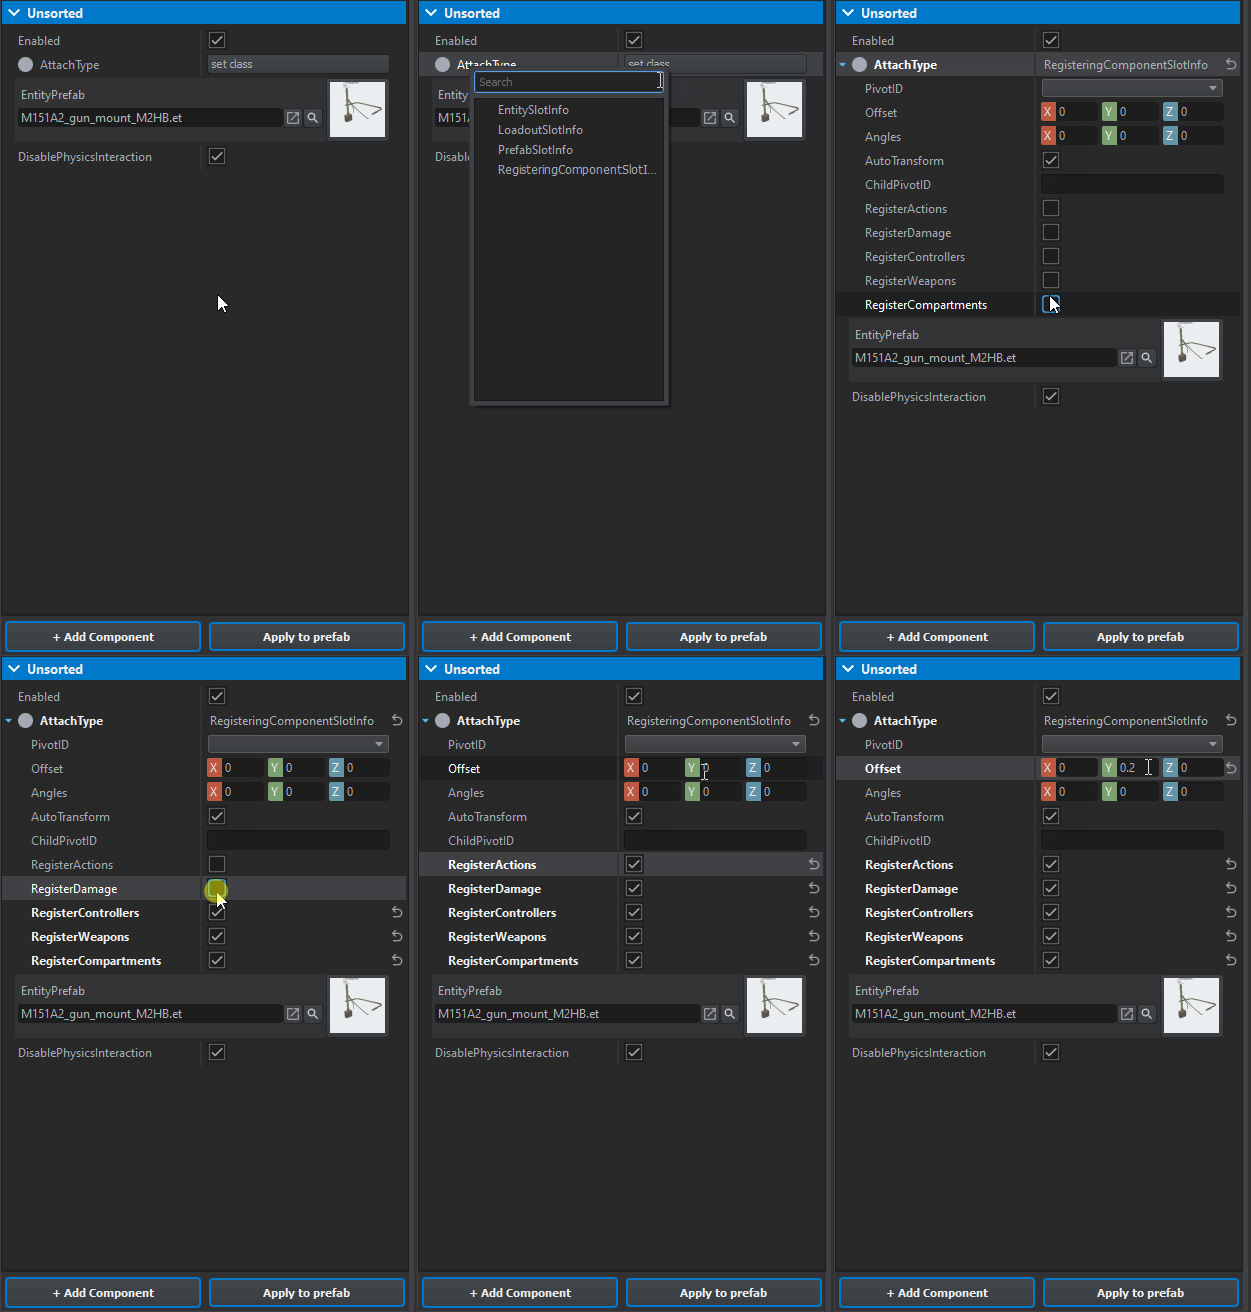
- Adding turret via SlotManagerComponent
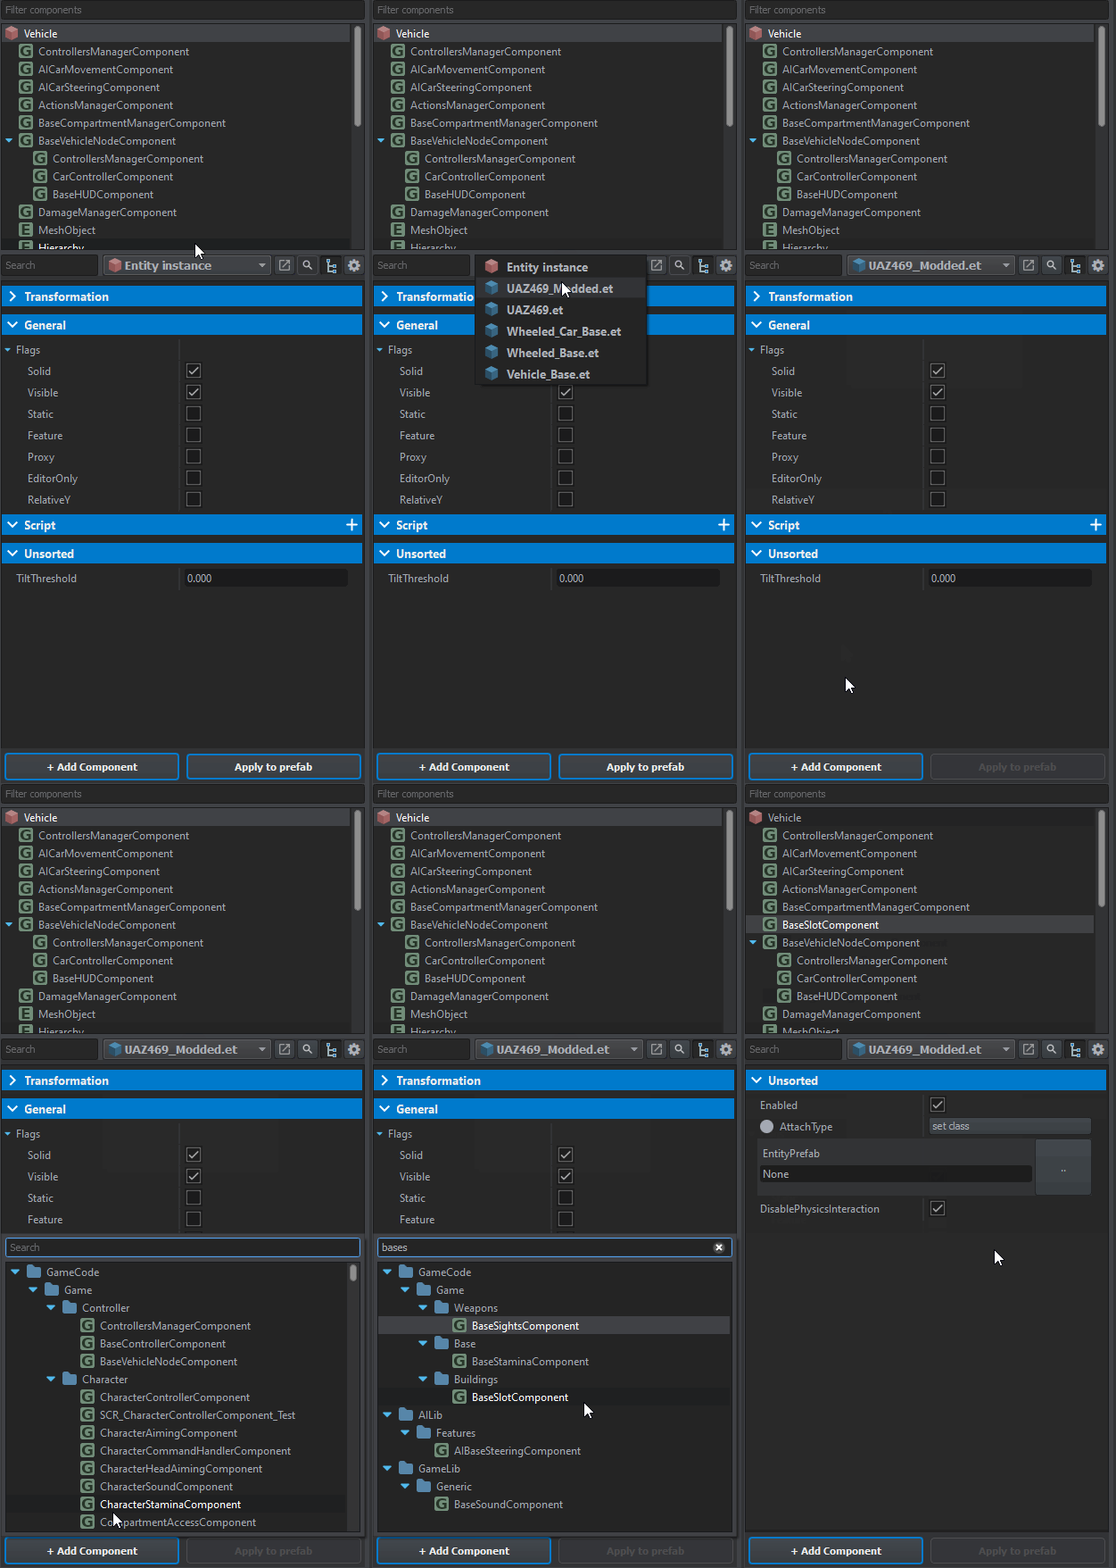
While it might look quite advanced at first glance, adding turrets to vehicle is not that complicated if you want to use one of the already existing turrets. Whole procedure can be done in two steps:
| 1. Adding base slot component | 2. Filling in proper values to base slot component |
|
|
| Click on "+ Add Component" and from that list pick up " SlotManagerComponent". | Once you have that component ready, assign M151A2_gun_mount_M2HB.et prefab to EntityPrefab slot & then change AttachType to RegisteringComponentSlotInfo. After that, you should few more parameters should be available to you - toggle all of them on and adjust Offset value to your liking. |
As a result, you should end up with something like this
Changing exhaust effects
Overview
As last thing, we will try to do some modifications to particle effects to get some sparks going out of exhaust tubes. To do so, we will learn about
- Adding additional emitor to particle effect
- Changing exhaust particle effects
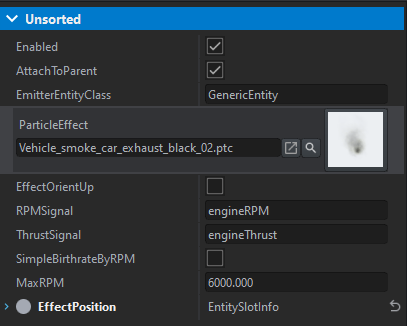
Vehicle exhaust effects configuration is located in SCR_MotorExhaustEffectGeneralComponent. Assuming you already know how to handle particle from Weapon Modding page, let's move to creating derivative of Vehicle_smoke_car_exhaust_normal.ptc and call that new effect Vehicle_smoke_car_exhaust_black_02_modded.ptc. If you want, you can straight away go to changing Particle Effect parameter in SCR_MotorExhaustEffectGeneralComponent.
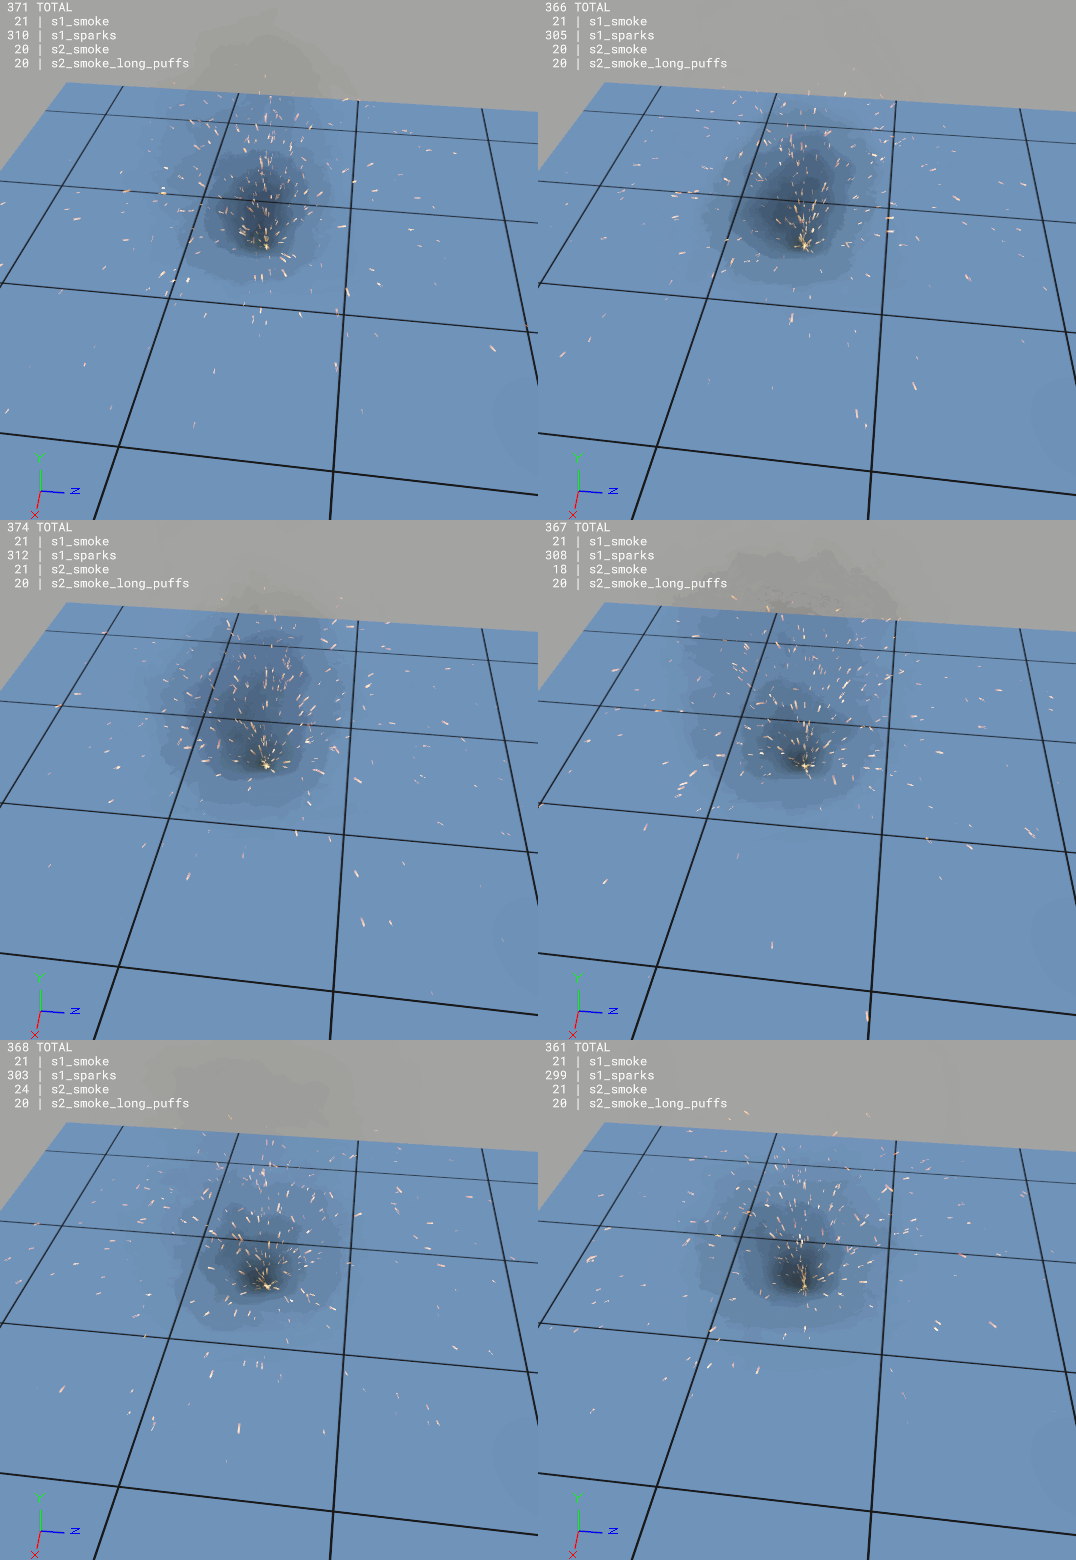
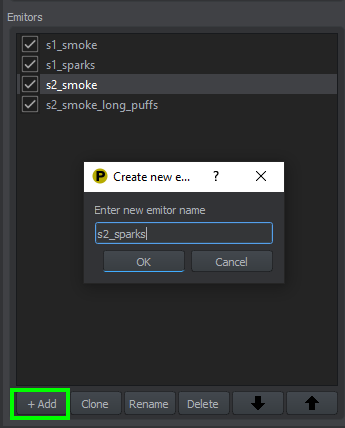
Once you are Particle Editor, try to adding new editor by clicking on "+ Add" button. Name that new emitor "s1_sparks" and proceed to creating new particle effect. This it's time for some challenge - try to replicate effect on the right by doing it on your own. If you have troubles with recreating it, try looking at previously made explosion effect or take a look at the spoiler below.
Small tip: make sure that "Repeat" parameter is checked!
Testing results in-game
Once everything is complete, it is finally possible to place this prefab on some terrain and spawn in-game.
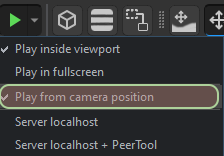
Easiest way to do it would be selecting of "Play from camera position" option in Play menu (accessible by clicking on little arrow to right of green one)
Additionally, it is worth to consider adding this new asset to Game Master Entity Browser. All instructions for that are listed on Asset Browser Mod Integration page
