Particles Tutorial: Difference between revisions
Lou Montana (talk | contribs) m (Text replacement - "[[Image:" to "[[File:") |
Lou Montana (talk | contribs) m (Text replacement - "{{Feature | Informative | " to "{{Feature|informative|") |
||
| Line 9: | Line 9: | ||
A particle (as well as a particle source) is '''[[Multiplayer Scripting#Locality|local]]''' to the computer where the script has been called; one player could see smoke while another could see through without any issue. | A particle (as well as a particle source) is '''[[Multiplayer Scripting#Locality|local]]''' to the computer where the script has been called; one player could see smoke while another could see through without any issue. | ||
{{Feature | | {{Feature|informative|Particles exist since [[:Category:Operation Flashpoint|{{ofp}}]], but the first related command ([[drop]]) was only introduced in [[{{ofpr}}]].<br> | ||
Particle source notions and commands were introduced in {{arma1}}, some commands were later added in {{arma3}} (e.g [[setParticleFire]], [[setParticleClass]]).}} | Particle source notions and commands were introduced in {{arma1}}, some commands were later added in {{arma3}} (e.g [[setParticleFire]], [[setParticleClass]]).}} | ||
| Line 19: | Line 19: | ||
<sqf>private _particleSource = "#particlesource" createVehicleLocal ASLToAGL getPosASL player;</sqf> | <sqf>private _particleSource = "#particlesource" createVehicleLocal ASLToAGL getPosASL player;</sqf> | ||
{{Feature | | {{Feature|informative|A particle source is '''[[Multiplayer Scripting#Locality|local]]''' (and all the particle commands take a local argument too), hence [[createVehicleLocal]] usage.}} | ||
{{ArgTitle|3|Set source class|{{GVI|arma3|0.50}}}} | {{ArgTitle|3|Set source class|{{GVI|arma3|0.50}}}} | ||
| Line 25: | Line 25: | ||
<sqf>_particleSource setParticleClass "ObjectDestructionFire1Smallx"; // defined in configFile >> "CfgCloudlets"</sqf> | <sqf>_particleSource setParticleClass "ObjectDestructionFire1Smallx"; // defined in configFile >> "CfgCloudlets"</sqf> | ||
{{Feature | | {{Feature|informative|Particle source class must be defined in game [[configFile|config]] and '''cannot''' be declared in [[missionConfigFile]] or [[campaignConfigFile]]. See [[Arma 3: Particle Effects]] for more information.}} | ||
=== Set source parameters === | === Set source parameters === | ||
| Line 140: | Line 140: | ||
== Full examples == | == Full examples == | ||
{{Feature | | {{Feature|informative|The following examples are for {{arma2}} and later titles. For {{arma1}} examples, see [[ParticleTemplates]].}} | ||
{{Feature | important | For games other than {{arma3}}: | {{Feature | important | For games other than {{arma3}}: | ||
* remove [[private]] usage | * remove [[private]] usage | ||
Revision as of 21:41, 16 May 2024
Basics
A particle is a (to some extent, non-physical) 2D plane that always faces the camera, or (more rarely) a 3D model. It can be used to simulate ambient effects, such as dust, fire, water splash, wood splinters and even rock debris.
A particle source is a non-physical object that creates particles at a certain rate and position/velocity.
A particle (as well as a particle source) is local to the computer where the script has been called; one player could see smoke while another could see through without any issue.
How to
Create a particle source
Set source class
Set source parameters
See ParticleArray for details on the array format.
Set source drop interval
Set source drop circle
Set source random values
Set source fire properties
Delete source
Use the drop command
The drop command only drops one particle. If multiple ones are needed, a loop (for, while) must be used.
See ParticleArray for details on the array format.
Design Workflow
In order to determine one particle behaviour, a simple drop usage in the Debug Console can do; but seeing the complete end result can be another task at hand.
Using a Script
One way to design your effect is to have an SQF file, named e.g "particles.sqf", filled with your code:
and run with
This format deletes all previous effects and still allows you to use the Debug Console in order to adjust particle source settings thanks to the usage of global variables (here, ps1 and ps2)
Using a Mod
Emitter 3Ditor (a real-time WYSIWYG particle source editor) adds and uses particle and light emitters in your scenarios without any scripting nor mod dependency.
Steam page - Forums post
Full examples
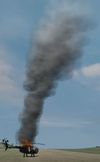
Burning Vehicle Fire Look-Alike
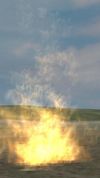
Fire
Floating Orb
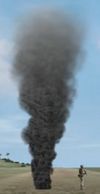
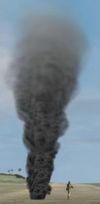
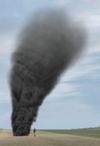
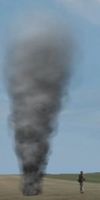
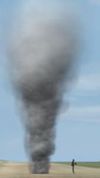
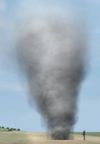
Heavy Oily Smoke (Small)
Heavy Oily Smoke (Medium)
Heavy Oily Smoke (Large)
Light Wood Smoke (Small)
Light Wood Smoke (Medium)
Light Wood Smoke (Large)
Mixed Smoke (Small)
Mixed Smoke (Medium)
Mixed Smoke (Large)
Rock Shower
See also
- Category:Particle System
- ParticleArray - particle array format
